Enable Card Authentication for Printers
You enable proximity card authentication by creating an Access Control Rule and assigning the rule to a printer. You however cannot assign an Access Control Rule directly to a printer. Instead, you create an Access & Rules Profile for a printer and add the Access Control Rule to the Access & Rules Profile.
1. Add a New Access & Rules Profile to a Printer
![]()
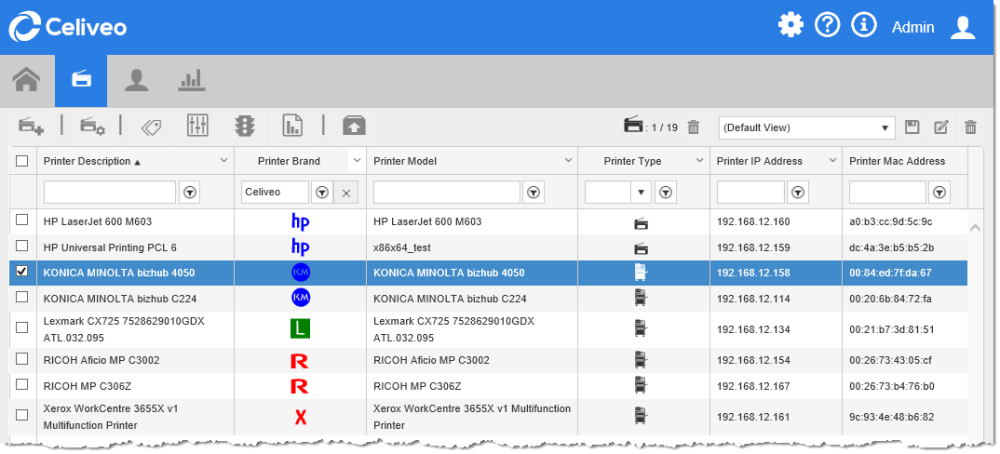
- Select the printer to add the Access and Rules Profile to.
- Click
. The Access & Rules dialog is displayed.
- Click
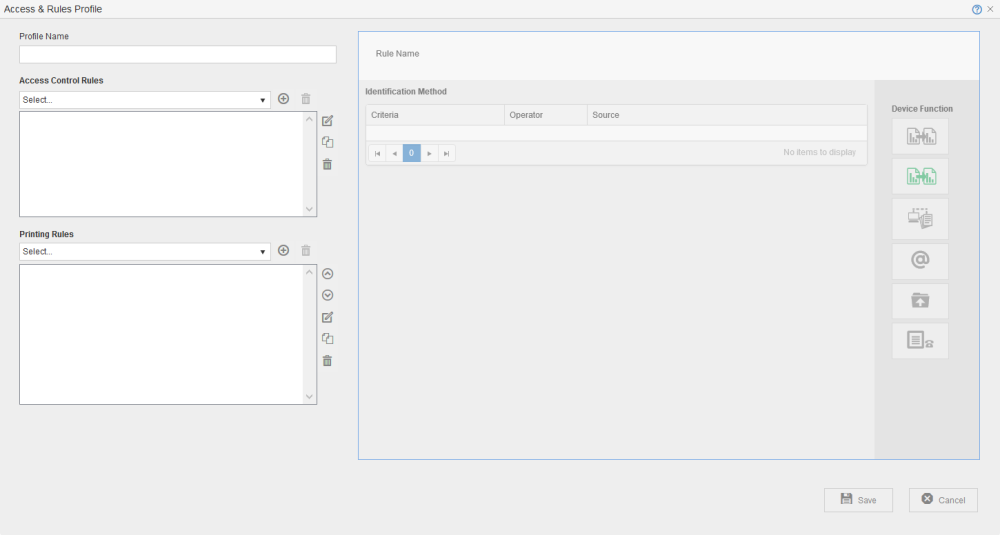
. The Access and Rules profile is displayed.
- At [Profile Name], specify a unique name for the Access & Rules Profile.
2. Add a New Access Control Rule to the Access and Rules Profile
- Click
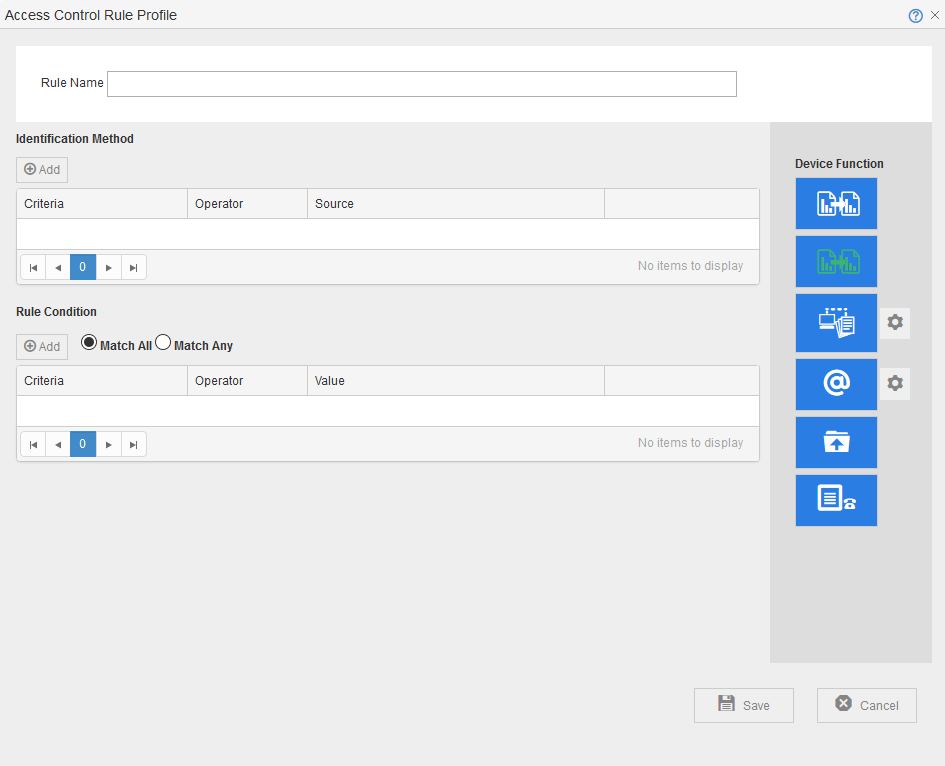
, located in the same row as the [Access Control Rules] drop-down. The Access & Rules Profile displays.
- At [Rule Name], specify a unique name for the Access Control Rule.
3. Add Card Authentication as the Identification Method
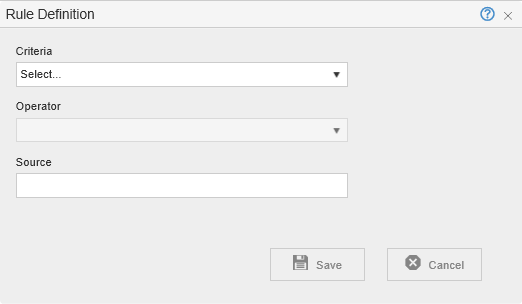
- Click [Add], located below [Identification Method]. The Rule Definition displays.
- From the [Criteria] drop-down, select [Card Number].
- From the [Operator] drop-down, select [Is In].
4. Build the Authentication Profile to Validate the Card Number
- Click
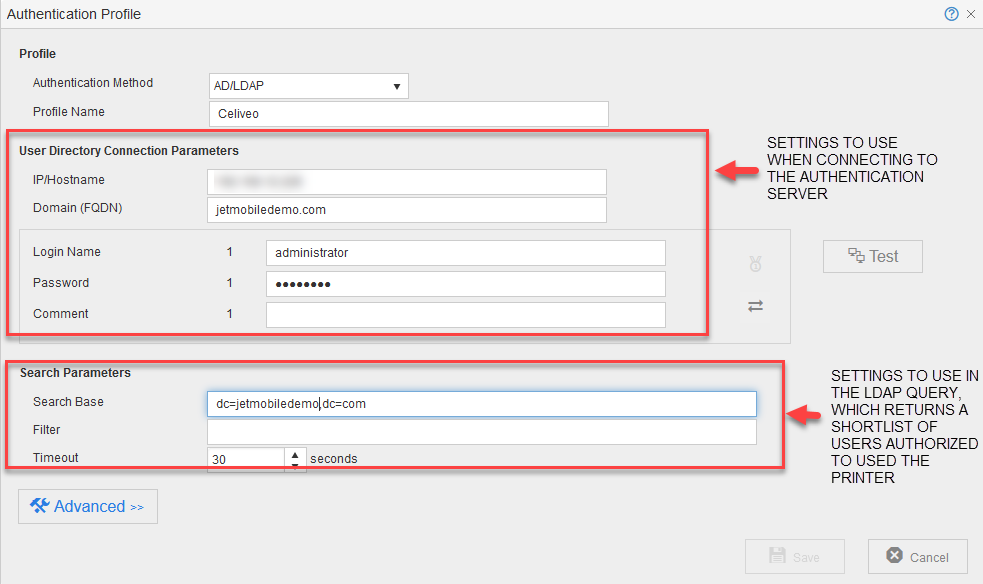
, located next to the [Source] drop-down. The Authentication Profile displays.
- In the [Profile Name] box, specify a unique name to identify the profile.
- Click
, located in the same row as the [Authentication Profile] drop-down. The Authentication Profile is displayed.
- Specify the AD/LDAP query (similar to that of the screen capture shown below) that returns the list of users who are authorized to use the printer.
- Click [Test].
If log in to the Authentication Server is successful, a message is displayed below the [Test] button. - Click [Save]. You are returned to the Authentication Source Profile.
5. Specify How to Process Card Number
![]()
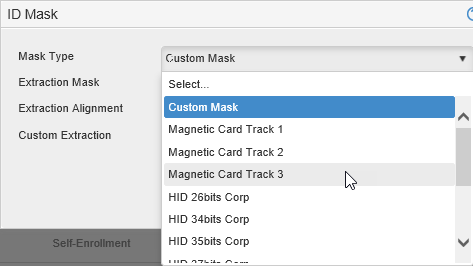
- Click [ID Mask].
- Click
next to the [ID Mask].
- From the [Mask Type] drop-down select the mask that extracts the card number.
- Click [Close].
- From the [ID Processing] drop-down, specify how the Card Number is processed.
6. Enable Self Enrollment
![]()
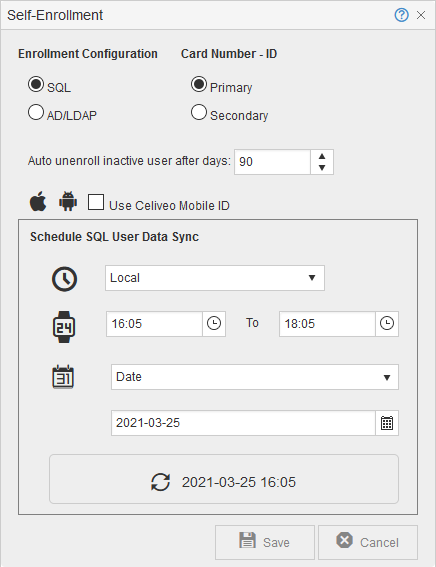
- Click [Self-Enrolment] to turn it on.
- Click
next to the [Self-Enrolment].
- Verify that [SQL] is selected and click [Close].
- Click [Save] until all dialogs close.
7. Enable Card Authentication for Remaining Printers
![]()
- In the Printers List, select the printers you want to apply the Access and Rules Profile to.
- Click
. The Access & Rules dialog is displayed.
- From the [Access & Rules Profile] drop-down, select the Access and Rules profile for the Printer.
Last modified:
11 February 2021





Post your comment on this topic.