
What is Multi-SQL configuration?
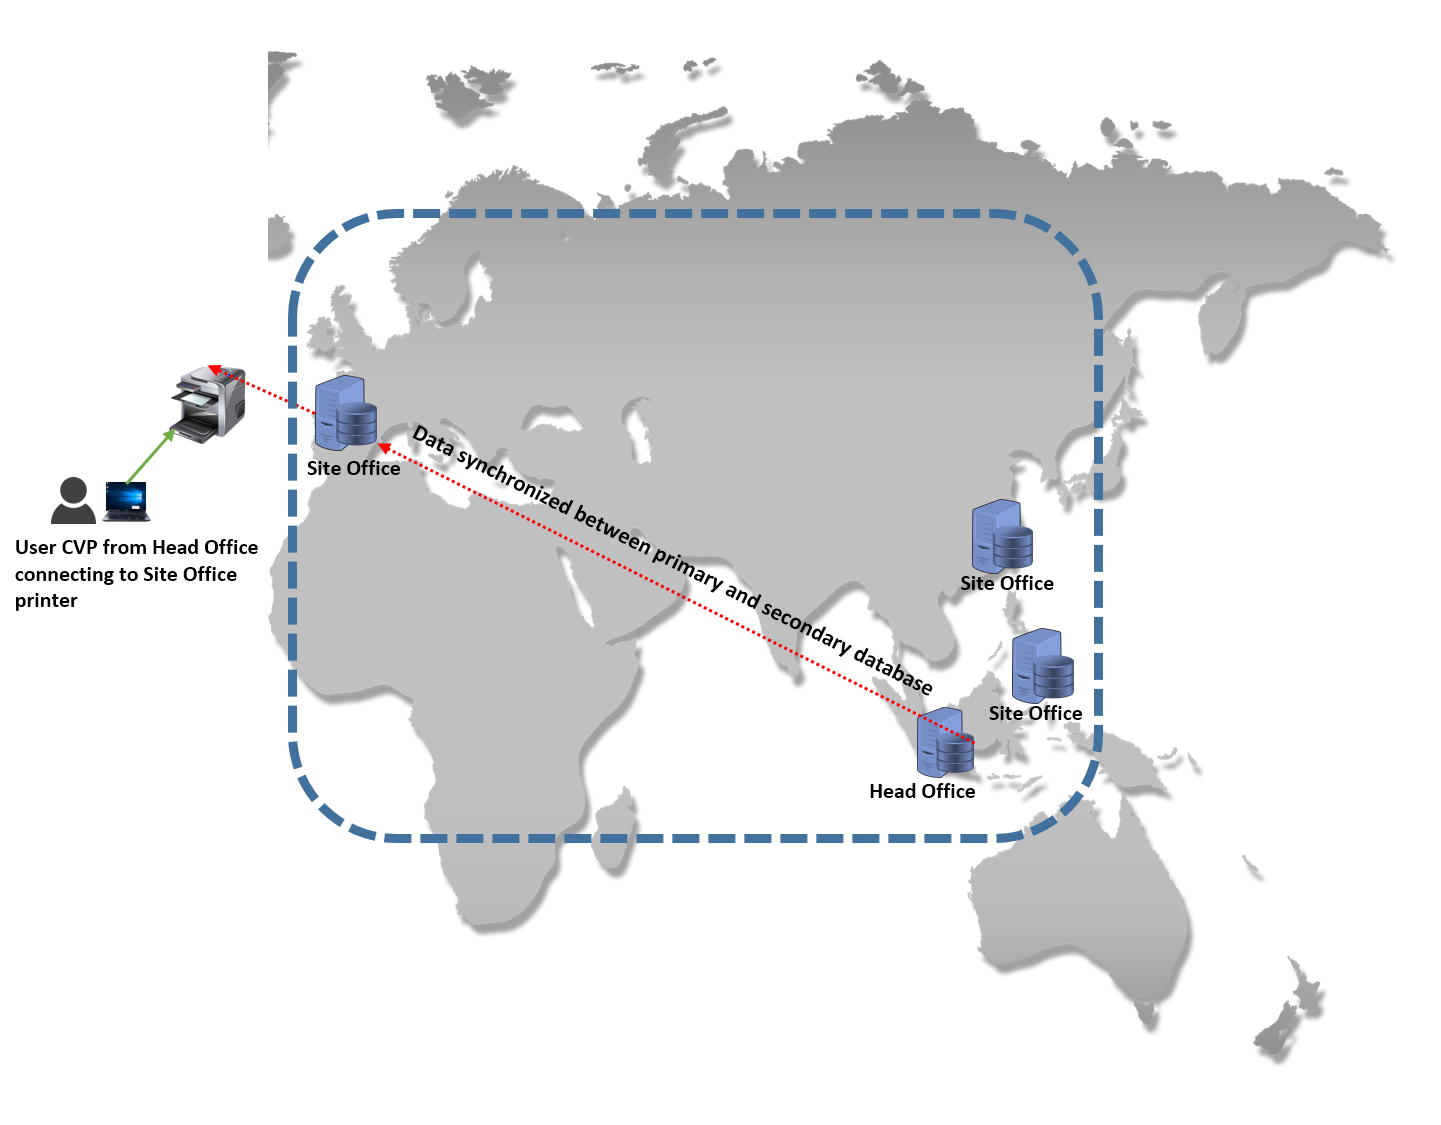
When being part of a large company with its offices distributed across the globe, and you have to travel from one site office to another, the need arises to switch to the appropriate regional database settings to connect and store print jobs locally. The Multi-SQL feature allows you to automatically change the database connection settings in a Serverless Pull Printing client configuration (CVP), to a region-specific database when you travel from one region to another.
The switch to applicable SQL database is based on the tag combinations and priority value.
Celiveo is able to map together the printers, database profiles, and IP Address ranges used in each geography so that they will belong to the same community. It is also able to map users to a community based on AD/LDAP attributes such as Name, Organizational Unit (OU), and Group. Thus, when a user attempts to print using Print Direct/ Pull Print, the tags filter the available printer list to display only those printers that are within the community.
When a user plugs into the network from within a specified community, the user is assigned an IP Address tied to that community.
Now, if the user is a member of a Group/OU, the community setting (tag combination) of the Group or OU or IP Address range with the highest priority value is assigned to the user. Those tag combinations will then be used to search and connect to the SQL server database with same tag combinations. All communications of the user will then be performed through this database.
Example:
- A large company Azone.Inc has its headquarters in Singapore and regional offices distributed in Malaysia, Hong Kong and Spain.
- The company uses tags to identify places. Each regional office is organized into a community on the basis of five tags set (Country, State, City, Building, Floor). The printers, database servers, and IP Address ranges are tagged so that the printers, and IP Addresses used in a geography will belong to the same community.
- Azone employee Simon Phil, who belongs to Singapore Office, travels to Spain Office for a meeting. Now Simon needs to print some important documents before the meeting. Simon uses Celiveo Virtual Printer for Serverless Pull printing in his laptop. He connects his laptop to the Spain Office network.
- Normally, Simon has to switch regions and sub regions in his CVP application to connect to region-specific database. With Multi-SQL feature, the database connection settings will be automatically updated during CVP application boot up.
- The tag settings for the IP Address Range in Spain Office is defined as (Spain, Madrid,,,*) with priority value: 75.
- Now, Simon is also a member of OU=SingaporeUnit (with tag combinations: Singapore, ,,, and priority value: 50) and Group=Managers (with tag combinations: Singapore,*,Orchard,Tower One,5 and priority value: 20)
- The tag combinations with the highest priority value takes effect. In this case, the tag combination of IP Address Range in Spain Office is chosen for connecting to the SQL Server database.
- The CVP notes these tag combinations and then proceed to connect to the SQL server database with same tag combinations.
- The CVP on Simon’s laptop will now search for SQL server profiles among the various other profiles for the same tag combination. Once it is successfully connected to the correct Database server profile, all Simon’s pending print jobs, even those that were stored in Singapore (primary) database will be moved to the now connected SQL server in Spain.
- Simon also receives a notification of this database change in his laptop.
- Simon can now proceed to submit the print jobs to the already existing Pull print queue configured in his CVP, and then release the print jobs at the printer.
- In case of Print Direct, the CVP searches for the printer to connect in the Spain Office. Because this IP address is tied to the Spain Community, CVP filters the list of printers to show only the Spain printers. Simon can also use floor map to choose the printer (Choose another printer).
To summarize:
When a user CVP moves its connection from SQL server A to SQL server B due to tag combination:
- The CVP synchronizes with the new SQL server profile.
- It moves all pending print jobs of the user from Server A to server B.
- A popup notification is displayed to user informing of the database change.
- All communications from user CVP is now done through SQL server B.
- Tracking information of print jobs are however stored on Server A (primary server)
How tag settings work?
What if I am a Member of Several Groups/OUs?
If you are a member of more than one Group/OU, and each Group/OU is mapped to a different community (tag assignments), the community setting of the Group or OU with the highest priority value is assigned to you. The same principle applies if your user name is assigned to a community and you inherit a community from the groups you belong to. It is the community with the highest priority that is assigned to you. To know more about priority settings, click here.
What if matching tag combination is missing for SQL server profile?
If a SQL server profile does not exist with the same tag combinations, the CVP will connect to the primary SQL server profile.
Tracking information on Primary SQL Server
Print tracking information are always stored in primary database, irrespective of its location of printing (for example, secondary server sites). This is due to the fact that print quota settings are configured on the primary database and cannot be mirrored across SQL databases.
Creating a Secondary database in Web Admin
A Super Admin can create a primary SQL server profile and define up to five additional secondary SQL server profiles in the Web Admin application.
How to create a secondary SQL server profiles in Web Admin?
- In the Web Admin, click
![]() icon Setup icon at the top right hand corner of the screen.
icon Setup icon at the top right hand corner of the screen. - Select the
![]() Database Configuration tab.
Database Configuration tab. - Click the
![]() Add icon.
Add icon.
![]()
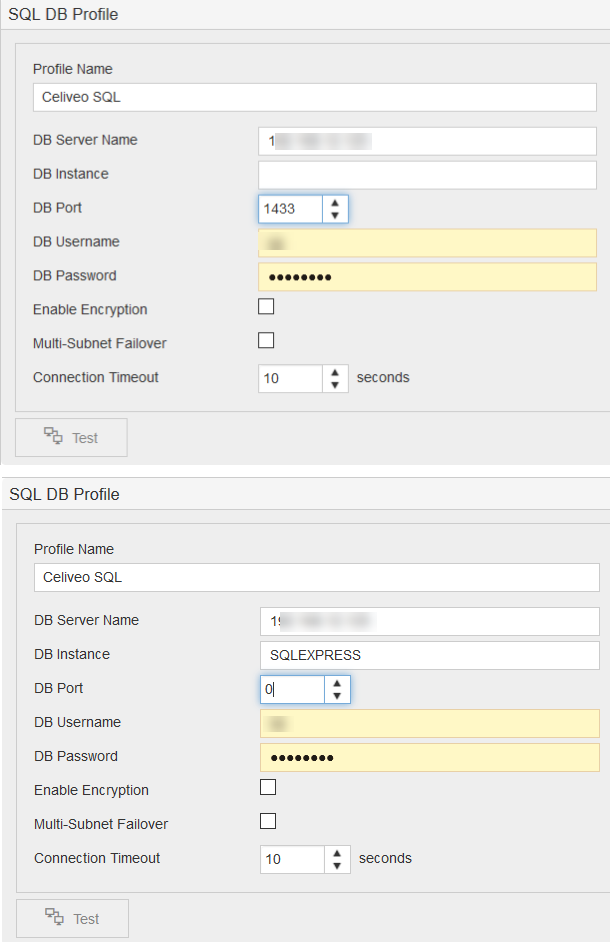
- Enter the following information for creating secondary DB profile:
| Field | Description |
|---|---|
| Profile Name | Name of the secondary database profile. |
| DB Server Name | For the default instance of SQL Server, the server name is the [computer name] or [IP address].E.g. CELIVEO SRVR, 192.68.3.211 For a named instance of SQL Server, the server name is the [computer name] or [IP address]\[instance name].E.g: CELIVEO SRVR\SQLEXPRESS, 192.68.3.211\SQLEXPRESS. |
| DB Instance | If default instance of SQL Server is used, leave this field empty. If named instance of SQL Server is used, provide the instance name. If SQL Server is installed using the Celiveo installer, the instance name is “SQLExpress”. |
| DB Port | By default, the SQL server listens on TCP port number 1433. Select the port number configured for this database instance. |
| DB Username | Type the user name with admin access privileges for this database. |
| DB Password | Type the corresponding password. |
| Enable Encryption | Select this option to secure the connection between Web Admin application and the specified SQL server. This encrypts all the communication occuring between them. |
| Multi-Subnet Failover | MultiSubnetFailover is a Microsoft configuration introduced in an update for Microsoft SQL Server 2012 and later versions to support the AlwaysOn features. When MultiSubnetFailover is enabled, Web Admin attempts parallel connections to the failover IP addresses of an (Always On) Availability Group during a multi-subnet failover. A multi-subnet failover cluster provides disaster recovery solution in addition to high availability. For further reference about MultiSubnetFailover, please refer to the following Microsoft articles:
|
| Connection Timeout | This denotes the time limit (in seconds), within which the connection to the specified SQL server must be made before terminating the attempt. |
- To use an API, enable the Web service API checkbox. Enter the IP/Hostname of the server on which the API will be installed. The Key, Port and URL fields are automatically filled. You can then download the API package and install it manually.
You can disable the installed API by unchecking the Web service API box without having to uninstall the API package. - Define tags for your database profile:
![]()

- For each tag category, select a value in the drop-down list or click the
![]() Add icon next to the drop-down list. To edit a value, click the
Add icon next to the drop-down list. To edit a value, click the ![]() Edit icon. To delete a value, click the
Edit icon. To delete a value, click the ![]() Delete icon.
Delete icon. - You can also save your tags in a bookmark to reuse it later. To do so, click the
![]() Add Tag Bookmark icon after entering tag values.
Add Tag Bookmark icon after entering tag values.
![]()

- Click the
![]() Test button to perform a connection test on the database. A confirmation message displays if connection to database is successful. The Save button becomes available.
Test button to perform a connection test on the database. A confirmation message displays if connection to database is successful. The Save button becomes available. - Select Synchronize database after save checkbox to synchronize with the primary database when you click [Save].
This will synchronize and replicate the primary database as the secondary database is created.
You can also synchronize the secondary database later using the [Sync] icon in the [DB Settings].
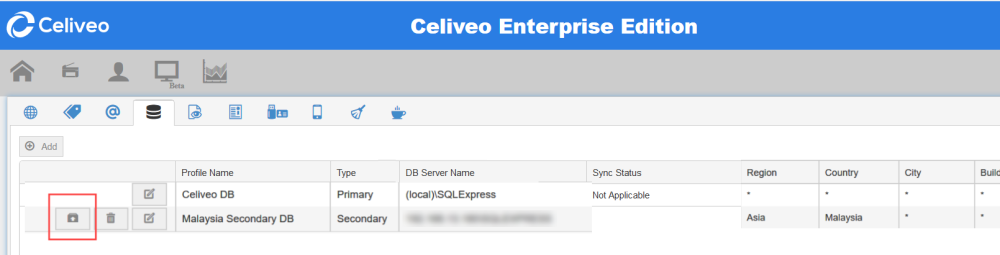
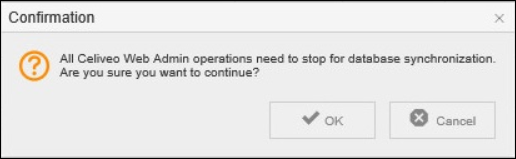
- A confirmation message displays. Click OK.
![]()
- During Synchronization, all unnecessary data is deleted from the secondary database.
![]()
- Once Synchronization is complete, a confirmation message displays.
![]()

Post your comment on this topic.