1. Add a New Access & Rules Profile to a Printer
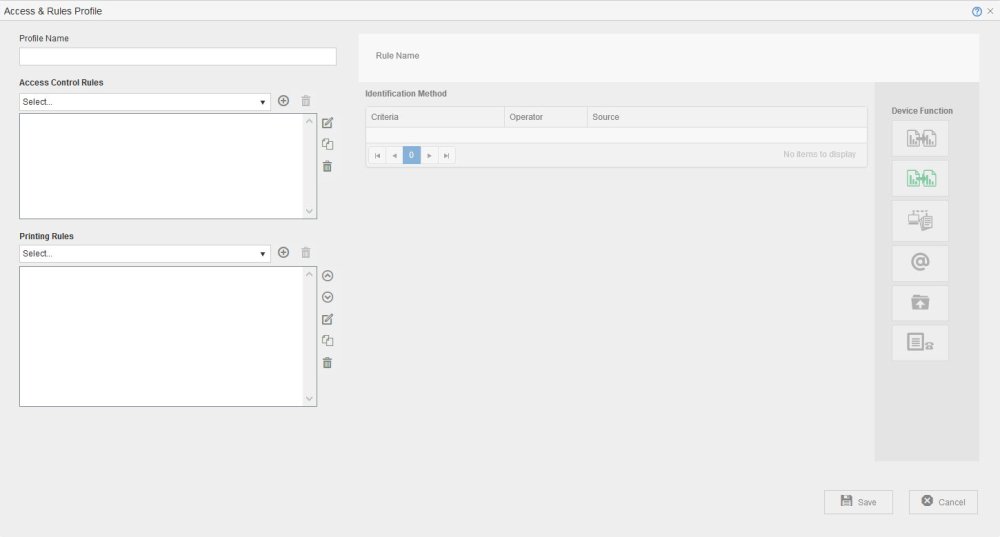
- Select the printer to add the Access and Rules Profile to.
- Click
. The Access & Rules dialog is displayed.
- At [Profile Name], specify a unique name for the Access & Rules Profile.
2. Add a New Access Control Rule to the Access and Rules Profile
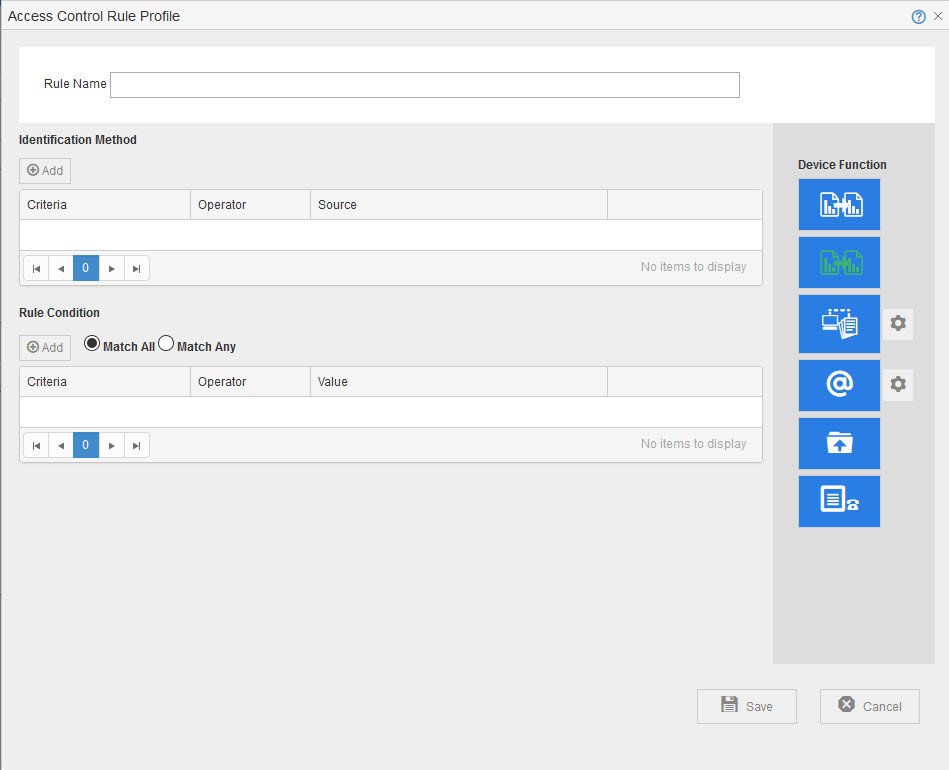
- Click
, located in the same row as the [Access Control Rules] drop-down. The Access & Rules Profile displays
- At [Rule Name], specify a unique name for the Access Control Rule.
3. Add ID Code Authentication as the Identification Method
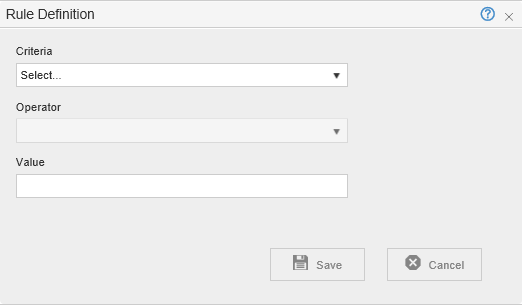
- From the [Criteria] drop-down, select [IDCode].
- From the [Operator] drop-down, select [Is In].
4. Build the Authentication Profile to Validate the PIN
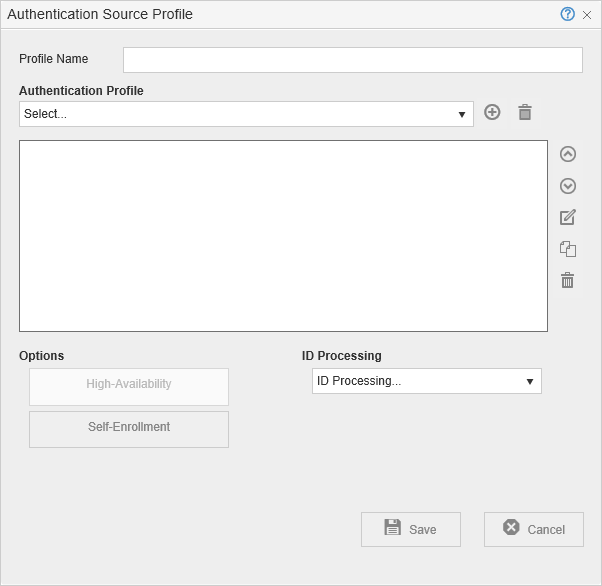
- In the [Profile Name] box, specify a unique name to identify the profile.
- Click
, located in the same row as the [Authentication Profile] drop-down. The Authentication Profile is displayed.
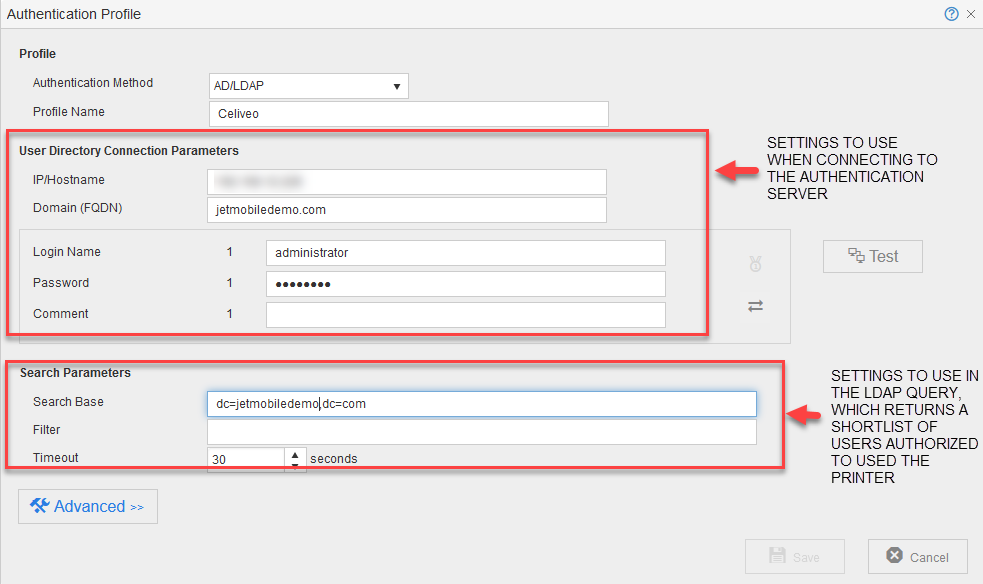
- Specify the AD/LDAP query (similar to that of the screen capture shown below) that returns the list of users who are authorized to use the printer.
- Click [Test].
If log in to the Authentication Server is successful, a message is displayed below the [Test] button. - Click [Save]. You are returned to the Authentication Source Profile.
5. Specify How to Enable Self Enrollment
![]()
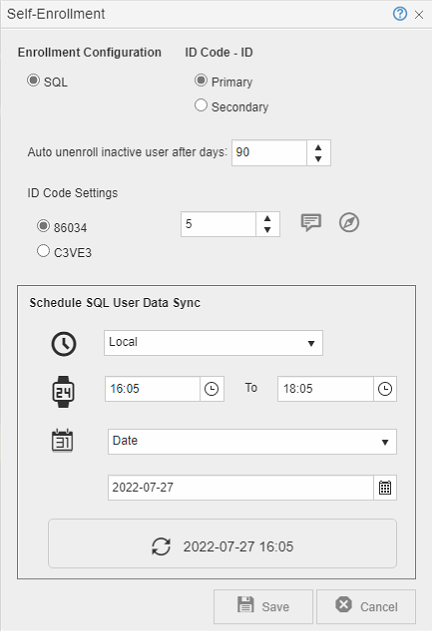
- At [Auto unenroll inactive user after days], enter the number of days.
An enrolled user who has not used the Celiveo system after the specified number of days is automatically removed.
- To enable authentication with a Smartphone using BLE (Bluetooth Low Energy), tick the Use Celiveo Mobile ID checkbox.
- At [ID Code Settings] specify if you want a numeric (made of digits) or alphanumeric (made of digits and letters) PIN. You can also choose the length of your code.
- Numeric ID codes shall not:
- Start with 0
- Be made of consecutive digits, for example 123456 or 2345
- Be made of repeated digits, for example 11111
- Have the same digits except one, for example 51111
- Be made of repeated patterns, for example 123123
- Alphanumeric ID codes shall:
- Be uppercased, for example 45ER9
- Always be uppercased when entered on MFP screen, for example at5p => AT5P
- Have a random mix of digits and letters
- Supported letters can be A to Z except o and i that can be mixed up with 0 and 1.
- Supported digits can be 1 to 9, no zero
- Alphanumeric ID codes shall not:
- Be lower cased
- Be made of the same characters, for example AAAA
- Be made of repeated patterns, for example ABAB or TOTO
- Numeric ID codes shall not:
If you have more than 1000 users, do not use less than 5 digits for the PIN.
- At [Schedule Time Zone], select one option:
Local Apply the time settings of the local machine. UTC Apply the preferred Coordinated Universal Time (UTC) time zone.
- Set the range of time for the data sync to occur.
To avoid a sudden increase in network traffic, the update is scheduled to happen anytime during the specified period. - Set the frequency of the data sync.
Date The data sync occurs on a specific date.
Set the date to start the data sync.Daily The data sync occurs every day during the specified time frame. Weekly The data sync occurs every week on a specific day of the week.
From the drop menu, select the day of the week.Monthly The data sync occurs every week on a specific day of the month.
From the drop menu, select the day of the month.
- Click
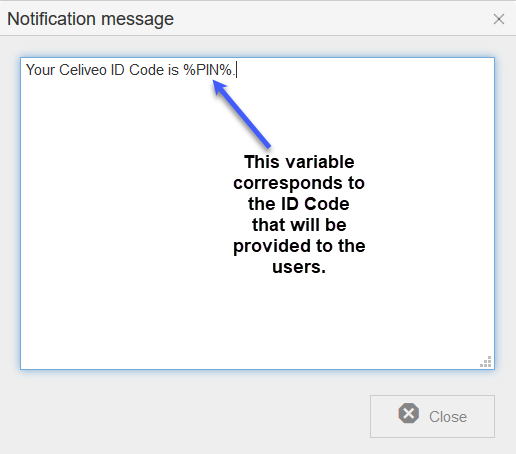
. The Notification Message displays.
- Specify the text for the notification and click [Close]. This template is used to inform users of their ID code, when they enroll.
- Click
. You are taken to the ID Code generating portal.
- Log in using your Windows credentials.
- Note down the URL of the portal. You need to send the link to users to enable them to generate their own ID Codes and enroll themselves.
- Close all dialogs by clicking [Save] to save all settings.
Last modified:
9 September 2020




Post your comment on this topic.