
System Requirements
The system requirements for installing Celiveo 8 solution can be found here.
Ports and Communication
A comprehensive list of all the ports used by Celiveo solutions, describing the ports and applications used for communication between the Celiveo components that consist of the Celiveo Server Services, Web Admin Server, Active Directory, Database (SQL) server, the device, and the PC/laptop/workstation can be found here.
Prerequisites
Before you install, make sure these prerequisites are met:
- The device is connected to an active LAN connection.
- The device has a fixed IP or DHCP reserved IP address.
- The network allows management by Simple Network Management Protocol (SNMP) v1/v2.
- From the device embedded web services, set the device session time to be longer than the default Celiveo Web Admin inactivity time out (30 sec).
Configuring CSA
By default, the CSA is set in DHCP mode. You can also opt for fixed IP network settings.
The steps to configure CSA for DHCP and for fixed IP network settings can be found here.
Celiveo Version upgrade on CSA
Follow the procedure given here to upgrade the Celiveo Version on CSA.
Once the Celiveo embedded solution is installed on the device, there are additional settings to be done in order to operate in the Celiveo environment. This section includes the topics:
Basic Security Setup on Lexmark Devices
Setup Basic Security on Lexmark Device running on Framework 3.x/ 4.x
- In the browser address bar, enter the IP address of the printer in the format shown below:
https://Device_IP_Address
The device Embedded Web Server page opens.
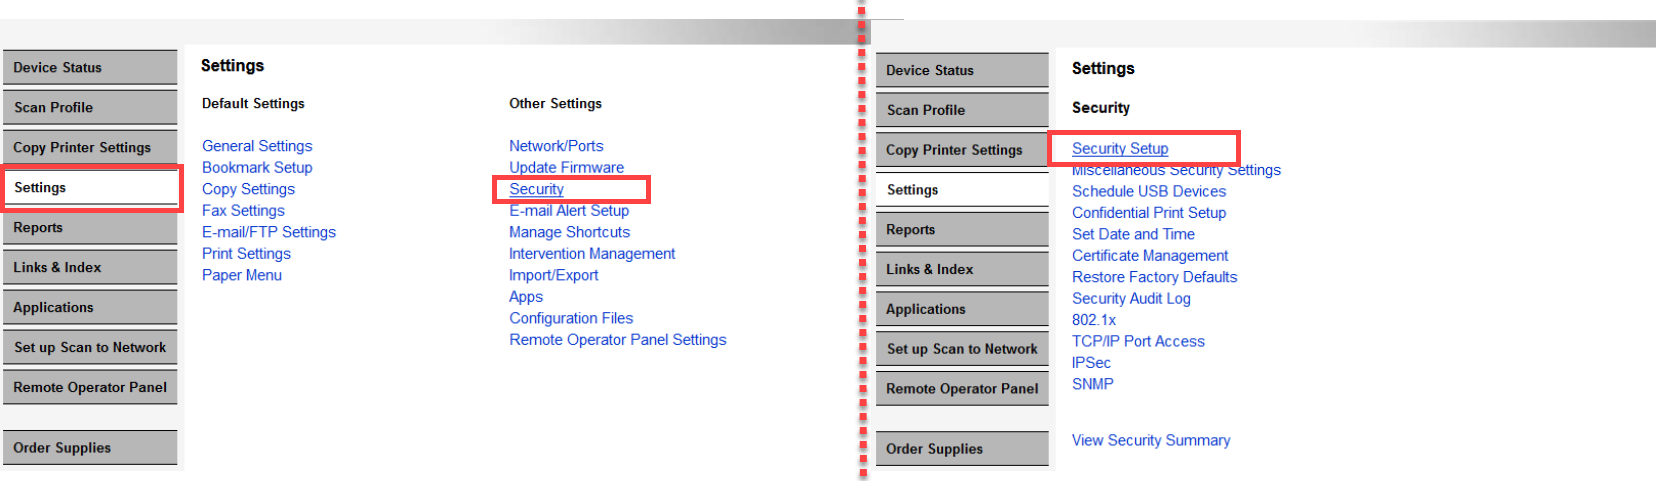
- Click Settings in the left panel, then go to Other Settings > Security > Security Setup.
![]()
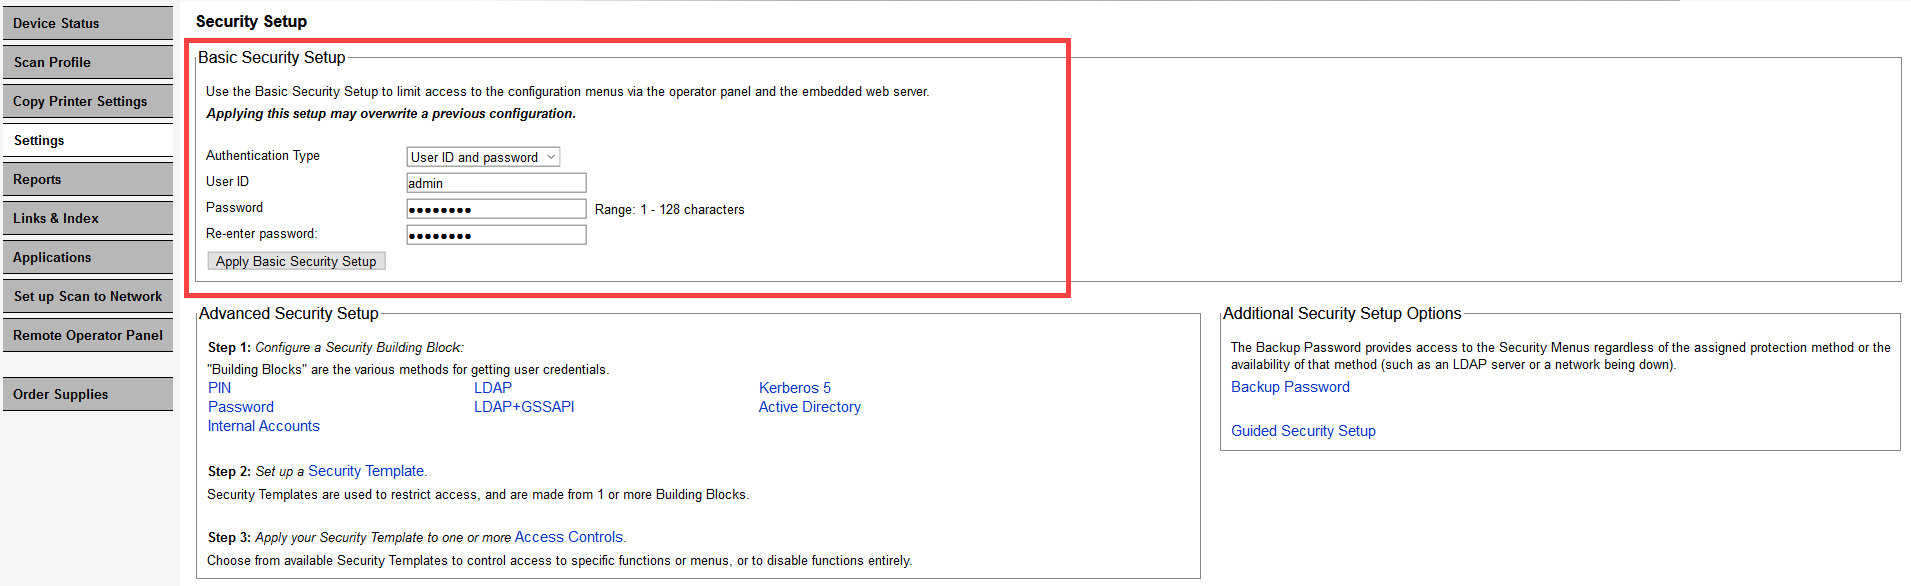
- In the Basic Security Setup section, select User ID and password option as Authentication Type.
- Set the User ID and password and click Apply Basic Security Setup.
![]()
Setup Basic Security on Lexmark Device running on Framework 5.x/ 6.x
- In the browser address bar, enter the IP address of the printer in the format shown below:
https://Device_IP_Address
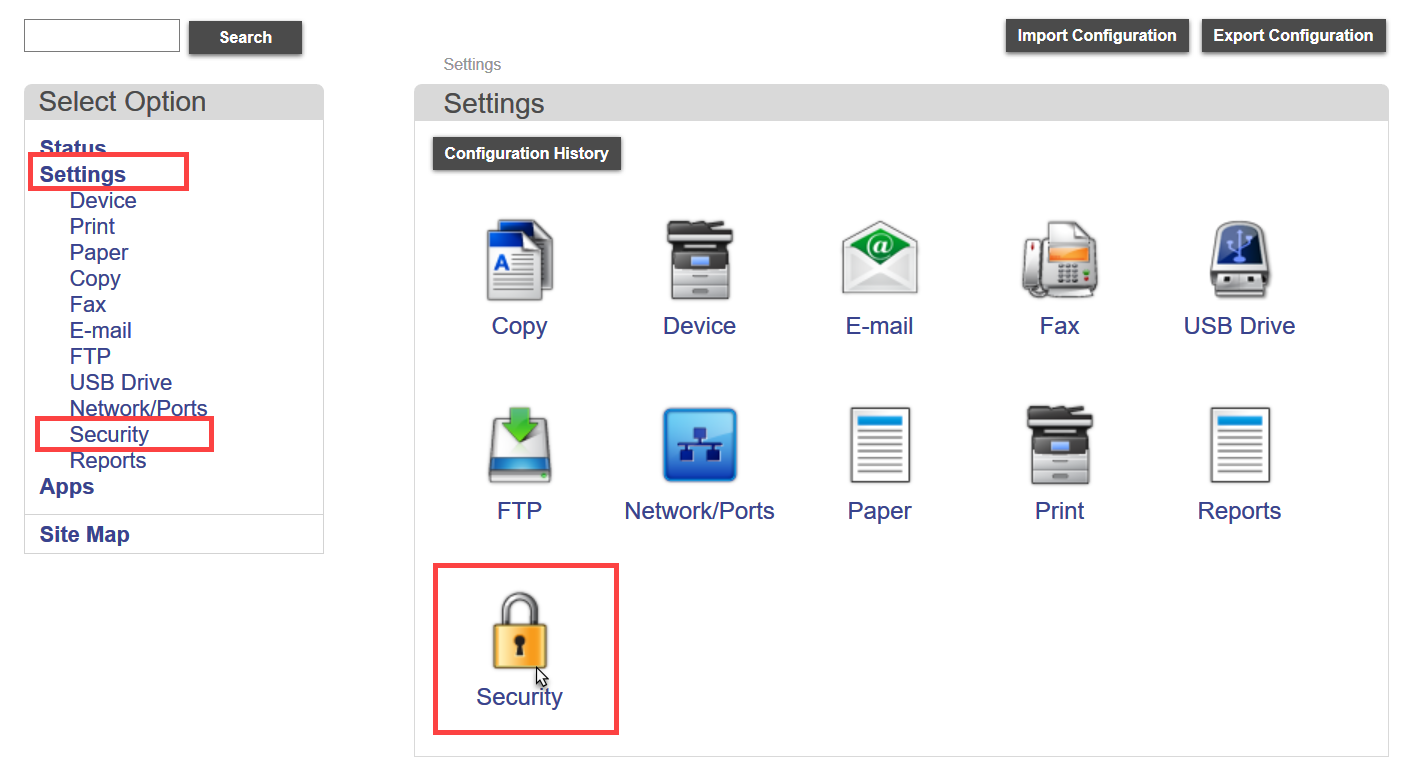
The device Embedded Web Server page opens. - Click Settings in the left panel, then click Security and open Login Methods block.
![]()
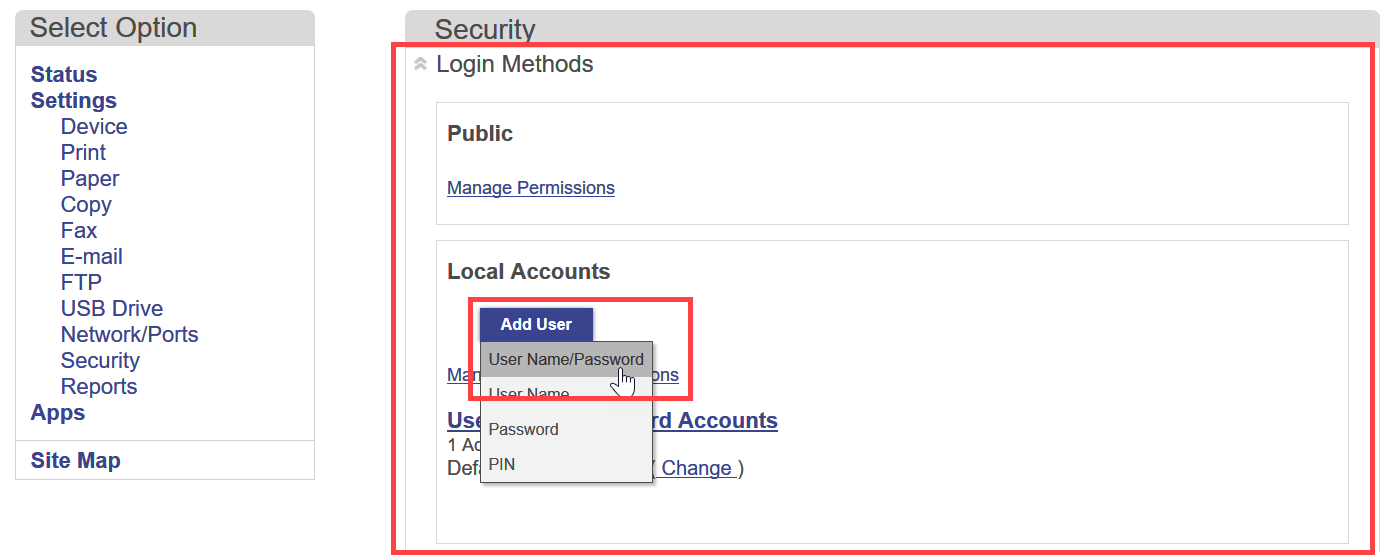
- Under Local Accounts section, click Add User button.
![]()
- Fill in user information such as name, username, e-mail, password etc.
- Select Admin checkbox under Permission Groups, and click Save.
![]()
- Go back to Security.
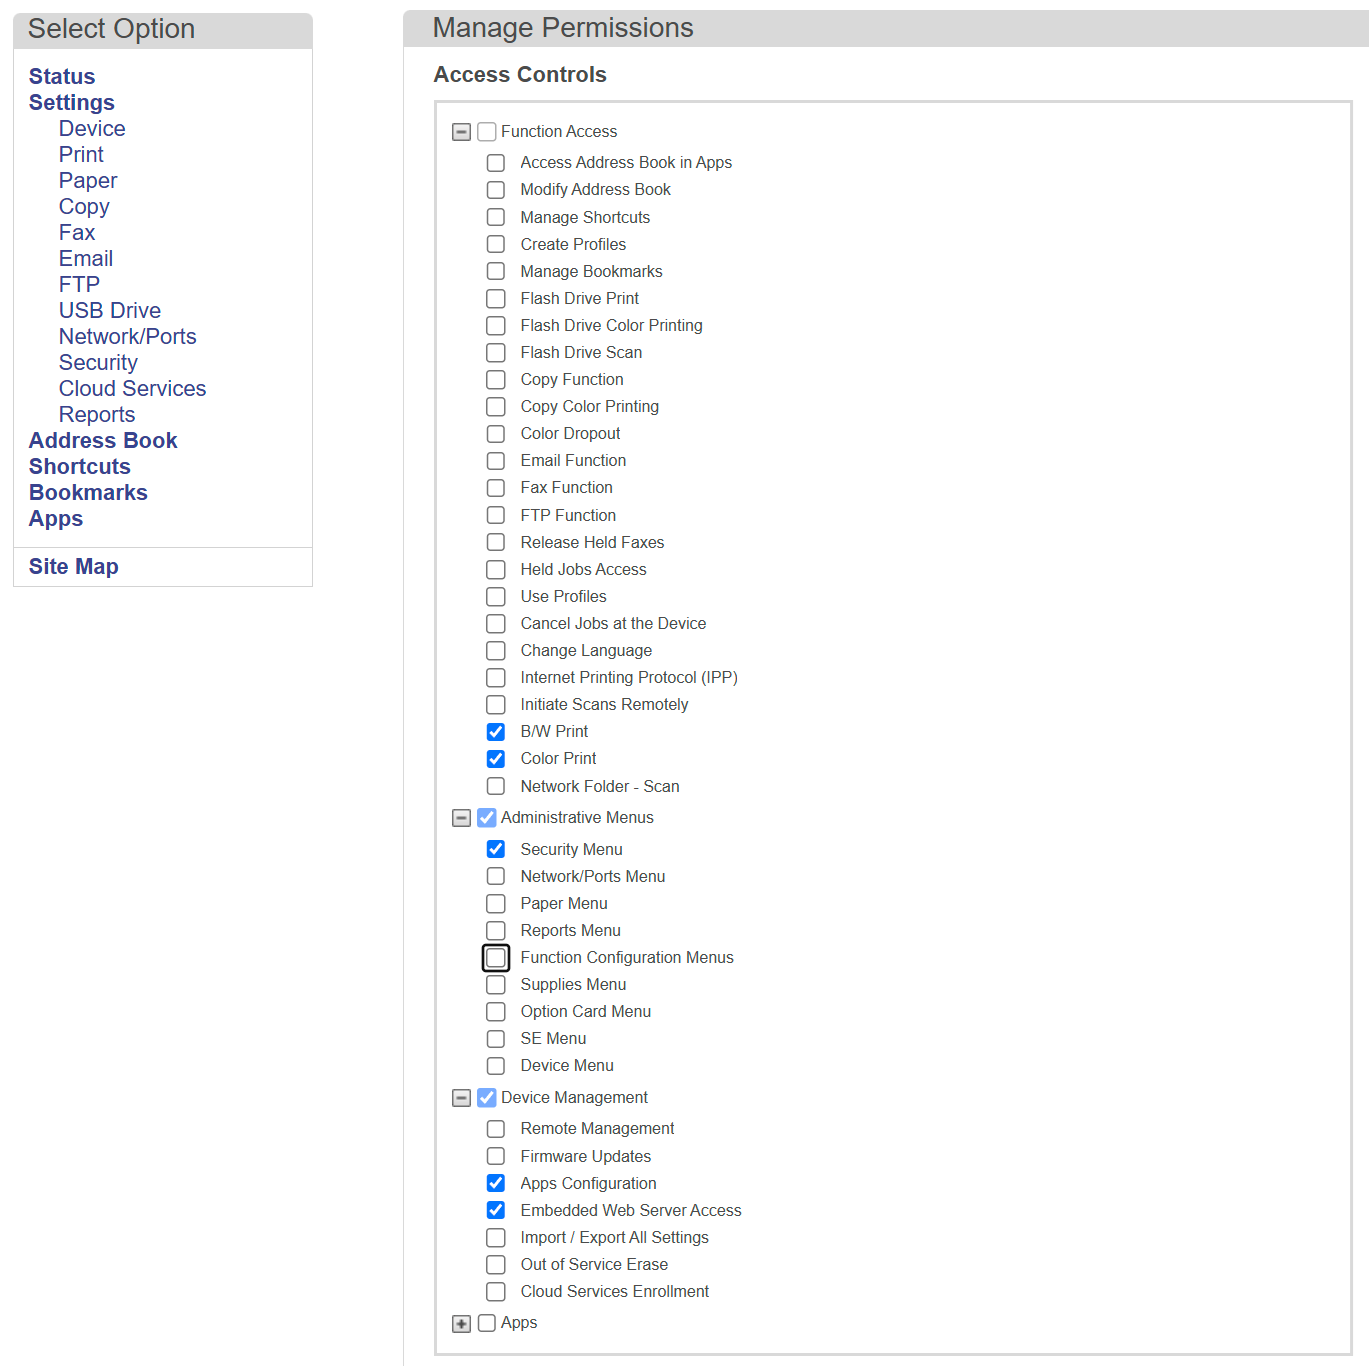
- In the Public section, click Manage Permission link.
- Uncheck all “Administrative Menus, “Device Management” and “Apps” controls.
- Uncheck all Function Access that you want to be restricted.
- Then, click Save.
![]()

Enable Lexmark Logs
Enabling the Lexmark device logs helps in detecting and diagnosing a problem.
To enable device logs on the Lexmark device:
- In the browser address bar, enter the IP address of the device in the format shown below:
https://Device_IP_Address/se
For example: https://192.168.8.82/se
The Lexmark Embedded Web Server page opens. - Login as Admin user.
- Click on Embedded Solutions, then click on Set Logging Level.
![]()
- Click Yes option to allow debugging entries in the log, then Submit.
- Repeat the above step.
- Go back to Embedded Solutions, then select Log File.
- Copy all the solution logs and send it to the Celiveo Support team.
- After the solution logs are copied, return to step 3.
- Click on Default option, then Submit.

Reset Factory
Reset Factory on Lexmark Device running on Framework 3.x / 4.x:
To enable device logs on the Lexmark device:
- In the browser address bar, enter the IP address of the device in the format shown below:
https://Device_IP_Address
For example: https://192.168.8.82
The Lexmark Embedded Web Server page opens. - Login as Admin user.
- Click Settings in the left panel, then click on Security.
- Click “Restore Factory Defaults”, then click on Erase Printer Memory.
- Check “This operation will clear all settings, solutions, jobs, and faxes on this printer, and restore to factory defaults. I understand and wish to continue.”
- Then click Erase.
![]()

Reset Factory on Lexmark Device running on Framework 5.x / 6.x:
- In the browser address bar, enter the IP address of the device in the format shown below:
https://Device_IP_Address
For example: https://192.168.8.82
The Lexmark Embedded Web Server page opens. - Login as Admin account.
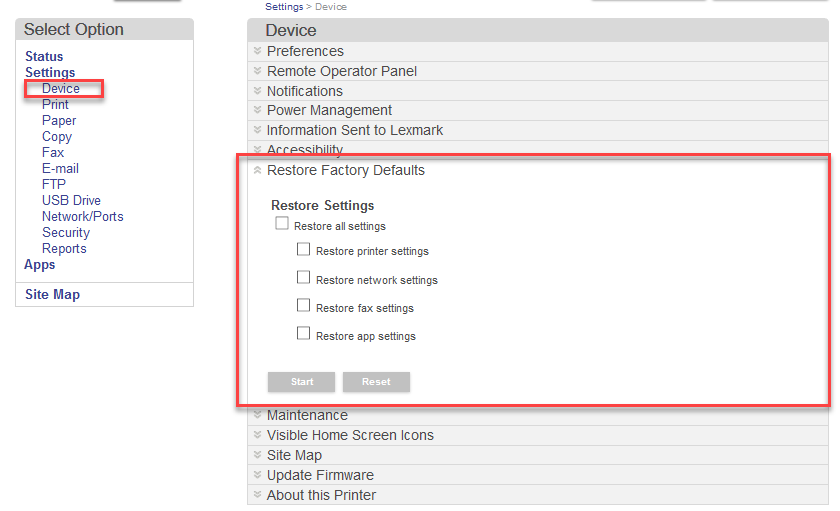
- Then click on Device on the left panel.
- Go to Restore Factory Defaults block.
- Check the required settings and click Reset.
- Confirm the action when prompted.
![]()
Timeout Settings
This configuration is necessary to ensure that the connection between the printer and Celiveo Smart Appliance is not disrupted.
Configure Timeout settings on Lexmark Device running on Framework 3.x / 4.x:
- In the browser address bar, enter the IP address of the device in the format shown below:
https://Device_IP_Address
For example: https://192.168.8.82
The Lexmark Embedded Web Server page opens. - Login as Admin user.
- Click Settings in the left panel, then click go to General Settings > Timeouts.
- Under the Timeouts section, make sure that Do not Hibernate is selected for Hibernate Timeout on Connection.
- Configure the settings as shown in the image below:
![]()
- Click Submit.
Configure Timeout settings on Lexmark Device running on Framework 5.x / 6.x:
- In the browser address bar, enter the IP address of the device in the format shown below:
https://Device_IP_Address
For example: https://192.168.8.82
The Lexmark Embedded Web Server page opens. - Log into Admin account.
- Then click Device on the left panel.
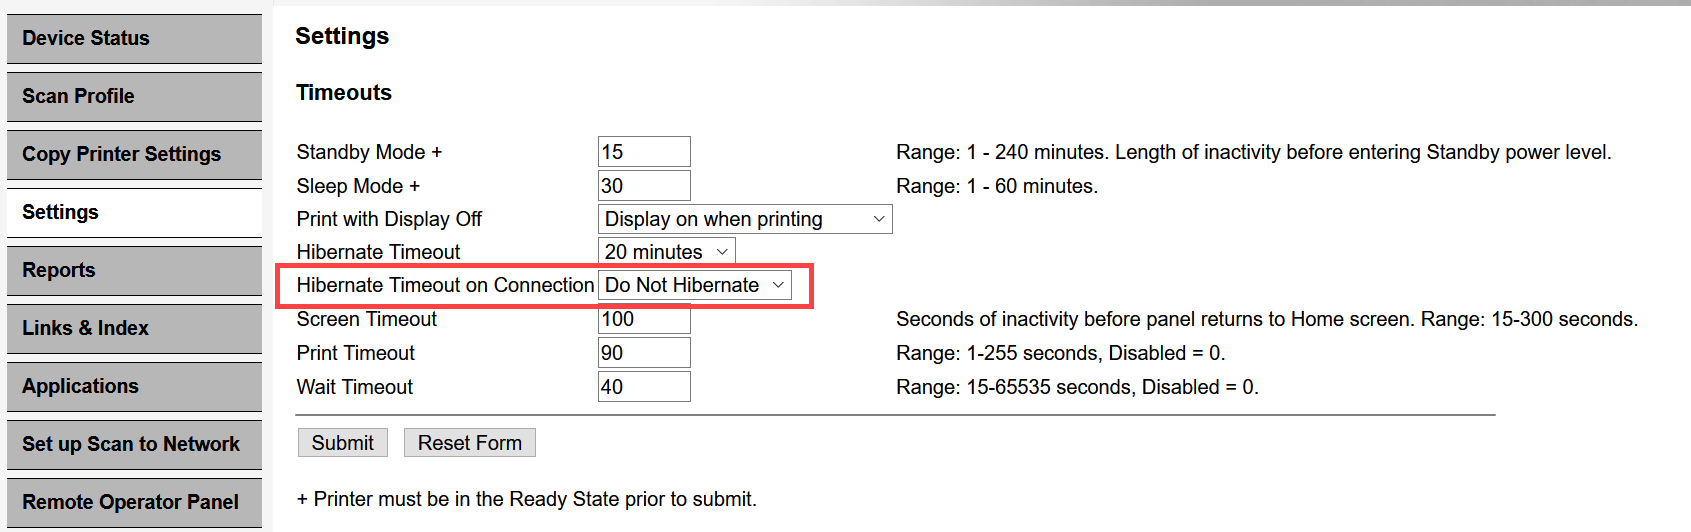
- Go to Power Management block.
- In the Timeouts section, select Do Not Hibernate for Hibernate Timeout on Connection.
- Select the configurations as shown in the image below:
![]()
- Click Save.

Post your comment on this topic.