Follow the steps listed below to deploy a Celiveo Shared Virtual Printer (CSVP) on a Print Server:
- Download the Deployment Package
- Install the CSVP on Print Server
- Verify CSVP on Print Server
- Connect to a CSVP from a User’s Workstation
1. Download the Deployment Package
![]()
- In the Web Admin, select the CSVP.
- Click
.
The Shared Virtual Printer Deployment Package downloads.
2. Install the CSVP on Print Server
- Log in to the server as its administrator.
- Copy the Virtual Printer Deployment Package to a temporary folder on the print server.
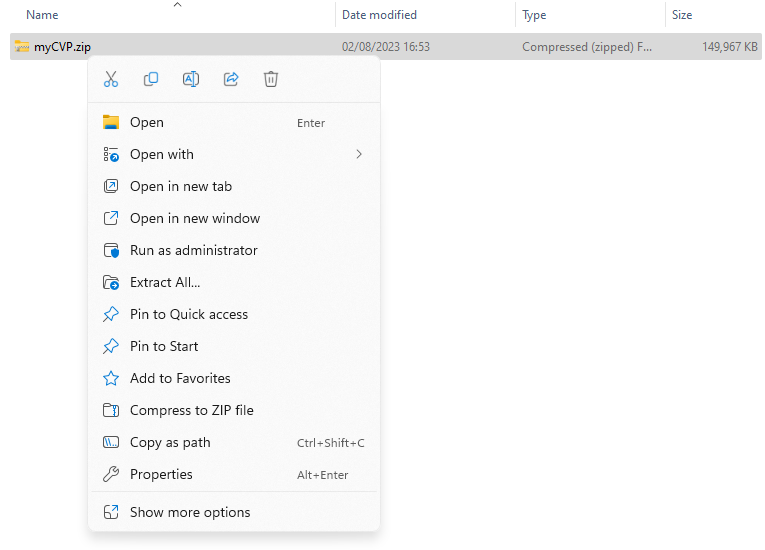
- Right-click the Deployment Package. A menu displays.
- Click [Extract All].
- Select a temporary folder to extract the files to, and click [Extract].
}!
- Double-click [Installer] and start the installation. Upon installation, a Celiveo Virtual Printer icon is placed on the Desktop
and the System Tray
.
3. Verify CSVP on Print Server
- Right-click
on the system tray. A menu displays.
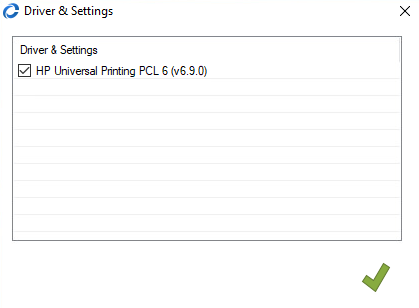
- Click [Celiveo Pull Printing]. The Driver and Settings screen displays.
- Select the printers to use and click
.
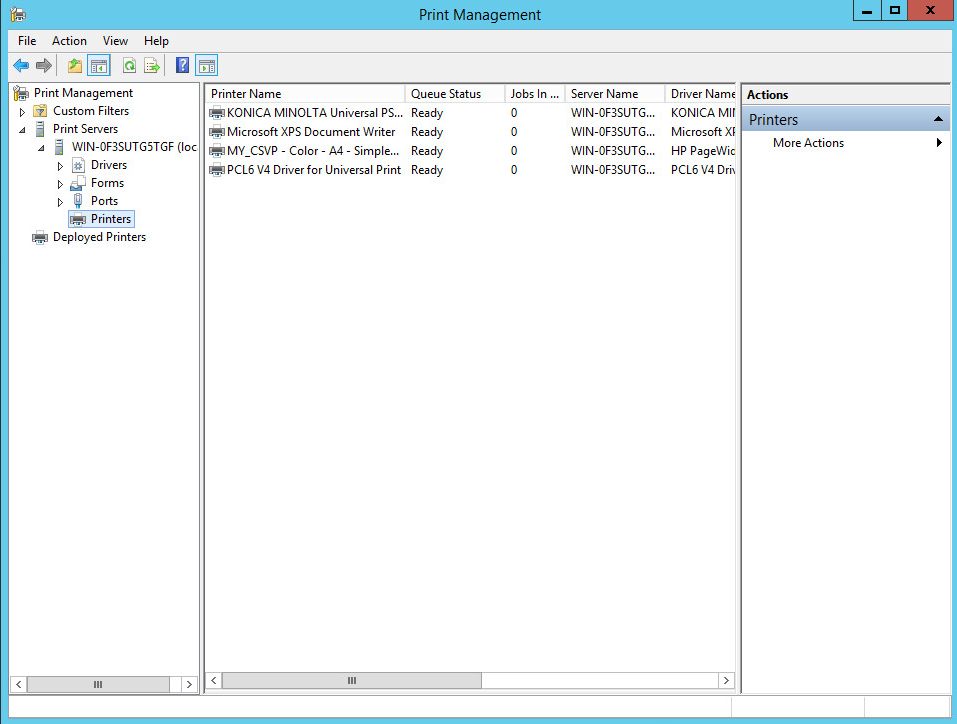
A vertical yellow bar starts running on the Celiveo Virtual Printer system tray icon while the printer drivers are installed. - Verify that the Celiveo Shared Virtual Printer is added to the Print Server
4. Connect to a CSVP from a User’s Workstation
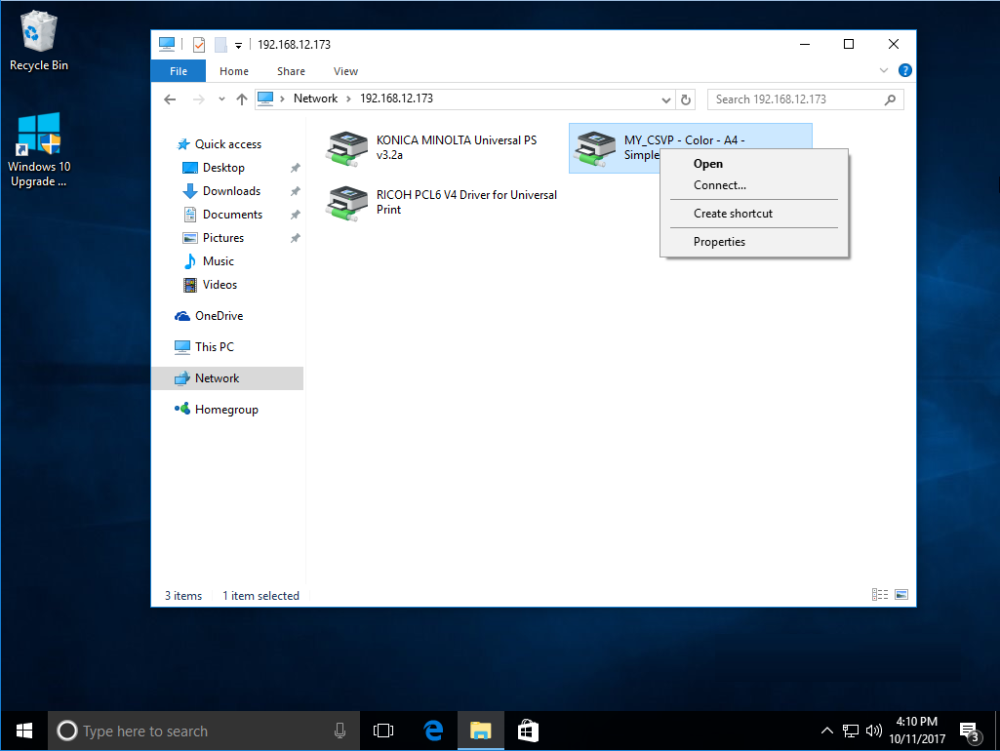
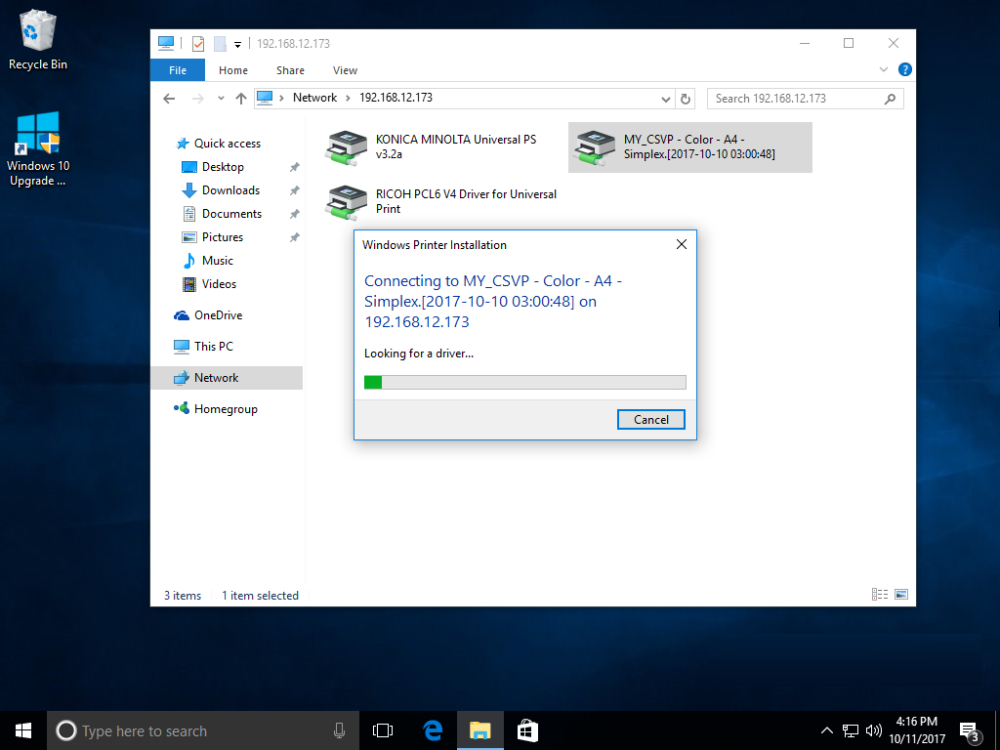
- From the end-user workstation, use Windows Explorer to Navigate to the print server.
- Right-click the Celiveo Shared Virtual Printer and select [Connect]. The printer installation starts.
- In Devices and Printers, verify that the Celiveo Shared Virtual Printer was installed.
Last modified:
14 June 2024


 }!
}!
Post your comment on this topic.