The Celiveo.me Intranet module will be generated and installed together with a CSVP (Celiveo shared Virtual Printer).
The whole service configuration is defined through a friendly wizard.
1. Login to Web Admin
2. Upload the new license and make sure license with Celiveo.me Intranet connector
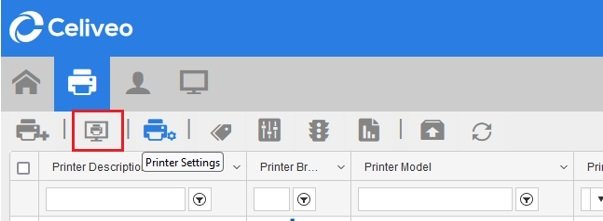
3. Create a new Celiveo virtual printer
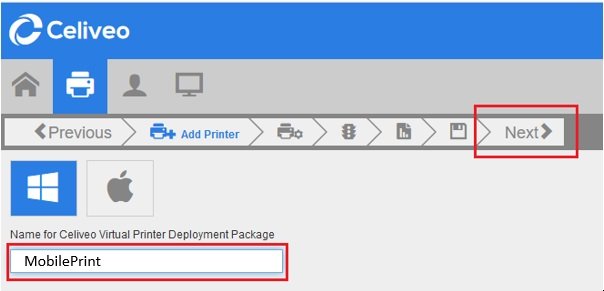
4. Enter the Celiveo Shared Virtual Printer name you want and click on Next.
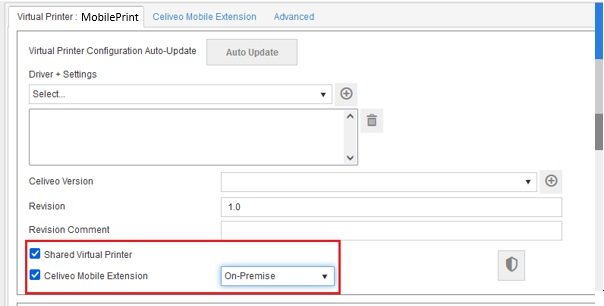
5. Check “Shared Virtual Printer”, then check “Celiveo Mobile Extension” and select “On-Premise”.
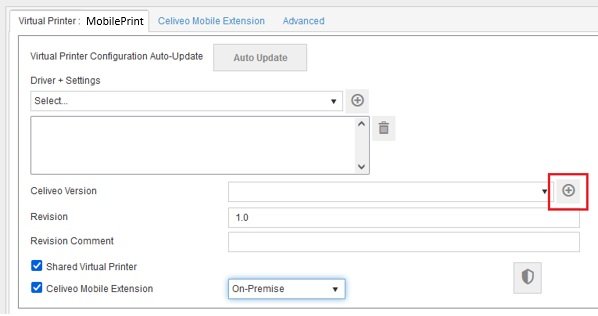
6. The special package name starts with “CeliveoMEI-” followed by version and date codes.
If it has not yet been loaded in the Celiveo WebAdmin portal you need to upload it, otherwise skip to step 9.
Download the package from this manual portal – Current release installers.
Click “+” button to upload it to your WebAdmin.
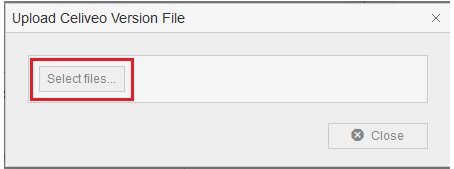
7. Click “Select files” to upload the package
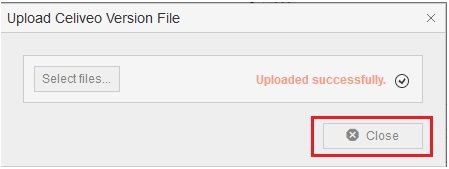
8. Close the popup after build has been uploaded successfully.
9. Use the “Celiveo Version” drop down to select the special CSVP package available in the Celiveo WebAdmin.
Define “Driver + Setting” to define for what printer brand the documents attached to emails must be converted.
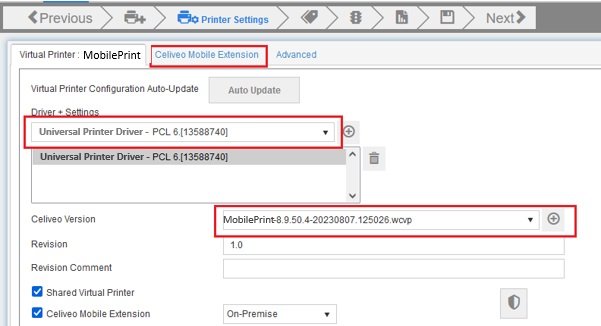
10. Now, select the “Celiveo Mobile Extension” tab.
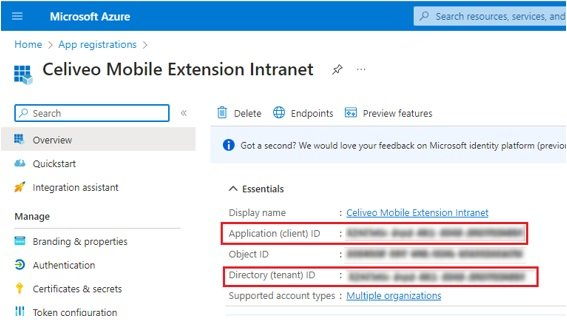
Copy in the configuration screen the OAuth2 authentication information, “Directory (Tenant) ID”, “Application (Client) ID”, for the Azure Authentication created earlier.
Enter the “Imap Server Hostname”, “Imap Server Port”, Email, password and define the Internet proxy settings if applicable.
Click the “Test” button to verify the access to the mailbox.
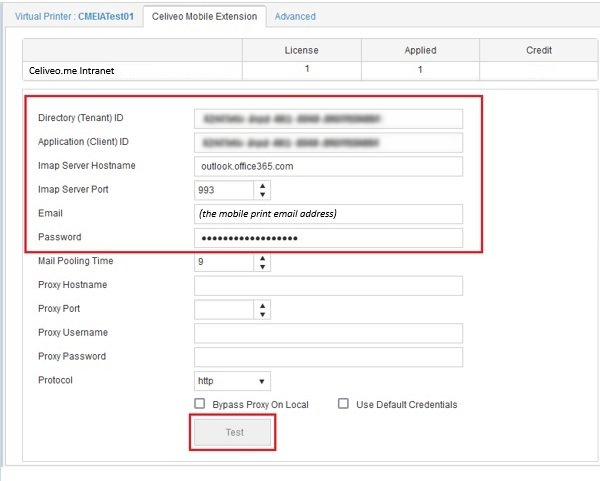
11. Click “Test” button. It should be successful.
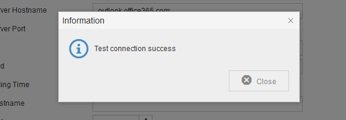
12. If the admin has not yet validated the OAuth2 application, the security prompt requests to consent to allow to read email.

Click “OK” to validate, a new browser tab will be opened and redirected to a Microsoft login page.
Login with the email address corresponding to the mobile print email account defined in the WebAdmin.

Depending on the tenant policy, the administrator installing Celiveo.me may be able to consent.
Accept to consent the application to allow to read from specified email.
Upon validation the screen will be redirected to www.celiveo.com.

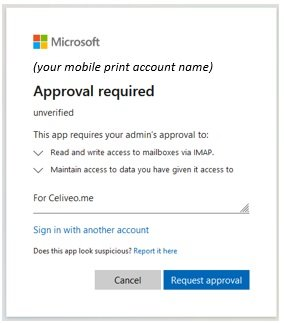
If the administrator installing Celiveo.me cannot consent due to insufficient rights, he needs to request approval from an admin with the needed privileges.
Click on “Request approval” to request the approval from that other admin.
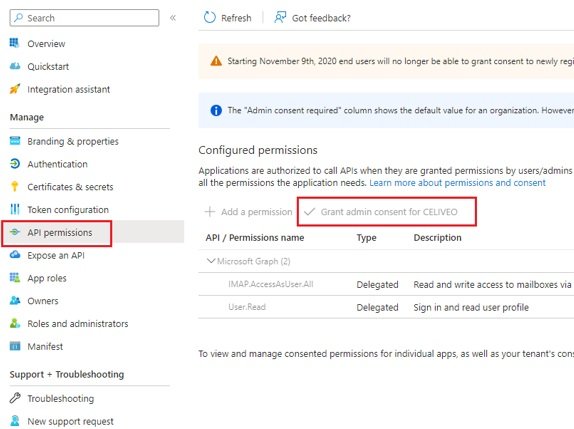
That other Administrator can sign to the Azure portal => App registrations => “Celiveo Mobile Extension Intranet” => “API permissions” and validate the access by clicking on “Grant admin consent for Tenant” button.
13. Click “Next” until “Save Virtual Printer Configuration” popup appears.
Ensure the Download option is checked.

14. The CSVP is created and the installer including Celiveo.me Intranet generated and downloaded on your browser.
The nest steps describe how to use that installer.


Post your comment on this topic.