
Use Tags to Define Communities
Contents
- What is community?
- Why use Tags/Communities?
- Examples
- Use Bookmarks to access communities quickly
- How to…
What is a community?
A community is a group of users, workstations, printers, and administrators that have a common characteristic. For example, a group of users, workstations, printers, and administrators, located in the same building.
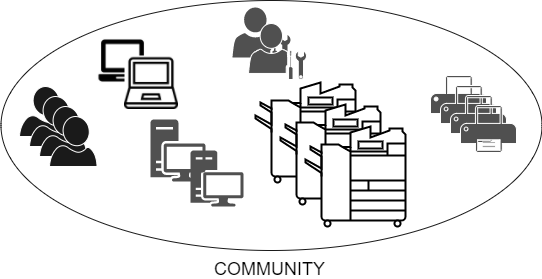
The community that a user or device belongs to is determined by the tags assigned to them.
Why use Tags/Communities?
![]()
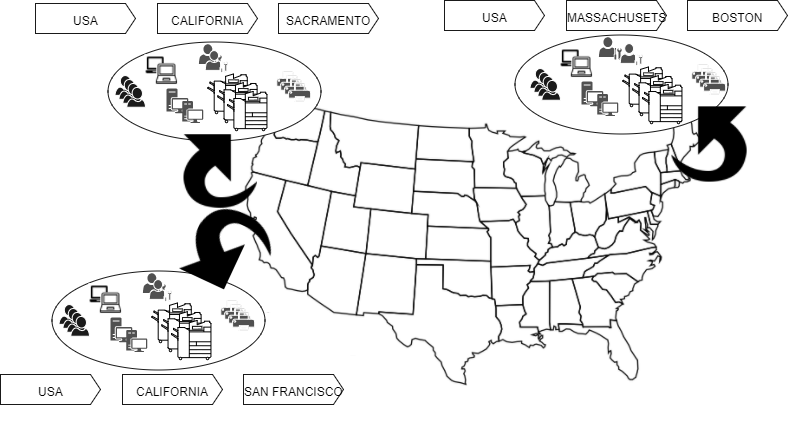
The example shown above illustrates a company distributed across several cities. The company uses tags to identify places. Although Celiveo supports up to five tags, they use only three, which identify Country, State, and City. A user tagged USA, California, San Francisco, belongs to the San Francisco community. A user tagged USA, California, *, belongs to the California community, which is a superset of San Francisco and Sacramento.
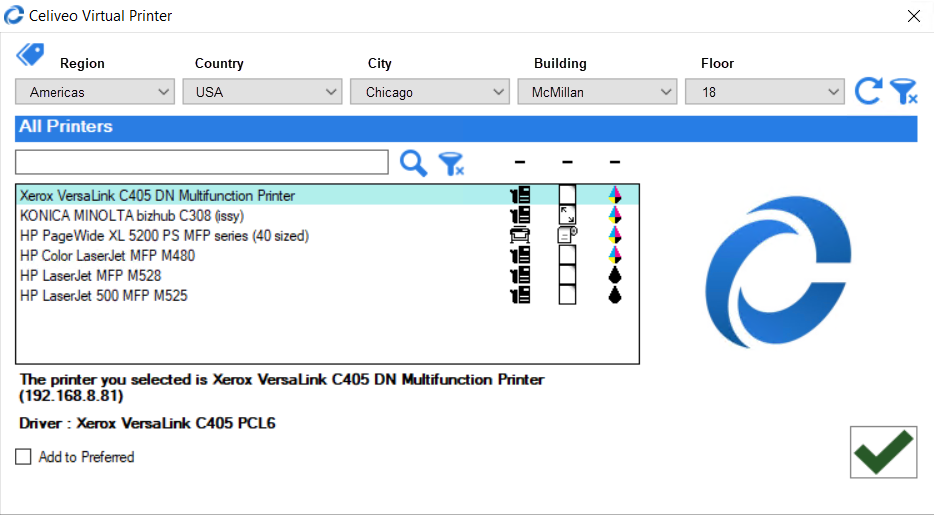
When you use Print Direct, tags filter the available printer list to display only those printers that are part of your community, thus minimizing screen clutter.

You can also use tagging to delegate the system administration of a community to a user who belongs to that community. (See Managing System Administrators for more information)
Examples
Example 1 : Your Company is distributed across multiple cities (Sacramento, San Francisco, and Boston). You don’t want to clutter a Boston user’s screen with Sacramento and San Francisco Printers (and vice versa). Hence, you create three separate communities for Sacramento, San Francisco, and Boston. You then tag the printers and IP Address ranges so that the printers and IP Addresses used in each geography will belong to the same community. When a user connects to the network from the Boston office, the user is assigned a Boston IP Address. Because this IP address is tied to the Boston Community, Print Direct filters the list of Printers to show only the Boston Printers. If this same user visits the San Francisco office, and plugs into the San Francisco network, the list of printers will automatically show the San Francisco printers.
Example 2: Your Company occupies a large multi-story building, and each organizational unit is housed in a different zone in the building. You want to provide users’ access to printers within their zone. Hence you create communities for each zone. You tag printers so that they belong to the zone they are placed in. Thereafter you tag Active Directory organizational units (using authentication profiles), such that users who belong to an organizational unit will belong to the zone they are seated in. When these users log in to Windows, the system interacts with the Active Directory and filters the list of available printers to those in the zone they are seated in.
Use Bookmarks to access communities quickly
In the Web Admin, you can save a tag combination as a bookmark. Thereafter when you load the bookmark, the tag combination loads. Thereby, a bookmark serves as a shortcut to a community.
How to…
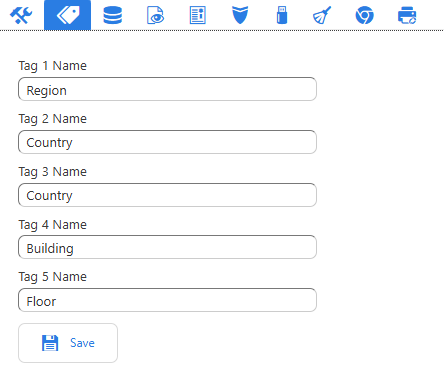
Label a Tag
- Click
![]() .
.
![]()
- Click
![]() .
.
![]()
- Label the tags as required and click [Save].
![]()


Tag Printers (Add Printers to a Community)
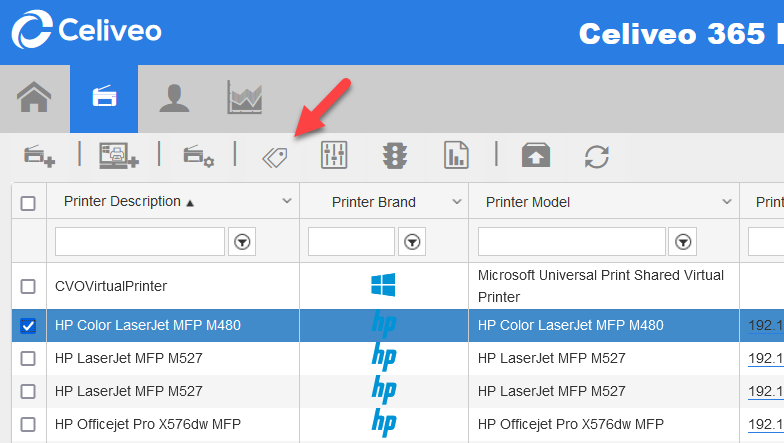
- From the List of Printers, select the printers you want to specify tags for and click
![]() .
.
![]()
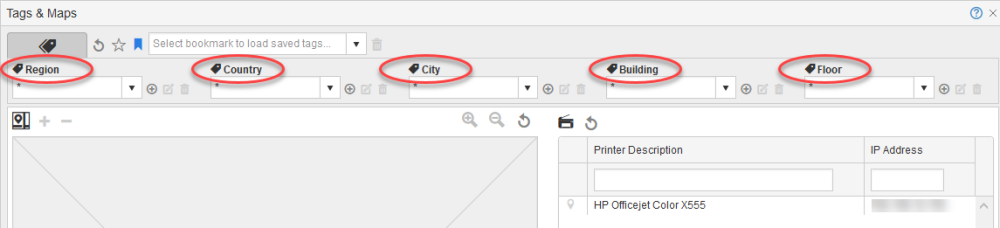
- Select the tags for the printers.
![]()
- If any tag drop-down list is empty, or does not contain the value you need:
- Click
![]() next to the drop-down.
next to the drop-down. - Specify the new value for the tag and click [Save].
- Click
- Click [Save]. The tags are assigned to the printers.
Tag Users (Add Users to a Community)
- From the List of Users, select the users you want to specify tags for and click
![]() .
.
![]()
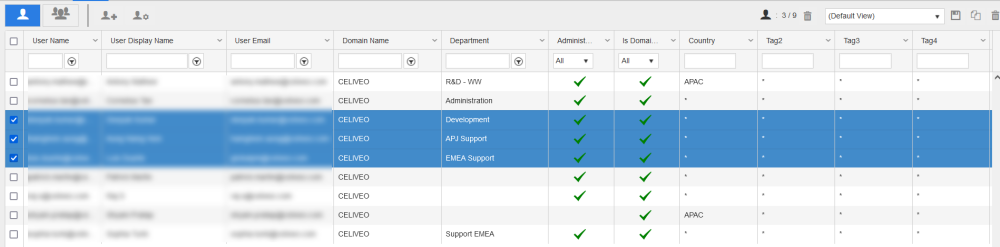
- Select the tags for the users.
![]()
- If any tag drop-down list is empty, or does not contain the value you need:
- Click
![]() next to the drop-down.
next to the drop-down. - Specify the new value for the tag and click [Save].
- Click
- Click [Save]. The tags are assigned to the users.

Tag User Groups (Add user groups to a community)
- From the List of User Groups, select the groups you want to specify tags for and click
![]() .
.
![]()
- Select the tags for the user groups.
![]()
- If any tag drop-down list is empty, or does not contain the value you need:
- Click
![]() next to the drop-down.
next to the drop-down. - Specify the new value for the tag and click [Save].
- Click
- Click [Save]. The tags are assigned to the users.


Tag IP Address Ranges (Add IP Address Range to a Community)
- From the List of IP Address ranges, select the range you want to specify tags for and click
![]() .
.
![]()
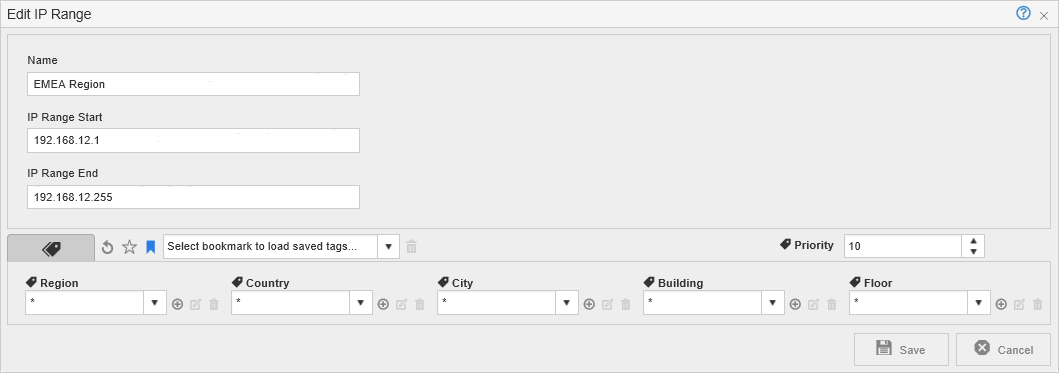
- Select the tags for the IP Range.
![]()
- If any tag drop-down list is empty, or does not contain the value you need:
- Click
![]() next to the drop-down.
next to the drop-down. - Specify the new value for the tag and click [Save].
- Click
- Click [Save]. The tags are assigned to the users.

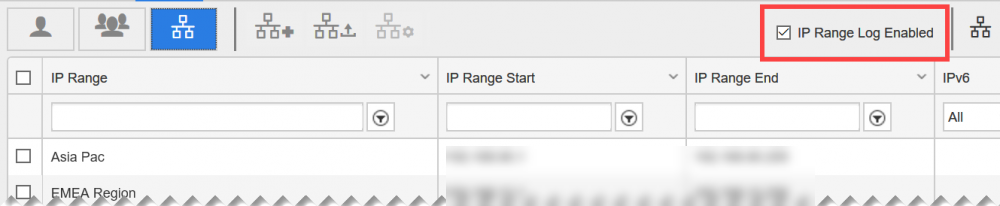
Enable IP Range Log (Generate log messages in System Log)
Select this checkbox to generate (warning) messages in Web Admin System Log if the user tries to connect from IP addresses that are not configured/ enlisted under the defined IP Address Range list. This option takes effect (i.e., log messages are generated) only if at least one IP Address Range is defined.
Post your comment on this topic.