
Enable Card Authentication for Printers
You enable proximity card authentication by creating an Access Control Rule and assigning the rule to a printer. You however cannot assign an Access Control Rule directly to a printer. Instead, you create an Access & Rules Profile for a printer and add the Access Control Rule to the Access & Rules Profile.
1. Add a New Access & Rules Profile to a Printer
![]()

- Select the printer to add the Access and Rules Profile to.
- Click
![]() . The Access & Rules dialog is displayed.
. The Access & Rules dialog is displayed.
![]()
- Click
![]() . The Access and Rules profile is displayed.
. The Access and Rules profile is displayed.
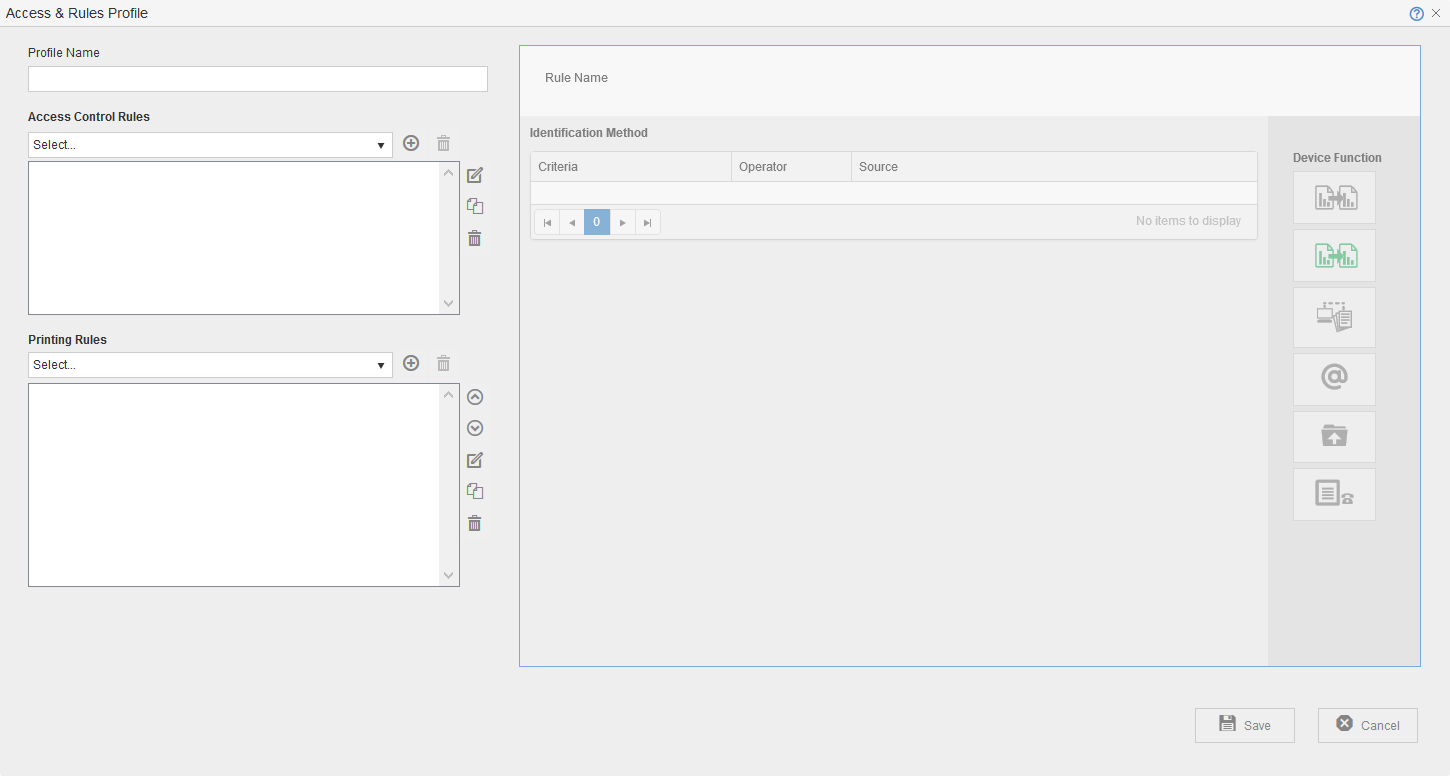
![]()
- At [Profile Name], specify a unique name for the Access & Rules Profile.

2. Add a New Access Control Rule to the Access and Rules Profile
- Click
![]() , located in the same row as the [Access Control Rules] drop-down. The Access & Rules Profile displays.
, located in the same row as the [Access Control Rules] drop-down. The Access & Rules Profile displays.
![]()
- At [Rule Name], specify a unique name for the Access Control Rule.
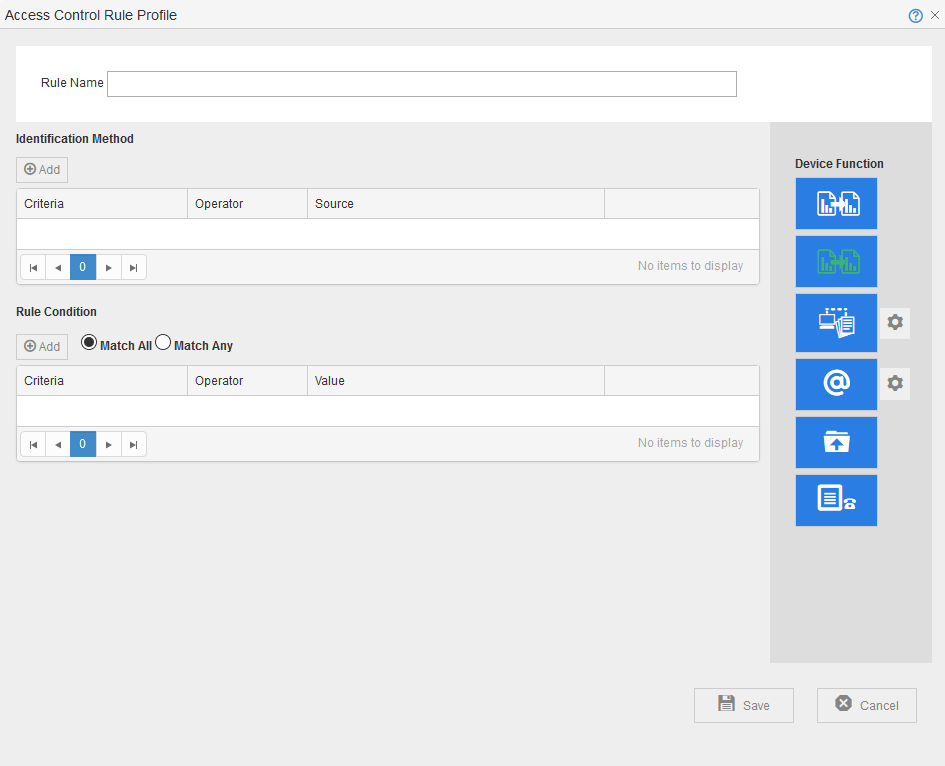
3. Add Card Authentication as the Identification Method
- Click [Add], located below [Identification Method]. The Rule Definition displays.
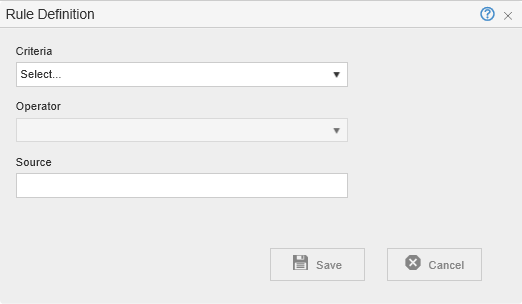
![]()
- From the [Criteria] drop-down, select [Card Number].
- From the [Operator] drop-down, select [Is In].
4. Build the Authentication Profile to Validate the Card Number
- Click
![]() , located next to the [Source] drop-down. The Authentication Profile displays.
, located next to the [Source] drop-down. The Authentication Profile displays.
![]()
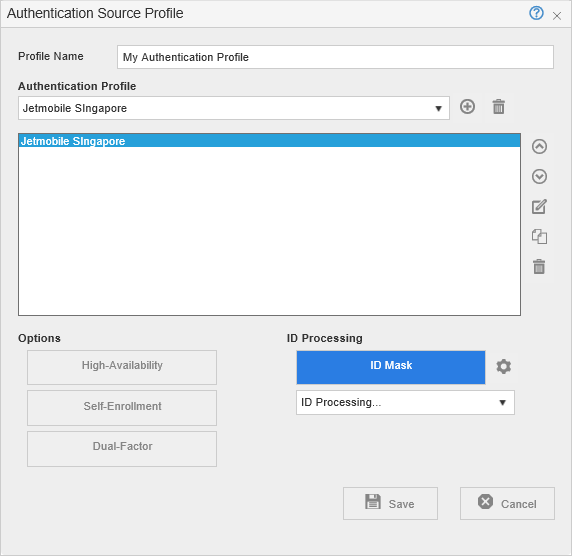
- In the [Profile Name] box, specify a unique name to identify the profile.
- Click
![]() , located in the same row as the [Authentication Profile] drop-down. The Authentication Profile is displayed.
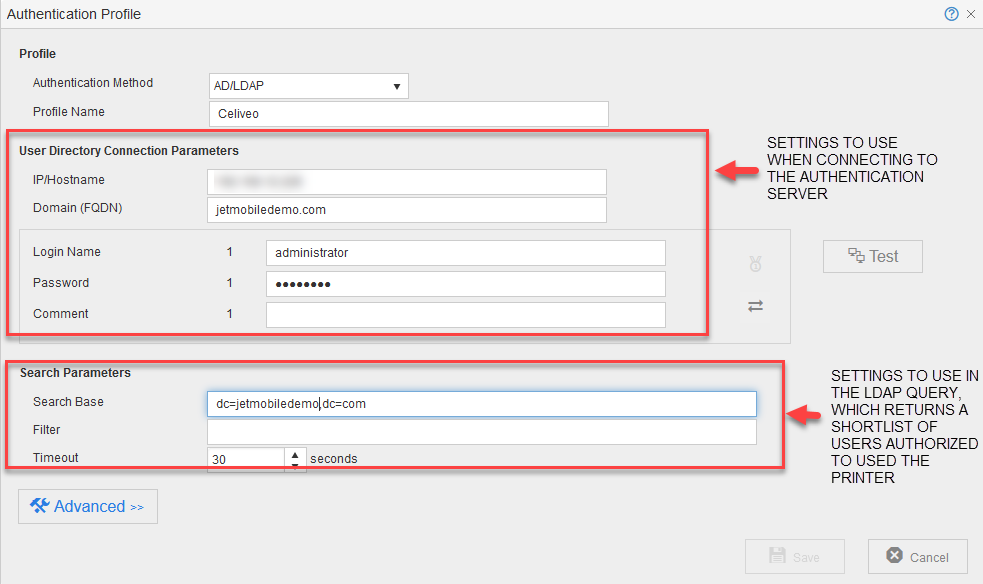
, located in the same row as the [Authentication Profile] drop-down. The Authentication Profile is displayed. - Specify the AD/LDAP query (similar to that of the screen capture shown below) that returns the list of users who are authorized to use the printer.
![]()
- Click [Test].
If login to the Authentication Server is successful, a message is displayed below the [Test] button. - Click [Save]. You are returned to the Authentication Source Profile.

Dual Service Account System
To avoid any connection error after refreshing/changing the login/password on service accounts used by Celiveo, the administrator can define a secondary set of credentials so that if the default (primary) set is declined by the solution, then the secondary set takes over and prevents the access from being denied.

5. Specify How to Process Card Number
![]()

- Click [ID Mask].
- Click
![]() next to the [ID Mask].
next to the [ID Mask]. - From the [Mask Type] drop-down, select the mask that extracts the card number.
![]()
- Click [Close].
- From the [ID Processing] drop-down, specify how the Card Number is processed.

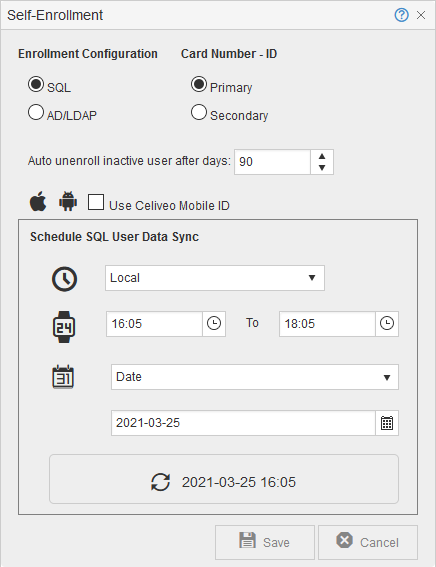
6. Enable Self Enrollment
![]()
- Click [Self-Enrolment] to turn it on.
- Click
![]() next to the [Self-Enrolment].
next to the [Self-Enrolment].
![]()
- Verify that [SQL] is selected and click [Close].
- Click [Save] until all dialogs close.
7. Enable Card Authentication for Remaining Printers
![]()
- In the Printers List, select the printers you want to apply the Access and Rules Profile to.
- Click
![]() . The Access & Rules dialog is displayed.
. The Access & Rules dialog is displayed.
![]()
- From the [Access & Rules Profile] drop-down, select the Access and Rules profile for the Printer.
Last modified:
24 November 2021
Post your comment on this topic.