
On this page, you can add or delete a printer. Or, simply get an overview of all the printers managed by Celiveo Web Admin. Click on one of the sections for details:
About the printers list
![]()

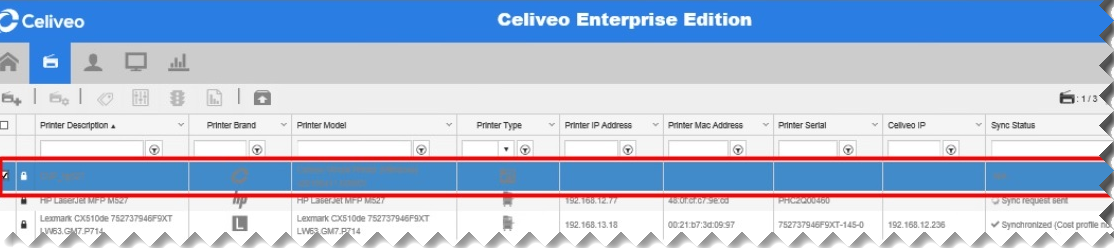
The printer list provides information on each printer added to Celiveo Web Admin. You can adjust the format of the printer list to suit your information needs. Save the order of the columns and access the same view the next time you log in.

Create a customized printer list
- On the right hand side of the screen, select the
![]() icon.
icon.
![]()
- When prompted, enter the name for the customized view and click [Save].
- Make the adjustments (if required):
- To reorder the columns:
Click and drag the selected column to the target location. Release to insert the column at the new location. - To show or hide a column:
Click on the down arrow next to the column label, select [Columns]. Check or uncheck the box next to each column header to show/hide.
![]()
- To sort the fields under a column:
Click once on the column header, for example [Printer Brand]. Click on the column header again to sort in ascending or descending order. - To customize the labels of Tags 1 – 5,
Click on the![]() icon on the top right corner of the screen. See the Help on Renaming Tags.
icon on the top right corner of the screen. See the Help on Renaming Tags. - To search a printer by its printer properties or assigned tags,
Enter the required field in the search box under each column header and click Enter.
- To reorder the columns:


- To save the changes, click on the
![]() Save icon.
Save icon.
- To rename the customized view,
Click on the![]() icon.
icon.
When prompted, enter the new name and click [Save]. - To delete a customized view,
Click on the![]() Delete icon.
Delete icon.
When prompted, click [OK].
- To rename the customized view,
Add printers
- At the Main Menu
![]() , click on the
, click on the ![]() Printer icon.
Printer icon. - At the Add Printer menu
![]() , select one of the following methods to add printers:
, select one of the following methods to add printers:
![]() Manual: upload printer information in a CSV file or enter the printer hostname manually.
Manual: upload printer information in a CSV file or enter the printer hostname manually.![]() Discovery Agent: allow Discovery Agent to automatically search and locate printers in the network.
Discovery Agent: allow Discovery Agent to automatically search and locate printers in the network.![]() Virtual Printer: set up a virtual printer where print jobs can be released to any printer in the network.
Virtual Printer: set up a virtual printer where print jobs can be released to any printer in the network.
 , click on the
 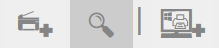 , select one of the following methods to add printers:
Edit printer settings
Under the printer list, select a printer and click on any of the icons on the printer taskbar.

| Icon | Menu Option |
|---|---|
| |
Edit printer settings. |
| |
Edit tags and maps. |
| |
Edit the language on the Celiveo menu and authentication screens on the printer. |
| |
Edit access control and printing rules. |
| |
Edit cost definition for the printer. |
| |
For Physical Printers: Sync the selected printer again. For Virtual Printers: Download the MSI configuration file again. |
Edit printer description
You can change the description of any physical printer. As you move the cursor over a printer description that can be changed, the cursor changes to an edit icon ( ![]() ).
).
- Double-click the printer description to change. The Edit Printer screen displays.
- At [Printer Description], specify the new description.
- Click [Save].
Delete a printer
- Under the printer list, select a printer and click on the
![]() [Delete] icon.
[Delete] icon. - When prompted, click [OK].
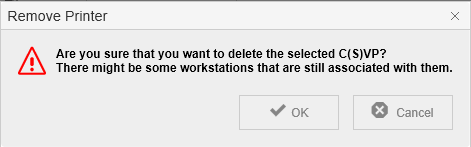
- When deleting a virtual printer (CVP/ CSVP), make sure there are no workstations associated to it. A prompt is displayed to confirm this action.
![]()
- Click [OK].
Last modified:
24 November 2021
Post your comment on this topic.