
Here, you will learn about the prerequisites and required settings to be done on the Konica Minolta printer device before and after installation of the Celiveo solution.
- Prerequisites
- Ports and Communication
- Configure the device using Konica Minolta Page Scope Web Connection
- Configuration after installing Celiveo
1. Prerequisites
Before you install, make sure these prerequisites are met:
- The device is connected to an active LAN connection.
- The device has a fixed IP or DHCP reserved IP address.
- The network allows management by Simple Network Management Protocol (SNMP) v1/v2.
- The badge authentication should be configured as “Unset” (deactivated) on the Konica Minolta devices. To enable/disable this feature, contact a Konica Minolta technician.
- User authentication (for Print without authentication) should be disabled on the Konica Minolta driver.
- The Celiveo Smart Appliance is connected to the device.
1.1 Configuring CSA
By default, the CSA is set in DHCP mode. You can also opt for fixed IP network settings.
The steps to configure CSA for DHCP and for fixed IP network settings can be found here.
1.2 Celiveo Version upgrade on CSA
Follow the procedure given here to upgrade the Celiveo Version on CSA.
2. Ports and Communication
A comprehensive list of all the ports used by Celiveo solutions, describing the ports and applications used for communication between the Celiveo components that consist of the Celiveo Server Services, Web Admin Server, Active Directory, Database (SQL) server, the device, and the PC/laptop/workstation can be found here.
3. Configure the device using Konica Minolta Page Scope Web Connection
This section describes the required configurations to be performed on the device’s web service page before you install the Celiveo solution.
- Create and upload an SSL certificate
- Enable SSL communication on socket
3.1 Create and upload an SSL Certificate
A valid SSL certificate is required for the solution to work. Either use an approved SSL certificate provided, or create a self-signed certificate on the device.
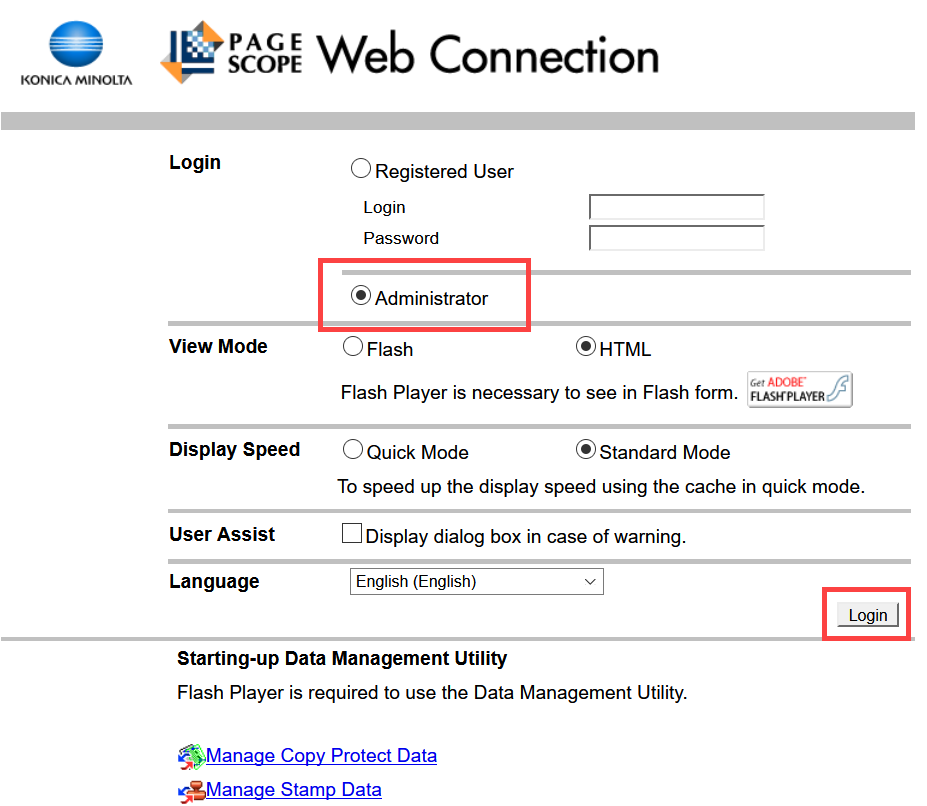
- At the web browser, enter the IP address of the Konica Minolta device.
- Select the Administrator radio button and click Login.
![]()
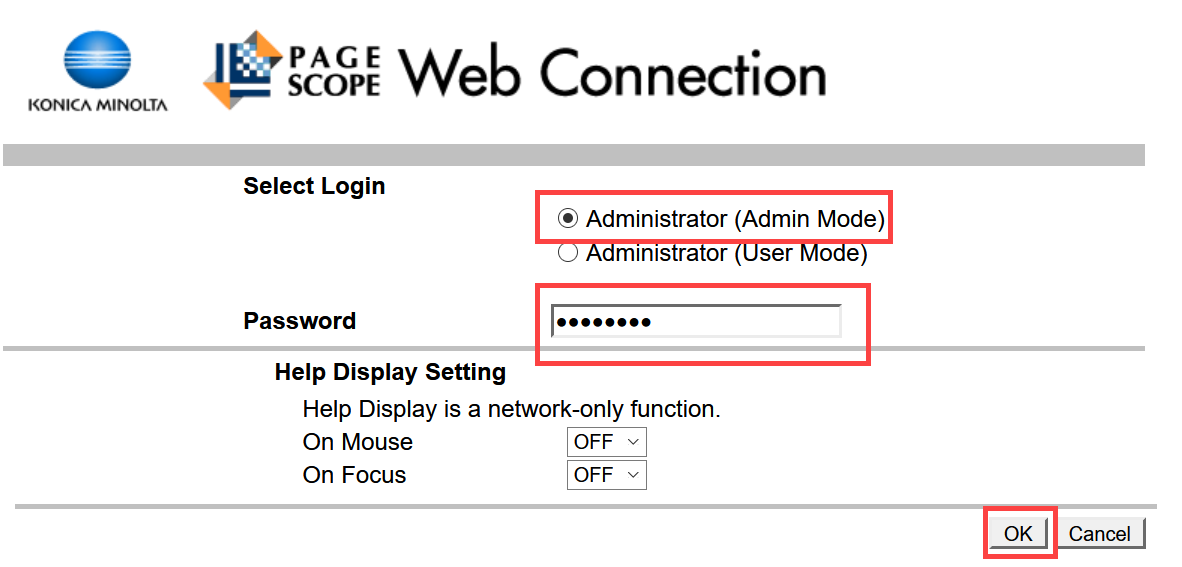
- Select the Administrator (Admin Mode) radio button.
- Enter the administration password and click OK.
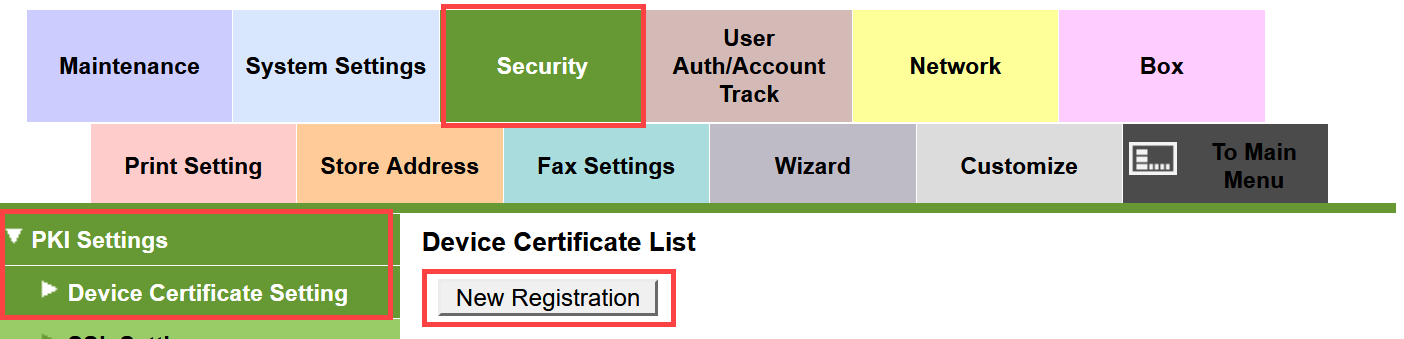
- After logging in, click Security.
- Go to PKI Settings > Device Certificate Setting, click New Registration.
![]()
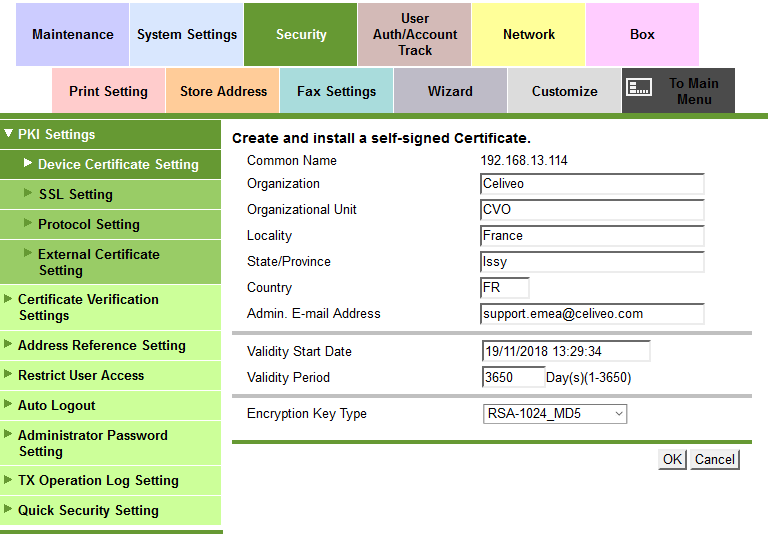
- Under Create Device Certificate, select the Create and install a self-signed Certificate radio button and click OK.
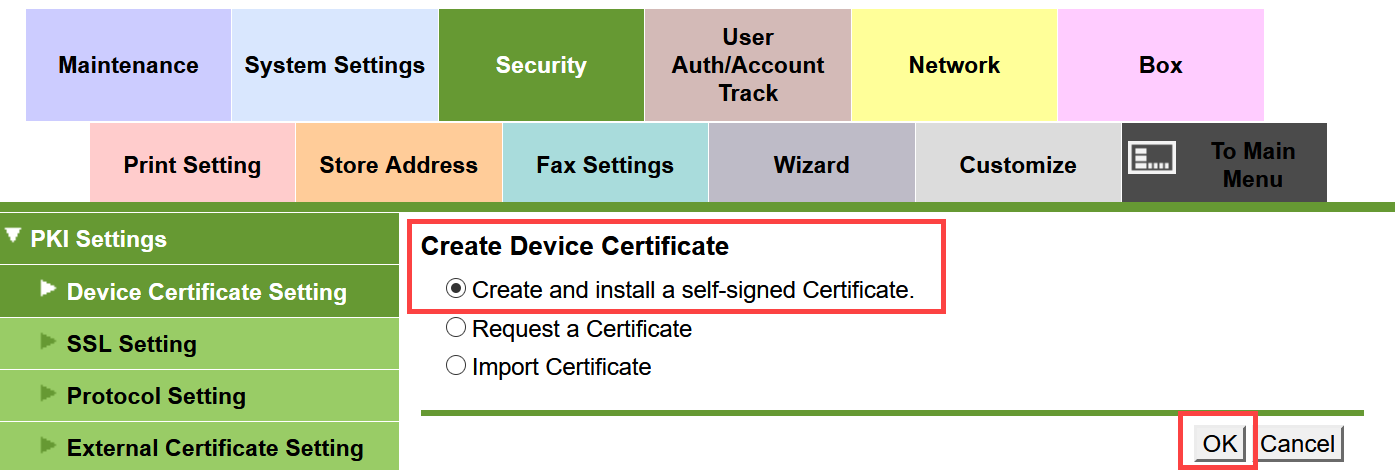
- Enter the information in the self-signed certificate fields as shown and click OK.
![]()
The messages are displayed:
‘Certificate is being created. Please wait’
‘Certificate has been created and installed. SSL/TLS can now be used. (After OK is clicked, SSL Mode setting will be available.)’
- Click OK to apply the SSL mode settings.
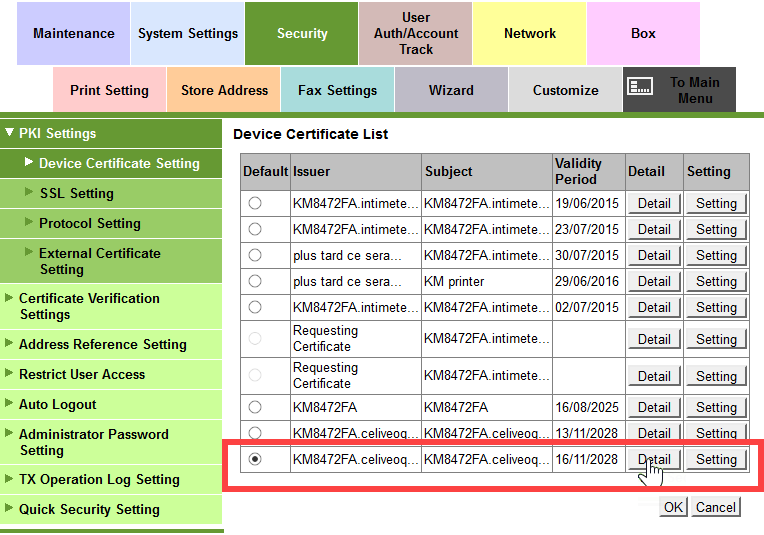
- After the certificate has been created and uploaded, click on Security, then click Device Certificate List.
- Select the newly created certificate, then click OK.
The following message is displayed: ‘Completed. Activate your browser again.
3.2 Verify the Protocol set for the Certificate
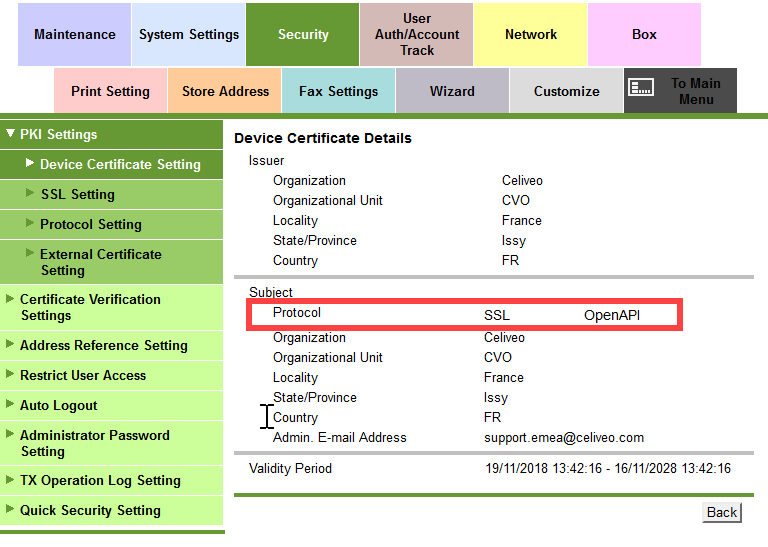
- Go to Security > PKI Settings > Device Certificate Settings, then click Details next to the certificate to use.
![]()
- Check that the Protocol is set to SSL OpenAPI. Otherwise, follow step 3.
![]()
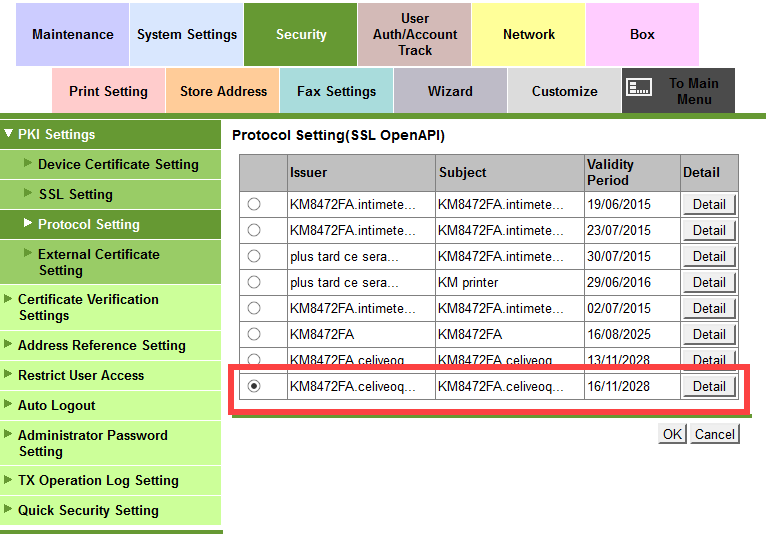
- Go to Protocol Setting, click the Edit button next to SSL OpenAPI and select the required certificate.
![]()

3.3 Enable SSL Communication on socket
This section describes the steps to enable the SSL/TLS port number so that it can establish the communication on the socket.
- Log into the Web interface as Administrator.
- After successful login, go to Security> PKI Setting> SSL Setting
- In the drop-down menu, select Administrator mode. Click OK.
Your browser will reconnect to the web server in “https” mode. You may need to confirm an invalid certificate in your browser.

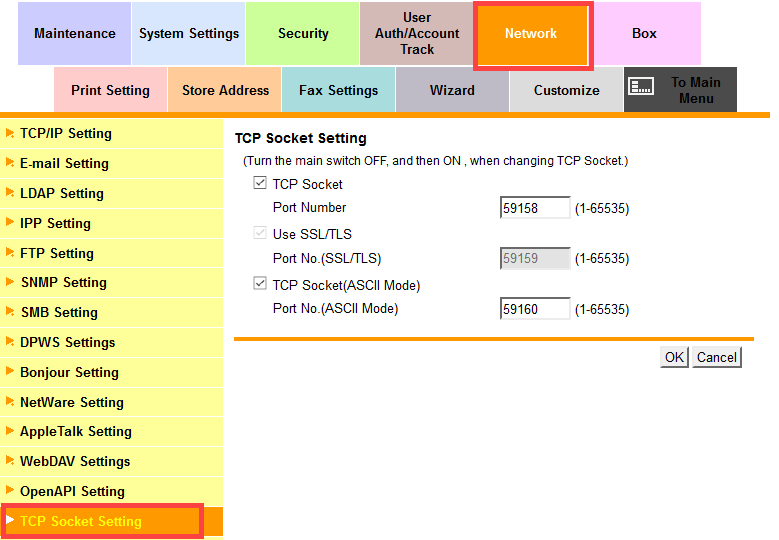
- Go to Network > TCP Socket Setting page, select Use SSL/TLS Port No. (SSL/TLS) and click OK.
The message is displayed: ‘Turn the main switch OFF, and then ON, when changing the settings.’
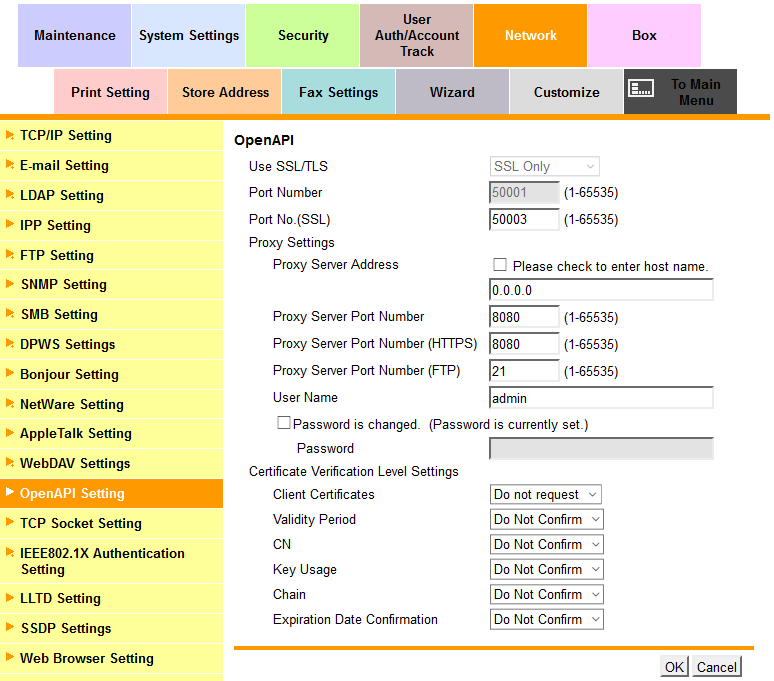
- Log in again to the Web interface as Administrator and in the Network section, select OpenAPI Settings.
- In the Use SSL / TLS drop-down list, select SSL Only.
- Verify that the SSL port number is 50003.
- Certificate Verification Level Settings must be set as follows: Client Certificates: “Do not request”.
For all other items, select “Do Not Confirm” (even for the Validity Period item for which “Confirm” is often set by default).
![]()
- To apply the settings, click OK.
- Reboot the device.
4. Configuration after installing Celiveo
Make these configurations after the installation of the Celiveo solution.
4.1 Disable user authenticated printing in printer properties
After installation of the Celiveo solution, disable the unauthenticated printing setting by the printer driver. This allows the Celiveo solution to take over tracking of device usage activities after user authentication.
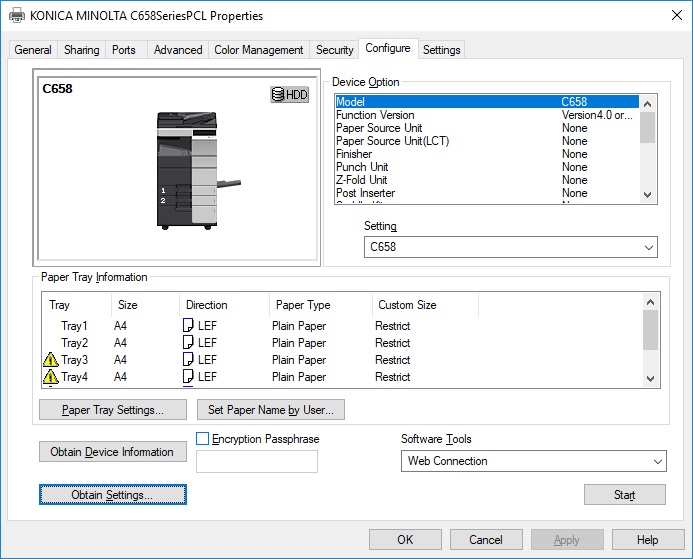
- At the client machine, open the print queue properties.
- Select Configure.
- Click on Obtain Settings.
![]()
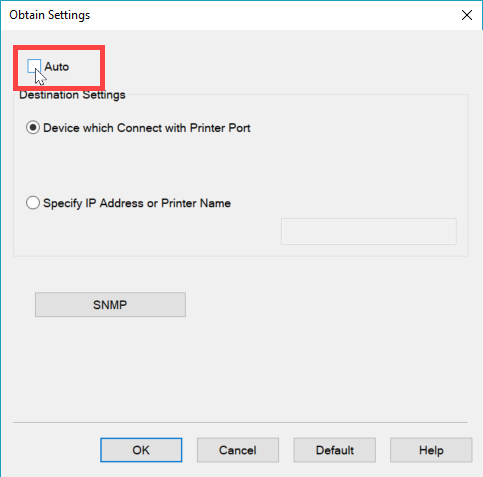
When prompted, uncheck Auto and click OK
![]()
- In the Device Options list, select User Authentication.
- Select Disable, then click Apply.
- To exit, close the dialog box.
4.2 Disable user authenticated printing on device UI
- On the front panel of the device, press the MENU button.
- Press Utility, then press Administrator Settings.
- Enter the administrator password and press OK.
- Press User Authentication/Account Track.
- Press Print without Authentication.
- To save the settings, press Full Color/Black, then press OK. (On some models, select Allow, if Full Color/Black is not available)
4.3 Disable user authenticated printing from Konica Minolta Page Scope Web Connection
- Log in to Web interface as Administrator.
- Go to User Auth/ Account Track > General Settings >Print without Authentication.
- In Print without Authentication drop-down menu, select Full Color/Black.
![]()
- To save the settings, select OK.

Post your comment on this topic.