
The Celiveo 8 Web Admin installer package comprises of the following components:
- Printer Discovery Agent
- Celiveo Virtual Printer deployment package
The new tracking and reporting tool Track- Green Saver (TGS 10) is a stand-alone installer package. This should be installed in the Server right after Web Admin installation. The instructions for installing TGS 10 can be found in here.
Before you start, ensure the following:
|
Follow these steps to install Celiveo Web Admin on Windows Server.
- Start Installation
- Install SQL Server Express
- Install Celiveo 8
- Finalize Installation
- Change Database Password After Installation
1. Start Installation
- Copy the Celiveo Web Admin installer package to the desktop. You can download the latest version from Downloads.
- Select the installer and right-click on [Run as administrator].
2. Install SQL Server Express
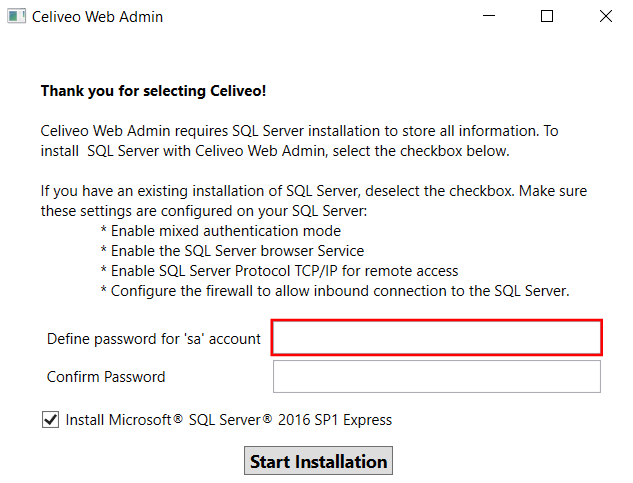
- In the welcome window, select [Install Microsoft SQL Server® 2016 SP1 Express]. If SQL Server already exists in your machine, do not select this option.
- Define the password for the account with System Administrator (role) access on the SQL server.
- Click [Start Installation].
![]()
- Follow on-screen instructions to install SQL Server® 2016 SP1 Express.
- When prompted to reboot the machine, click [Yes].
3. Install Celiveo 8
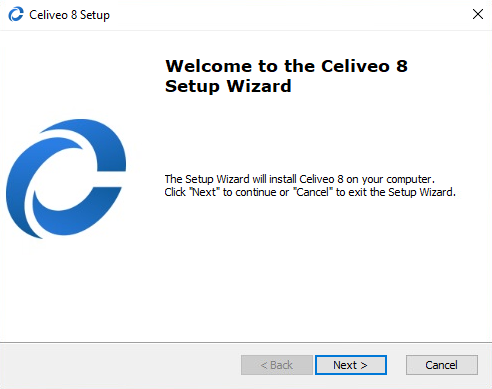
- To continue the installation after the machine reboots, click [Next].
![]()
- Be informed of the license terms and conditions. To continue installation, select the checkbox to accept and click [Next]. To cancel, click [Cancel].
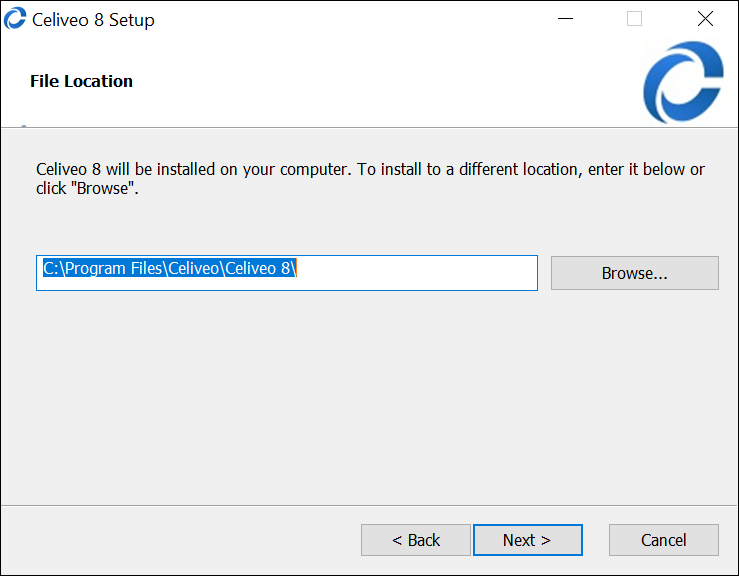
- If required, edit the file location and click [Next].
![]()
- Select the SQL Server IP address/hostname in the [Database Server] list.
- The default database is (local)\SQLEXPRESS.
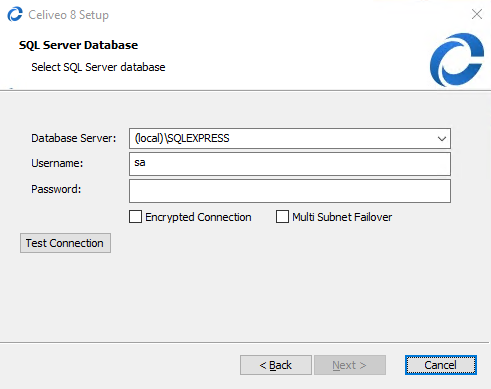
Options:
- Select [Encrypted Connection] checkbox to enable secured communication with SQL Server.
- Select [Multi Subnet Failover] checkbox to enable connection to (Always On) Availability Groups in case of a failover in a multi-subnet environment.
- Click [Test Connection].
- Once the connection test is successful, click [Next].
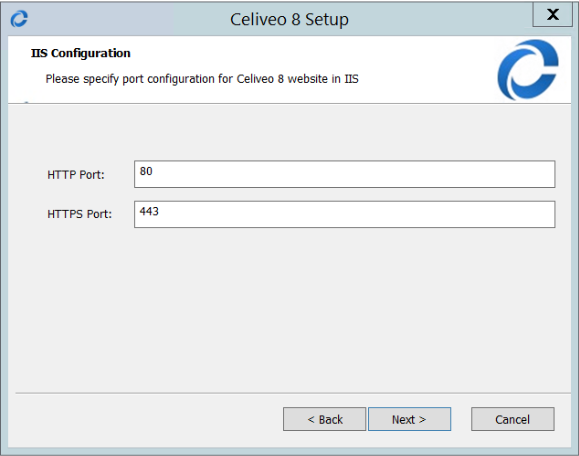
- In the IIS Configuration window, enter the [HTTP Port] and [HTTPS Port] details. The default values are provided as 80 and 443 respectively. If required, change the port details and click [Next].
![]()
4. Finalize installation
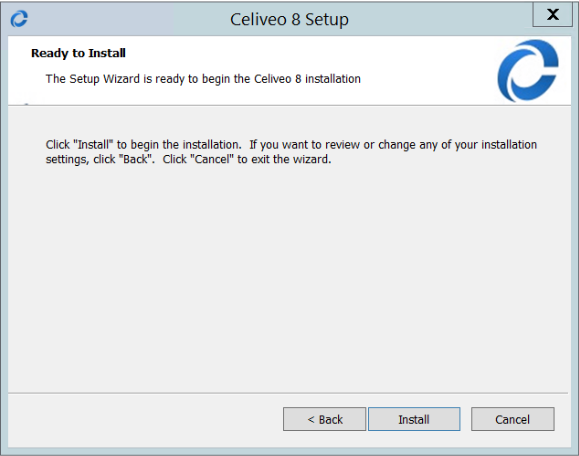
- When prompted, click [Install].
![]()
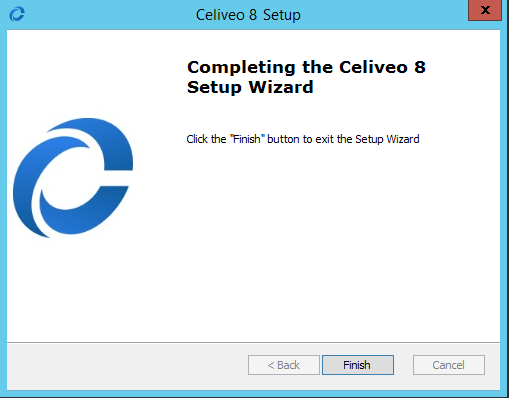
- When prompted to exit the Setup Wizard, click [Finish].
![]()
The Celiveo Web Admin icon is added to the desktop.
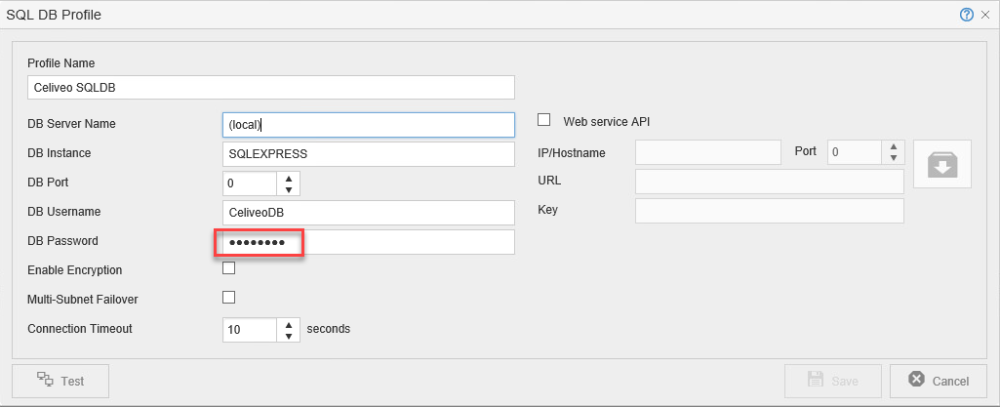
5. Change database password after installation
For security purposes, it is recommended to change the default password of SQL Server right after installation. You can update the password on the SQL server for Celiveo database (CeliveoDB) account and then update the same password for the database profile in Web Admin.
On SQL Server:
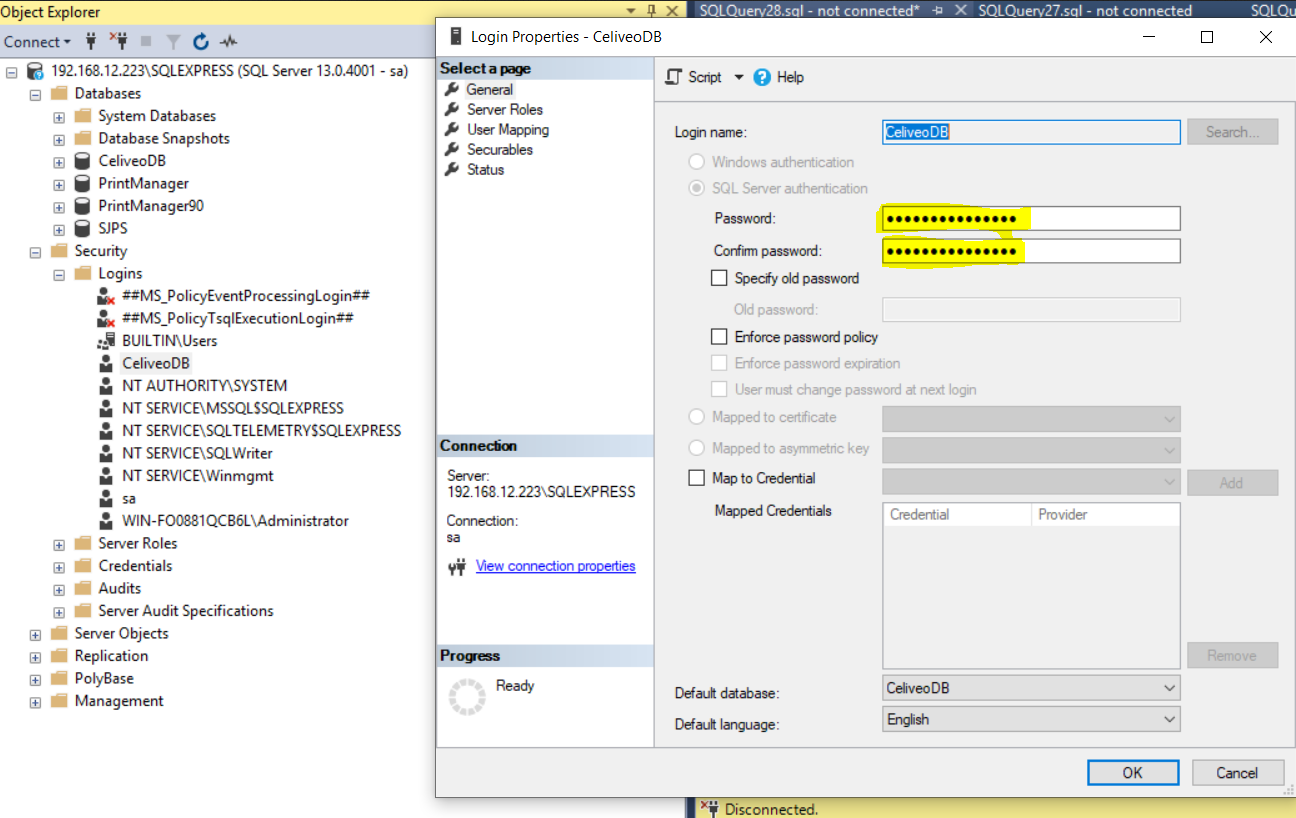
- Go to Security > Login.
- Right-click on CeliveoDB account and choose Properties.
- Go to General page.
- Set a new password for CeliveoDB in [Password] field
- Re-enter the password in [Confirm Password] field.
- Click [OK].
![]()
On Web Admin
- On Celiveo Web Admin Home page, click the
![]() Setup icon.
Setup icon. - Choose
![]() DB settings tab.
DB settings tab. - On the SQL DB profile row, click the
![]() Edit icon.
Edit icon. - Update the [DB password] with the new password set for CeliveoDB account.
- Click [Save].
![]()
Last modified:
24 November 2021
Post your comment on this topic.