
No Active Directory? AD LDS allows to manage easily and professionally users
Some clients do not have Active Directory but need Print Management and a users list is necessary to provide authentication service on printers.
A solution is to use free Microsoft AD LDS software (Active Directory Leightweight Directory Services) to manage users and groups and make them accessible from Celiveo Web Admin and printers.
AD LDS is a scaled-down version of Active Directory, much smaller and simpler to install and use than the full blown version. It runs on PC workstations and Servers OS, can be used standalone and it is even possible to have multiple instances of AD LDS running independently on the same PC or server, they will not interfere with each other. Celiveo supports natively AD LDS users directory in authentication profiles thanks to its AD/LDAP interface.
With AD LDS you benefit from:
- A Microsoft graphical UI to manage users and groups (ADSI Edit tool present within AD LDS)
- Management through Powershell cmdlets
- The ability put users in groups, used to grant rights on printers/rules
- The ability to import users lists from CSV list into AD LDS. This can be useful if users are coming from a third party system, ie a door management system with card numbers, or a PIN code generation system.
- A fast track to Active Directory and Azure AD the day you want to migrate
Note that PC login against AD LDS is possible but we don’t recommend it, it is best to then use a full blown Active Directory software.
If you are already familiar with Active Directory, AD LDS has some limitations, detailed in the AD LDS Microsoft page:
https://docs.microsoft.com/en-us/previous-versions/windows/it-pro/windows-server-2008-R2-and-2008/cc732019
AD LDS can be downloaded from that link:
https://www.microsoft.com/en-us/download/details.aspx?id=1451
A lot has already been written on AD LDS, you will find here an excellent article detailing how to install and setup AD LDS on Servers and PCs:
http://www.rebeladmin.com/2018/02/step-step-guide-setup-active-directory-lightweight-directory-services-ad-lds/
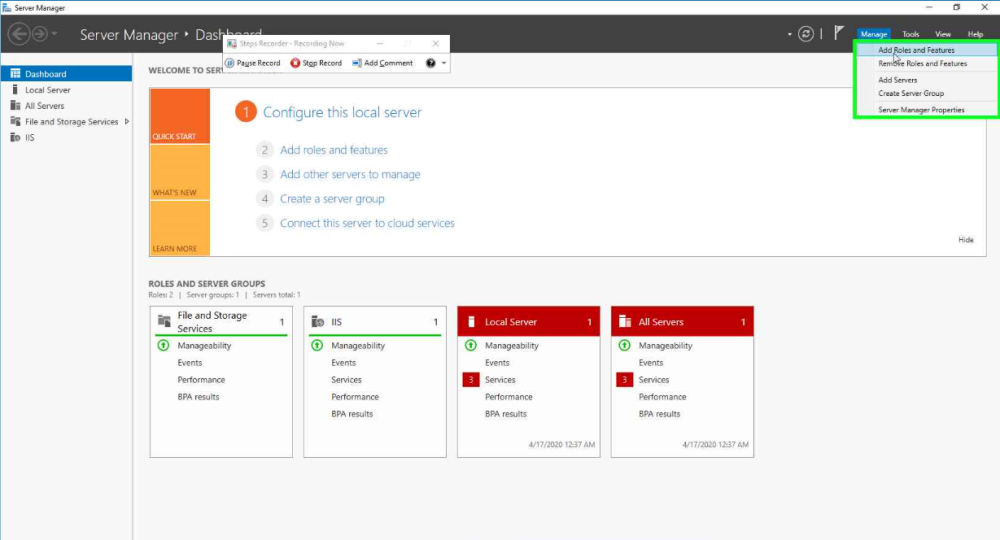
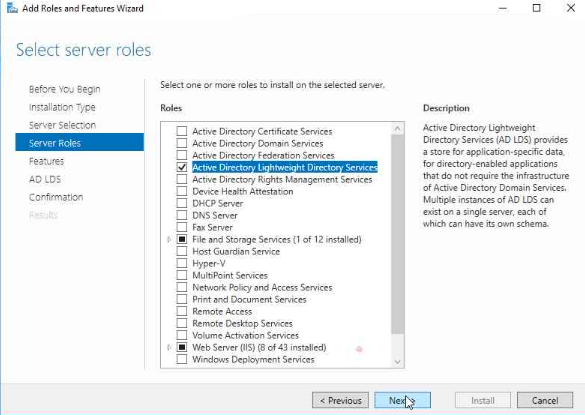
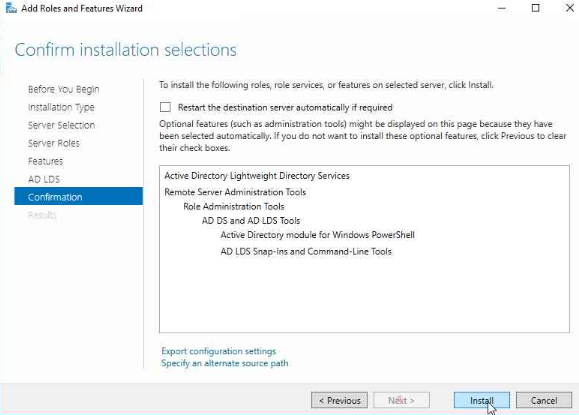
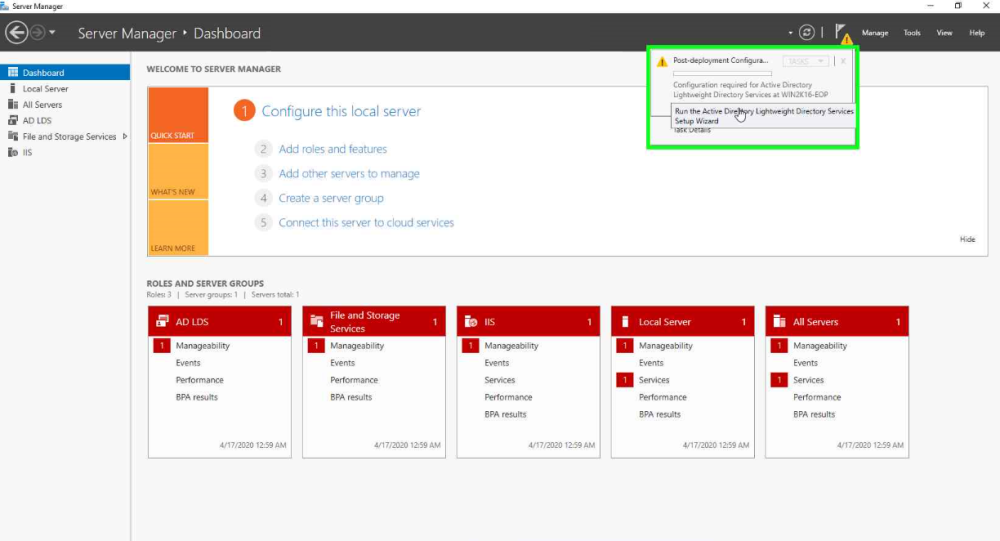
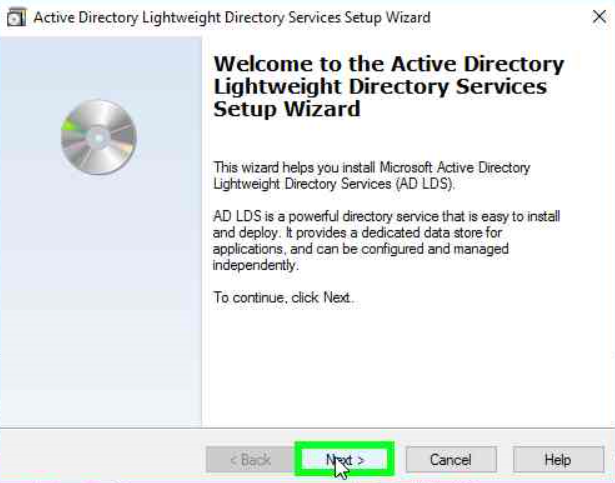
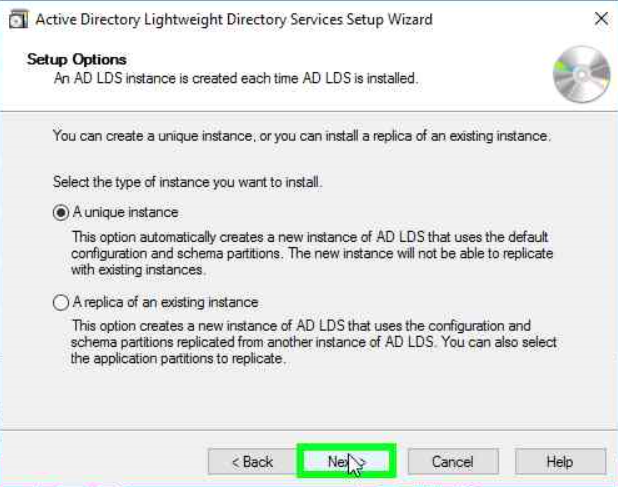
Installing AD LDS
Open Windows Server Manager and click Manage > Add Roles and Features.
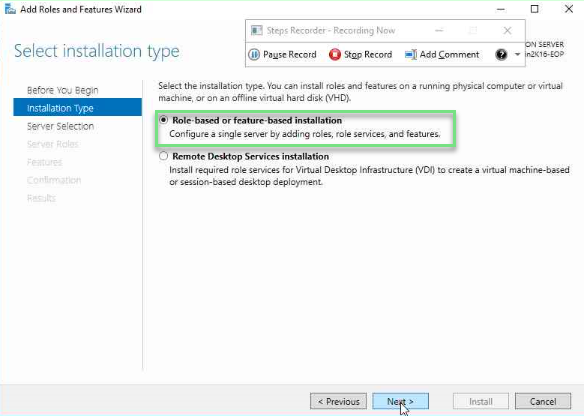
In the Installation type section, select Role-based or feature-based installation and click Next.
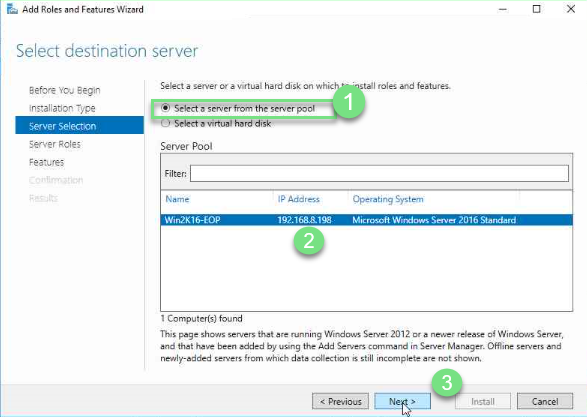
In the Server Selection section, click Select a server from the server pool, select a server and click Next.
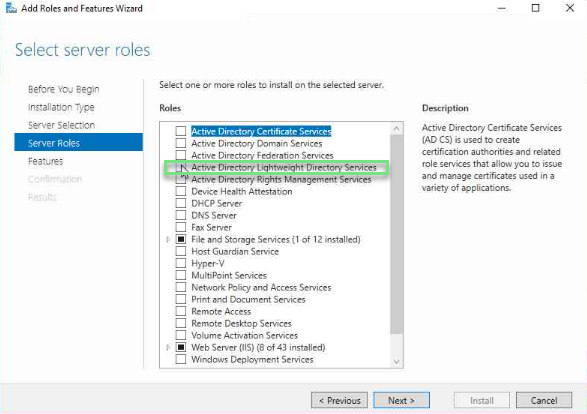
In the Server Roles section, select Active Directory Lightweight Directory Services from the Roles list.
In the Add Roles and Features pop-up window, click Add Features.

Back to the Server Roles section, click Next.
In the Features section, select .NET Framework 3.5 Features and .NET Framework 4.6 Features then click Next.

In the Confirmation section, click Install.
In Windows Server Manager, click the yellow exclamation mark to enter the setup wizard.
Click Next.
In the Setup Options, select A unique instance.
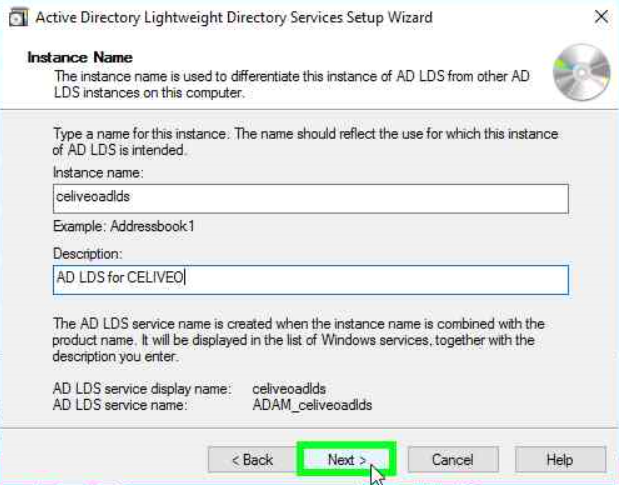
Enter an Instance name and description and click Next.
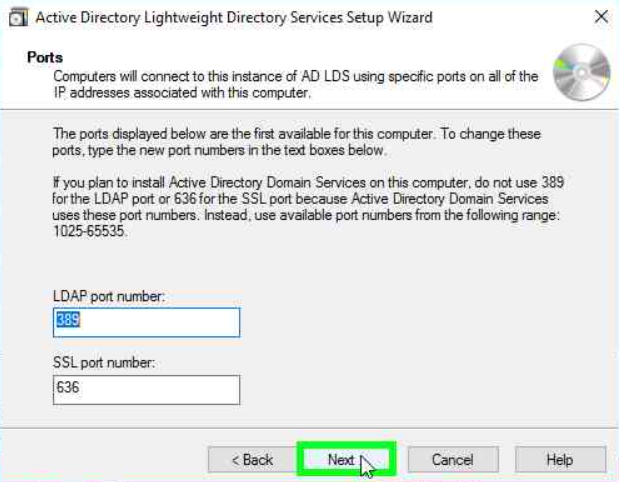
Enter the LDAP and SSL port numbers and click Next.
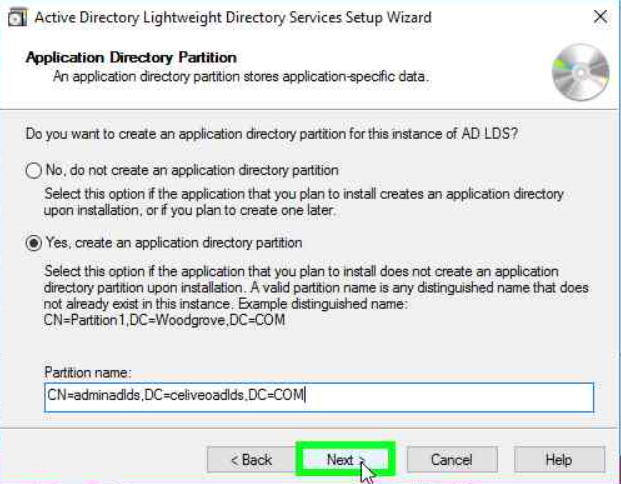
Select Yes, create an application directory partition, enter a partition name and click Next.
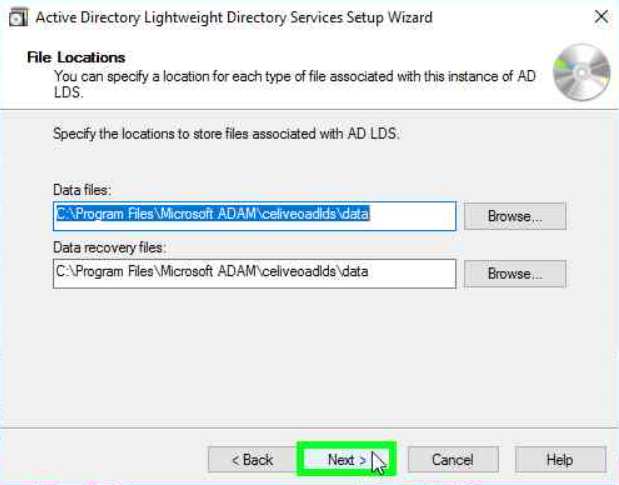
Select the locations to store the files associated with your instance of AD LDS and click Next.
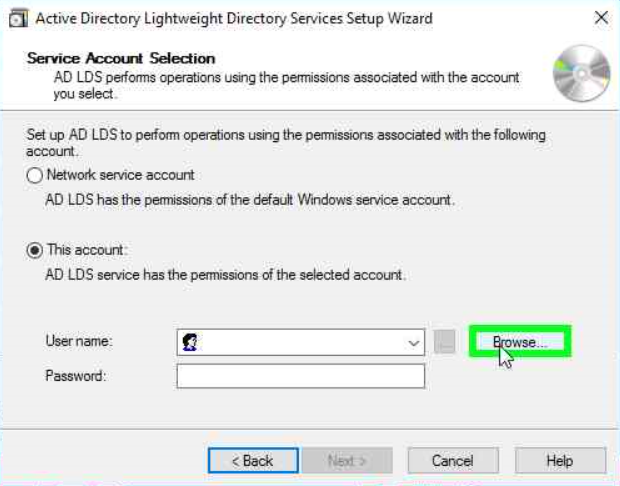
In the Service Account Selection window, select This account.
Click the Browse button to select a user.
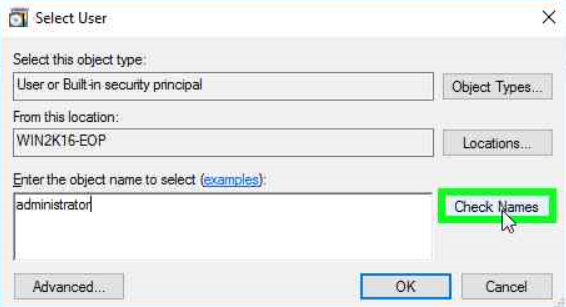
Type a user name in the dedicated field and click Check Names. Then click OK.
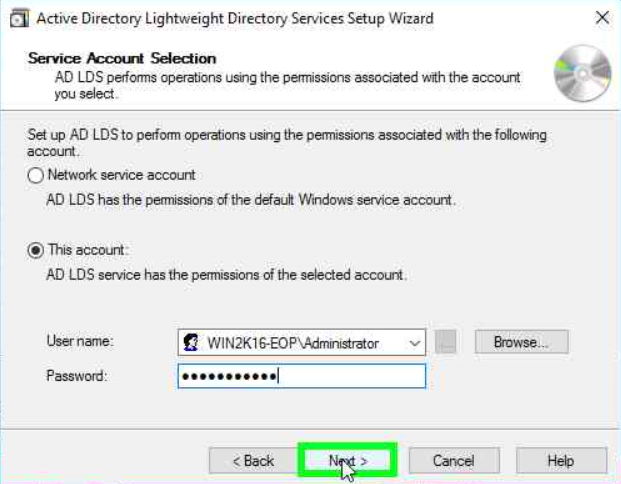
Enter the selected user’s password and click Next.
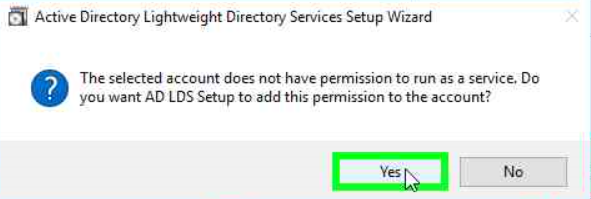
When prompted to add the permission to run as a service to the account, select Yes. Then click Next.
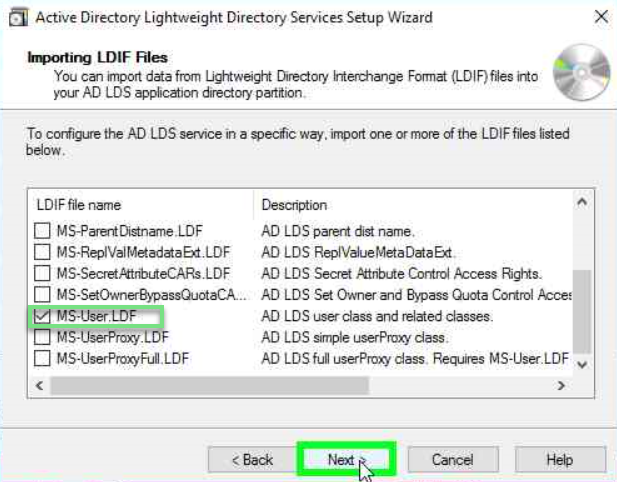
Select the MS-User.LDF file in the LFIF files to import list and click Next.
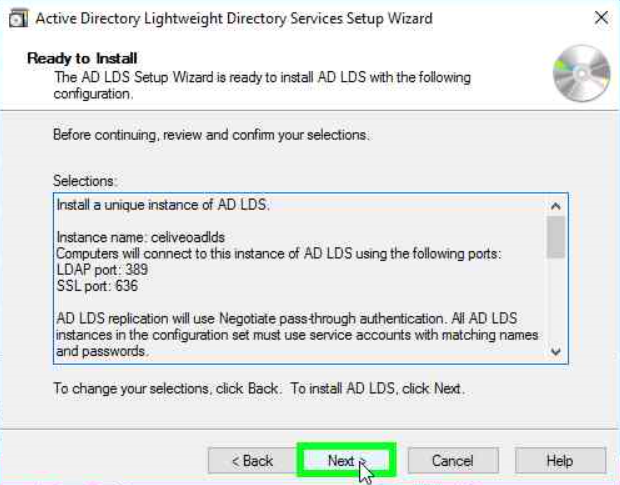
In the Ready to Install window, click Next to start the installation.
When prompted, click Finish to complete the installation.
AD LDS and User Authentication for printers
No sAMAccountName attribute:
sAMAccountName is a legacy AD attribute (logon name that supports old versions of Windows) progressively replaced by the user UPN (userPrincipalName). The Windows Print Spooler still uses the sAMAccountName but you won’t find it in AD LDS or in Azure AD. That won’t be an issue as with a mouse click you can instruct Celiveo Authentication profile to use the UPN attribute instead of sAMAccountName. Note that the UPN attribute shall then contain the user PC login name, not the real UPN (which contains the domain name), otherwise there will be no match to the user name used by the Windows print spooler when supplying print jobs to Celiveo pull print service.
Indexing the user ID attribute:
When there are a large number of users the lookup for a PIN code or card number is much faster if the attribute (field) that contains it is indexed.
By default Celiveo uses the postOfficeBox attribute to store the user ID (card or PIN) and it is indexed, but any other attribute can be selected.
If you need to index an attribute in Active Directory that article explains how to proceed:
https://docs.microsoft.com/en-us/previous-versions/tn-archive/aa995762
Importing/exporting users list with PIN/card ID in/from AD LDS using CSV file
Microsoft provides the free csvde utility to import/export users into AD LDS. That can’t import/export password, which are not be necessary when using AD LDS to store a pre-defined list of users and card ID/PIN codes. The documentation for
https://docs.microsoft.com/en-us/previous-versions/windows/it-pro/windows-server-2012-r2-and-2012/cc732101
Updating frequently the list of users
Microsoft warns that “By design AD LDS keeps track on all deleted records though. This lead to the scenario where the database file grew more and more, as all deleted records were not permanently deleted by only flagged as “to be deleted””. The file adamntds.dit grows significantly when a script is run very frequently and performs significant updates. The link below describes the issue and the solution.
https://docs.microsoft.com/en-us/archive/blogs/isablog/the-case-of-the-big-ad-lds-database
Configuring AD LDS for Celiveo Users list
- Create admin accounts to manage the AD LDS system. We recommend you define a complex and long password and use a non-explicit login name.
- Create a service account with read/write access rights, that will be used in the Celiveo Access Control profile to query AD LDS for user IDs and users information. We recommend you define a complex and long password and use a non-explicit login name.
Configuring the Celiveo Authentication profile to connect to the AD LDS instance
- From the physical printer access control button
![]() create a PIN code or Card authentication profile.
create a PIN code or Card authentication profile. - Do not activate “Self Enrollment” unless all users have a login/password defined in AD LDS and know it. Otherwise users will not be able to authenticate on MFPs to enroll their card or on the web portal to request a PIN code.
- Create an authentication profile matching the Connection Settings detailed in ADSI Edit tool mentioned above.
![]()
You can see all fields that by default are sAMAccountName have to be changed to userPrincipalName since sAMAccountName does not exist by default in AD DLS. - Test the connection to AD LDS using the
![]() button, you should have successful status. If not, verify the settings and firewall to allow the LDAP host ports inbound and outbound communication.
button, you should have successful status. If not, verify the settings and firewall to allow the LDAP host ports inbound and outbound communication. - Go to the Users Management screen as shown below, select the user icon then the group icon then add Group/OU.
![]()
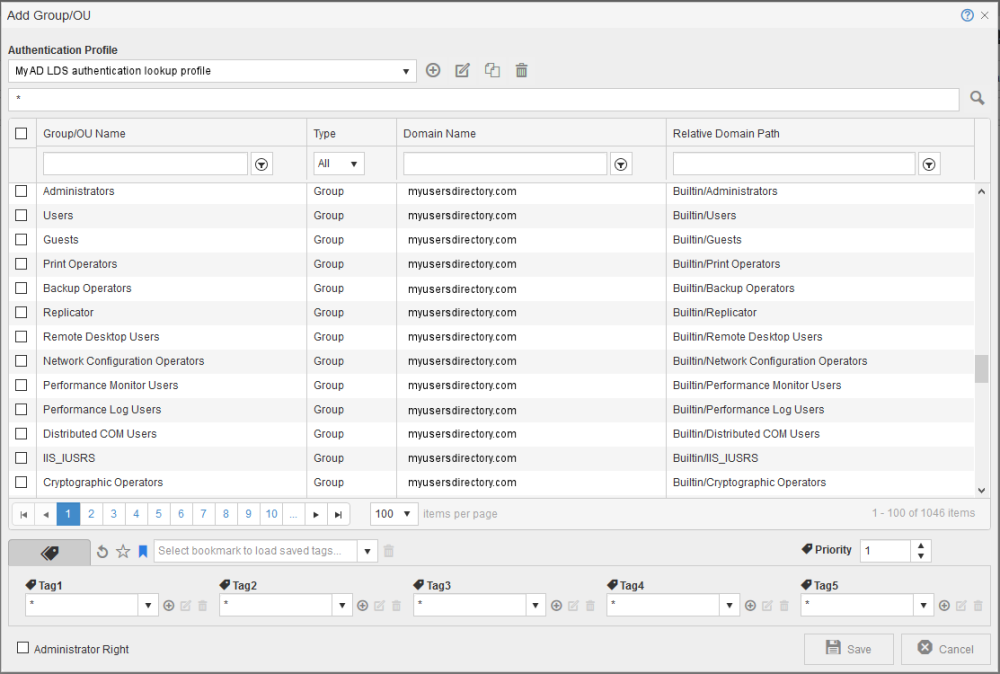
- Select the Authentication profile created earlier, then enter * below to select all group. If the connection is successful the list of groups shows up.
![]()
 create a PIN code or Card authentication profile.
 button, you should have successful status. If not, verify the settings and firewall to allow the LDAP host ports inbound and outbound communication.
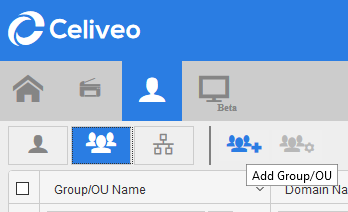
Adding users and their PIN code or Card number into AD LDS
- From the UI: use ADSI Edit to add users manually, enter their PC login name in the userPrincipalName attribute and their PIN or card number in the postOfficeBox attribute.
- From CSV file: use the csvde utility referenced earlier in that article.
Using the static users list in printer capability
- Some setup require the full list of users inside the printer memory, no connection to the AD LDS. Celiveo in the printer can connect to AD/ADLDS to extract a list of users and card number/PIN codes to authenticate them locally witout connecting to AD/ADLDS. Should a PIN/Card number be unknown the AD/AD LDS is still queried in case that’s a new user not yet in the local list. All this is possible using the Full Cache in printer capability, activated in the authentication profile.
- We recommend to narrow the scope of AD extract to not extract the full directory, that will be more efficient and faster.
- Define a time range that’s wide enough to not trigger all the extracts at the same time and ensure the PC or server that hosts AD/ADLDS is accessible at that time.
Post your comment on this topic.