
Contents ![]()
![]()
- About Authentication Profiles
- How to…
About Authentication Profiles
What are Authentication Profiles?
Authentication Profiles contain the settings that Celiveo uses to query an Authentication Server and retrieve a list of users (who typically are authorized to access Celiveo-enabled printers). Celiveo works with Microsoft’s Active Directory (AD), the directory service used by Microsoft Windows for identity management, using the vendor neutral Lightweight Directory Access Protocol (LDAP).

If you already have a running installation of SecureJet 7 or Celiveo 8.0.x, you can connect to the Celiveo Authentication Gateway instead of connecting directly to AD/LDAP. By connecting to the Celiveo Authentication Gateway, you avoid having to set up the authentication mechanism all over again.
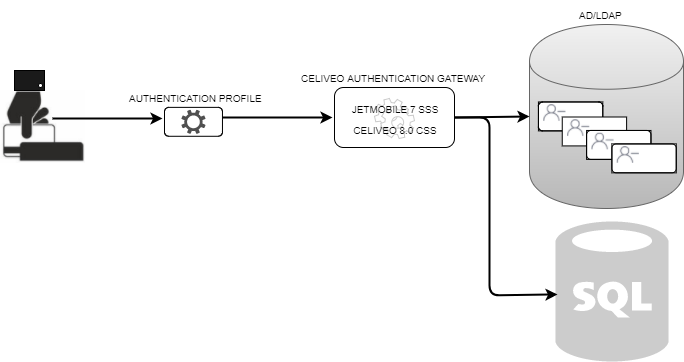
However, connecting to the Authentication Gateway deprives you of the performance improvements introduced with the current version of Celiveo. For example, the ability to optimize authentication for large organizations.
Settings Specified in an Authentication Profile
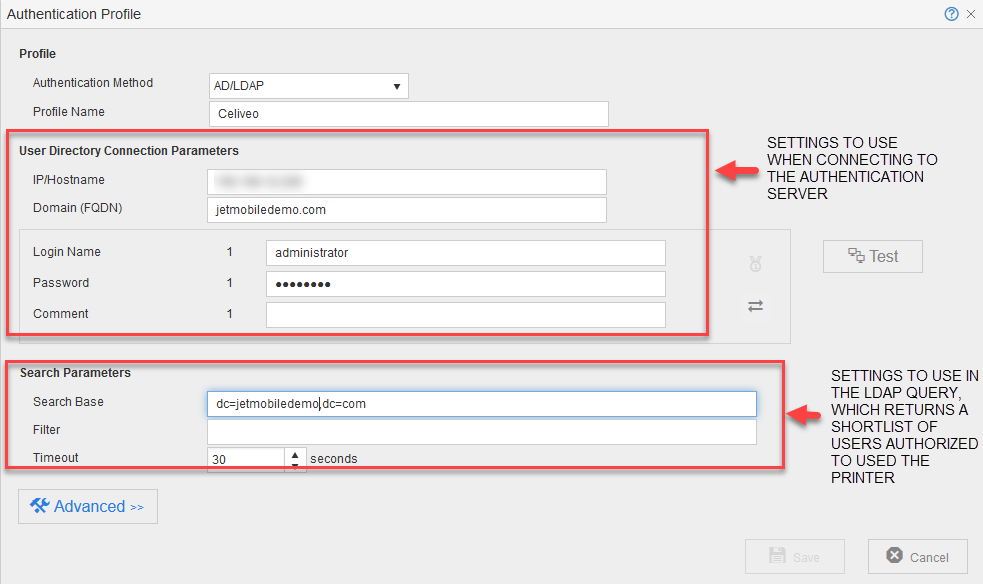
The basic settings of an authentication profile specify:
- Settings to open a connection to an Authentication Server.
- LDAP search parameters that results in a shortlist of authorized users.
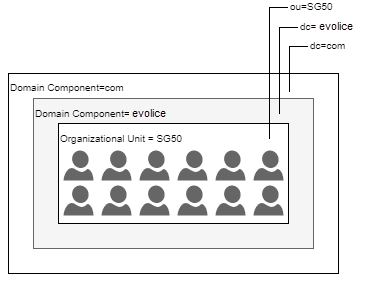
The example shown below:
- Connects to 192.168.12.200 (the Authentication Server hosting the AD Database for the domain jetmobiledemo.com).
- Shortlist users who are part of the Organizational Unit SG50 (OU=SG50).
![]()
![]()
Authentication Profiles in Access Control Rules
Access Control Rules connect to Authentication Profiles through Authentication Source Profiles.
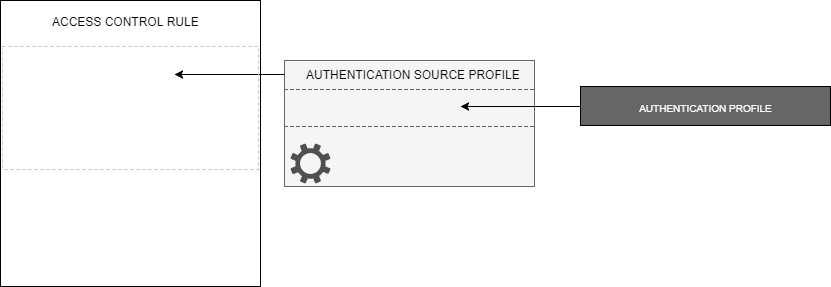
An Authentication Source Profile supplements Authentication Profile by carrying additional information that may be required by an Authentication Profile. For example, the mask used to extract the employee id from an employee card.
Optimizing Authentication for Large Organizations ![]()

In large organizations, where the number of users is considerably high, or is geographically distributed, authentication may take time. The Enterprise Version of Celiveo provides a work-around for this bottleneck. The Enterprise Version supports the ability for an Authentication Source Profile to contain multiple Authentication Profiles.
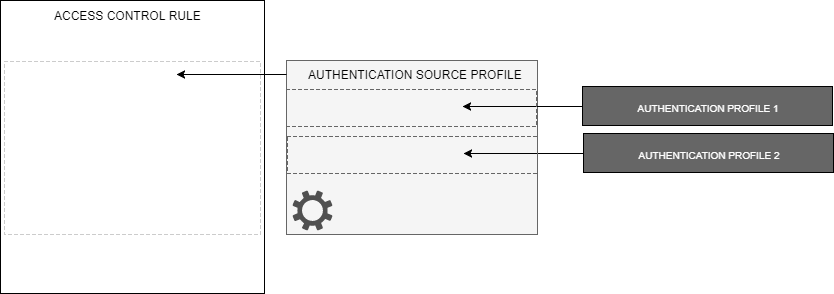
If authentication fails on the first Authentication Profile, the system automatically falls back on to the next profile. By setting up more restrictive but faster Authentication Profiles to be processed before the less restrictive but larger ones, you can speed up authentication for regular users.
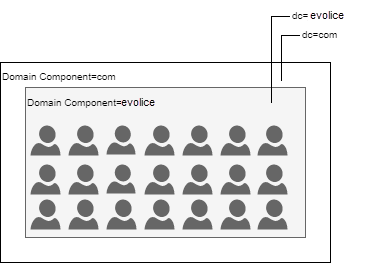
For example, supposing a large company has offices distributed across the globe, you can set up one authentication profile exclusively for employees of one office (OU=SG50 in the illustration below) and another less restrictive one for the entire company. Both Authentication Profiles are then assigned to the printers in that office.
 |
 |
| Authentication Profile 1 | Authentication Profile 2 |
|---|
When SG50 employees authenticate at a printer, Authentication Profile 1 is able to handle their authentication. Supposing a visitor from another office of the same organization visits the SG50 office, Authentication Profile 2 is able to handle their Authentication. SG50 employees are able to authenticate faster than the visiting employee because Authentication Profile 1 ensures that the system has to deal only with the SG50 employees. The visiting employee will take longer to authenticate because Authentication Profile 2 results in a larger number of users to look up. This technique (of falling back on a secondary authentication profile when authentication against a main profile is unsuccessful) helps to cover all of the company’s employees, while allowing the SG50 office employees enjoy faster authentication.
Additional Settings in an Authentication Profile
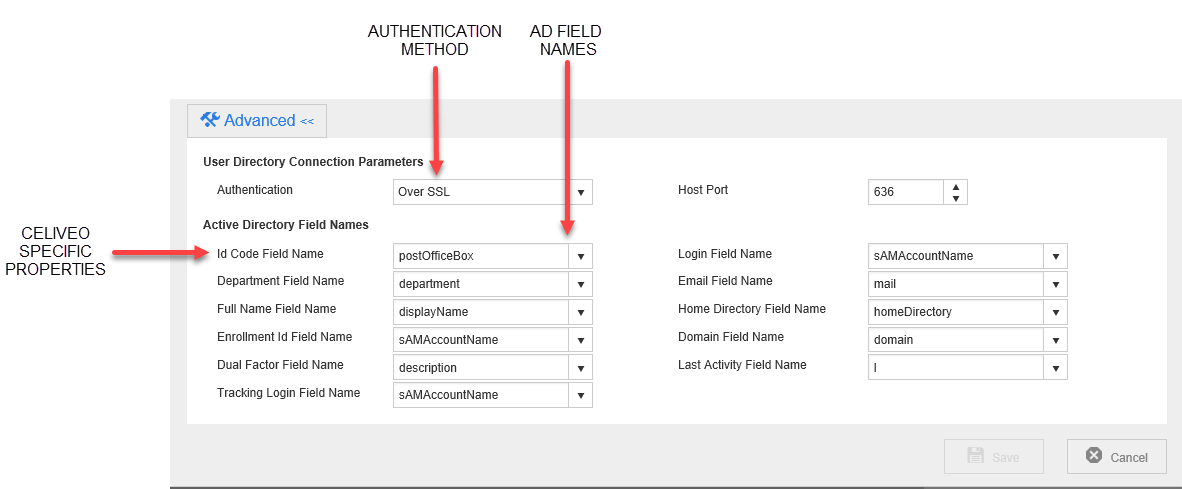
The Advanced settings are important only if you choose to configure the connection method (Simple or Encrypted) and /or store enrollment information on the Authentication Server, instead of the Celiveo Database.
Connection to the Authentication Server can be made in two ways:
- Simple: Choose this method to connect to the AD via unsecured port. Simple connection uses port 389 for communication.
- Over TLS: Choose this method to enable secured connection to AD. Standard port used for such communication is 636. You can also change the port number.
Since AD does not have fields that correspond to some Celiveo specific properties, you can use the Advanced section to map Celiveo properties to AD field names that are not in use.
For example, when Card Authentication is enabled, Celiveo uses the card number to identify a user. Similarly, when PIN Authentication is enabled, Celiveo uses the PIN code to identify users. Celiveo stores both the card number and PIN code in a Celiveo specific property named Id Code. However, AD does not have a field named Id Code. So, you must store the Id Code in an unused AD field that already exists on the Authentication Server. In the Advanced section, you can map Id Code to the relevant unused AD field.
| Setting | Description |
|---|---|
| Id Code Field Name | Default value is [postOfficeBox]. Or, select the Active Directory field which stores the user ID in the Active Directory or User Directory. |
| Department Field Name | Default value is [department]. Or, select the Active Directory field which stores the user department information. |
| Full Name Field Name | Default value is [displayName]. Or, select the Active Directory field which stores the user full name information. |
| Enrollment Id Field Name | Default value is [sAMAccountName]. This field is searched in the Active Directory to match the user login name and get their information during enrollment. |
| Dual Factor Field Name | Default value is [description]. Or, select the Active Directory field which stores the Dual Factor password. |
| Tracking Login Field Name | Default value is [sAMAccountName]. Or, select the Active Directory field which stores the user tracking login activity. |
| Login Field Name | Default value is [sAMAccountName]. Or select the Active Directory field which stores the user login information. |
| Email Field Name | Default value is [mail]. Or, select the Active Directory field which stores the user email information. |
| Home Directory Field Name | Default value is [homeDirectory]. Or, select the Active Directory field which stores the user information. |
| Domain Field Name | Default value is [domain]. Or, select the Active Directory field which stores the user domain. |
| Last Activity Field Name | Default value is lowercase of letter ‘L’. The time of the most recent authentication by the user. The feature is critical for auto-unenrollment, as the exact time is calculated before the user is automatically un-enrolled. The data of Last Activity Time is stored in the file if the user is enrolled locally. NOTE: Make sure that this field is documented and that it has read/write rights for the indicated AD service account. |
How to…
Create a New Authentication Source Profile
New Authentication Profiles are created while binding Access Control Rules to printers.
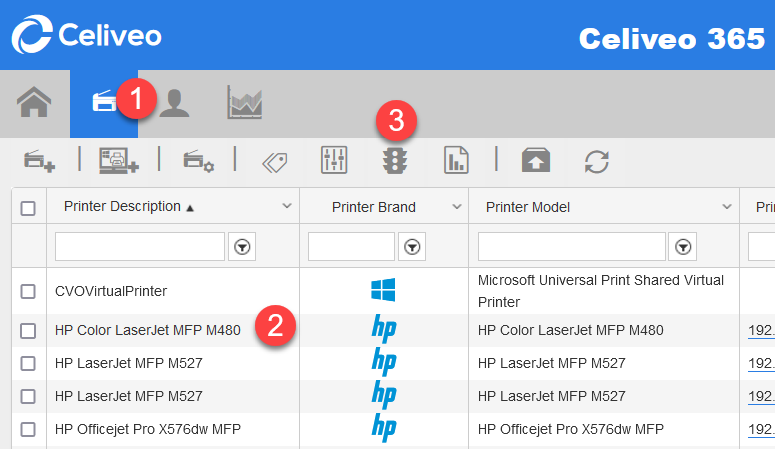
- On the Celiveo Web Admin, at the main menu, click
![]() . The Printer List displays.
. The Printer List displays. - Select the Printer you want to add the new Access & Rules Profile to.
- On the printer menu, click
![]() . Access and Rules is displayed.
. Access and Rules is displayed.
![]()
- Select an Access & Rules Profile from the [Access & Rules Profile] drop down and click
![]() . The Access & Rules Profile displays.
. The Access & Rules Profile displays.
![]()

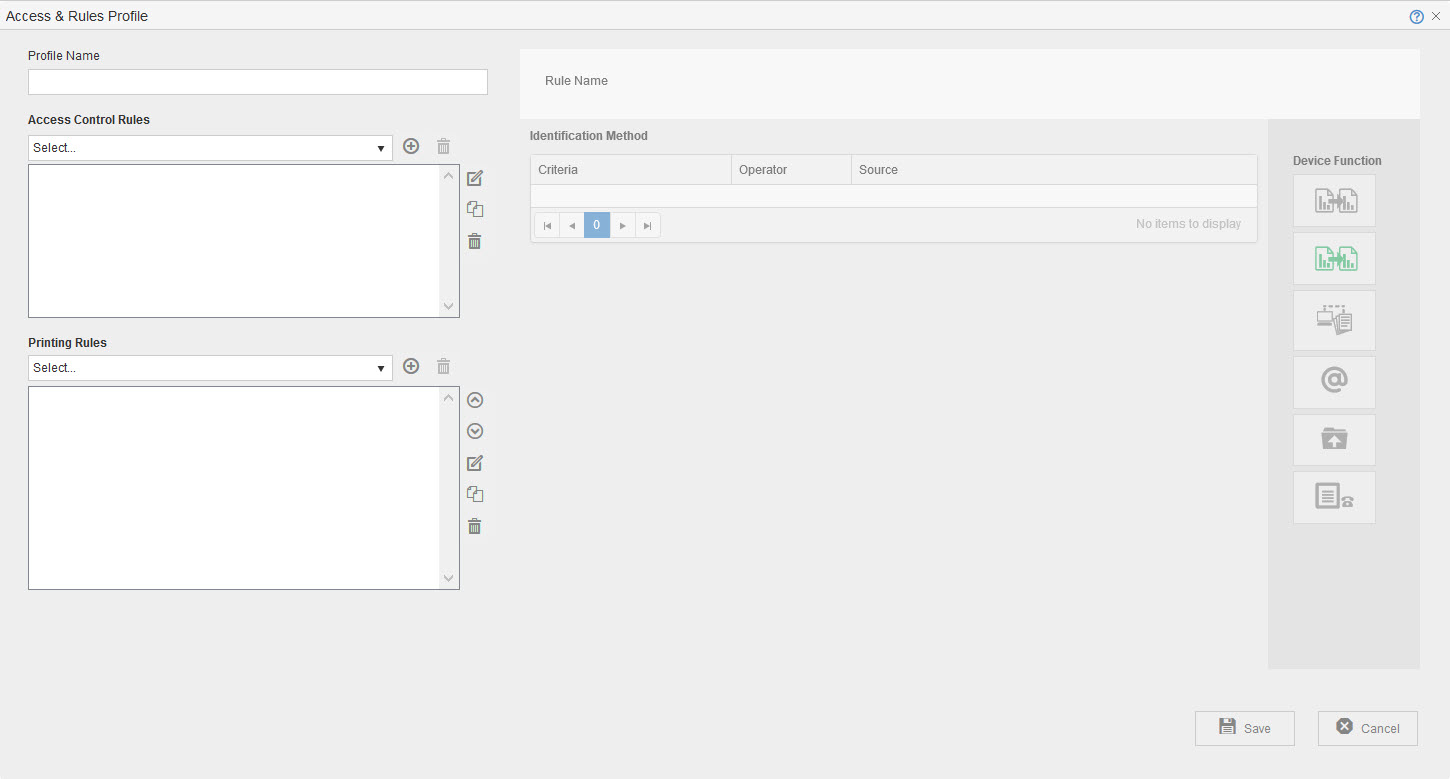
- In the [Profile Name] box, specify a unique name for the Access & Rules Profile.
- Click
![]() adjacent to the [Access Control Rules] drop-down. A new rule displays.
adjacent to the [Access Control Rules] drop-down. A new rule displays.
![]()
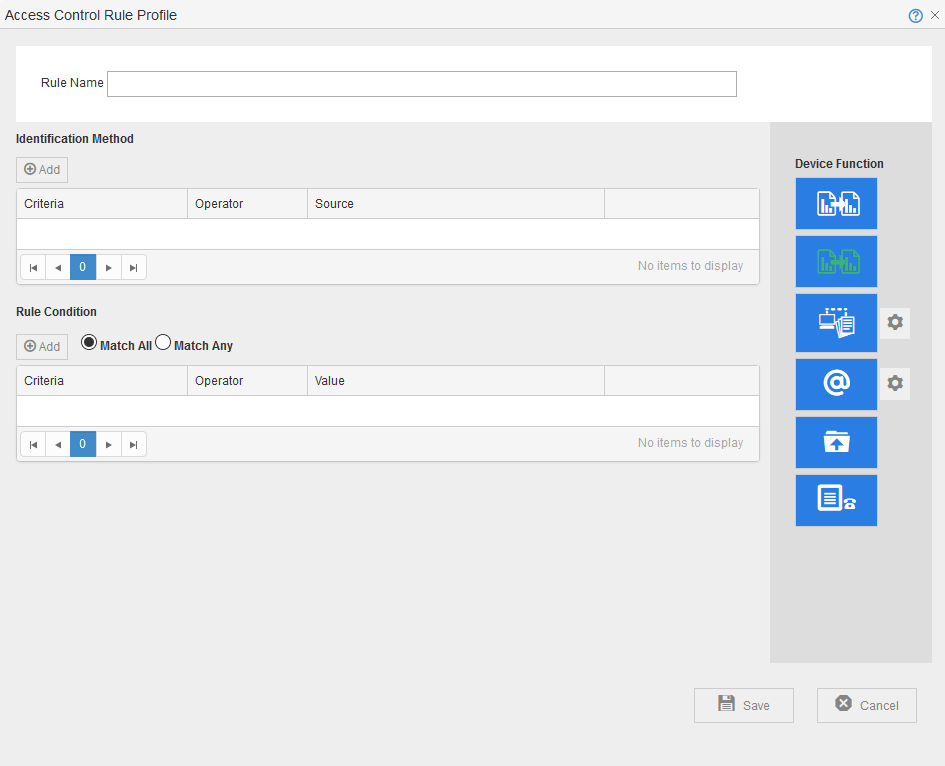
- At [Rule Name] specify a name for the rule.
- In the Access Control Rule Profile, In the [Identification Method] section, click
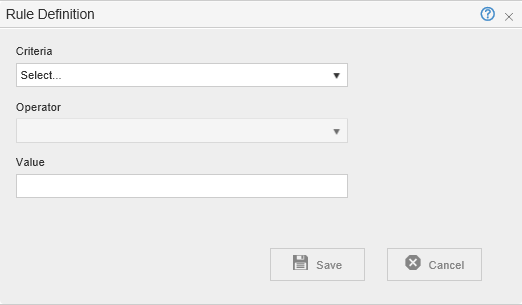
![]() . The Rule Definition is displayed.
. The Rule Definition is displayed. - In the [Criteria] drop-down, select [Card Number] or [PIN Code] for PIN Authentication.
![]()
- Click
![]() , which is located next to the [Source] drop-down. A new Authentication Source Profile displays.
, which is located next to the [Source] drop-down. A new Authentication Source Profile displays.
![]()

- At [Profile Name], specify a name for the Authentication Source Profile.
Create and Add an Authentication Profile to an Authentication Source Profile
- Click
![]() , which is located next to the [Authentication Profile] drop-down. A new Authentication Source Profile displays.
, which is located next to the [Authentication Profile] drop-down. A new Authentication Source Profile displays.
- To specify authentication against your company authentication server:
- Ensure that the Authentication Method is set to AD/LDAP.
- Specify the parameters to query the authentication server.
![]()
Configure advanced settings
- Click on [Advanced] to access the advance configuration.
- At [Authentication], select either [Simple] or [Over TLS].
- At [Host Port], depending on the authentication method selected, the port number selected is:
- 389 for [Simple] and
- 636 for [Over TLS].*
- Make the required changes to the [Active Directory Field Names].
- Click [Save]. You are returned to the Authentication Source Profile.
- From the [Authentication Profile Name] drop-down, select the Authentication Profile you just created.
- Click [Save].
Create a New Authentication Profile (Alternate Method)
- From the Celiveo Web Admin Main Menu, click
![]() . The User list displays.
. The User list displays. - Click
![]() . The User Groups list displays.
. The User Groups list displays. - Click
![]() . The Add New Group|OU displays.
. The Add New Group|OU displays.
![]()
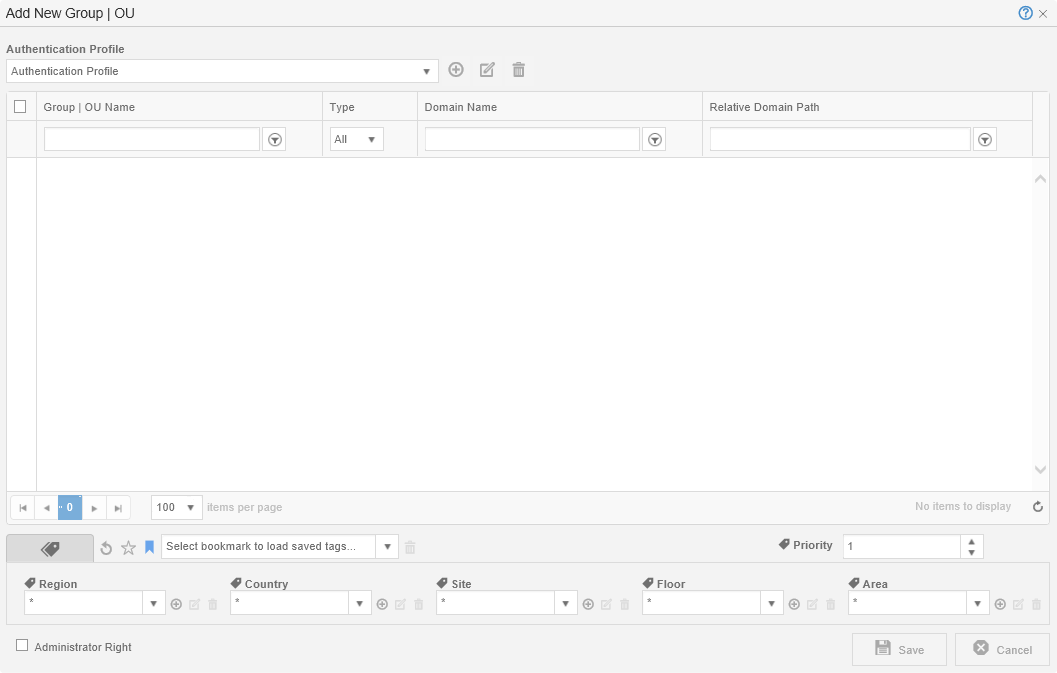
- Click
![]() , which is located next to the [Authentication Profile] drop-down. The Authentication Profile dialog displays.
, which is located next to the [Authentication Profile] drop-down. The Authentication Profile dialog displays. - At Authentication Profile Name, specify a name to identify the Authentication Profile.
- Specify the parameters to query the authentication server.
![]()
- Click [Save]. The Groups and Organizational units retrieved by the LDAP query you specified is listed in the Add New Group|OU dialog.
![]()
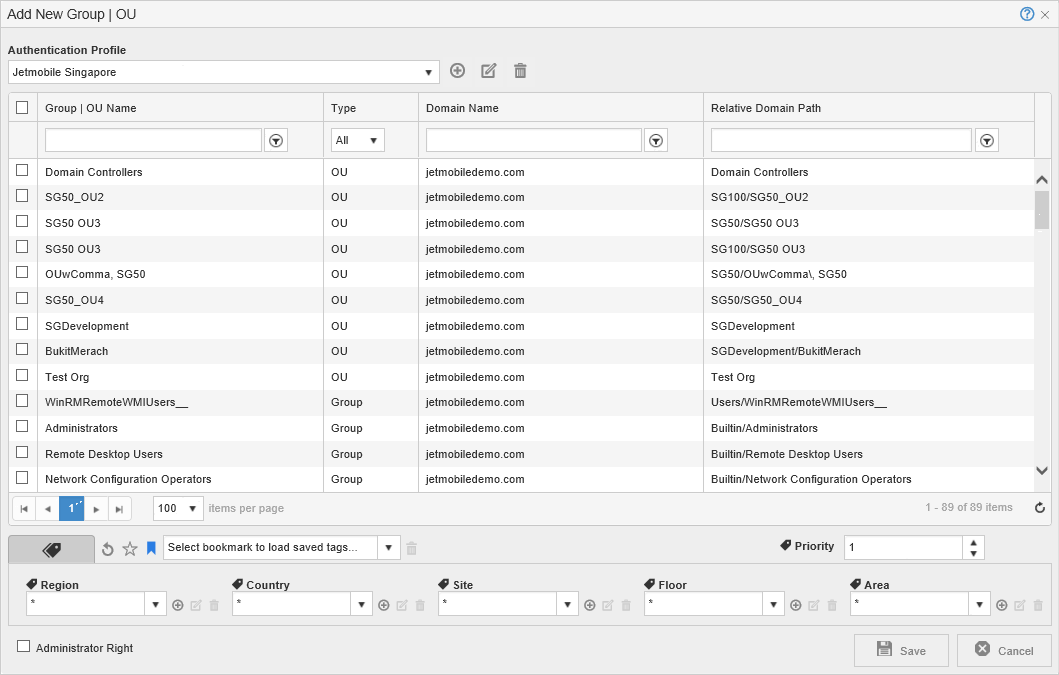
- Inspect the list and verify if the information that the Authentication Profile retrieved is correct.
- Click [Cancel].
Post your comment on this topic.