
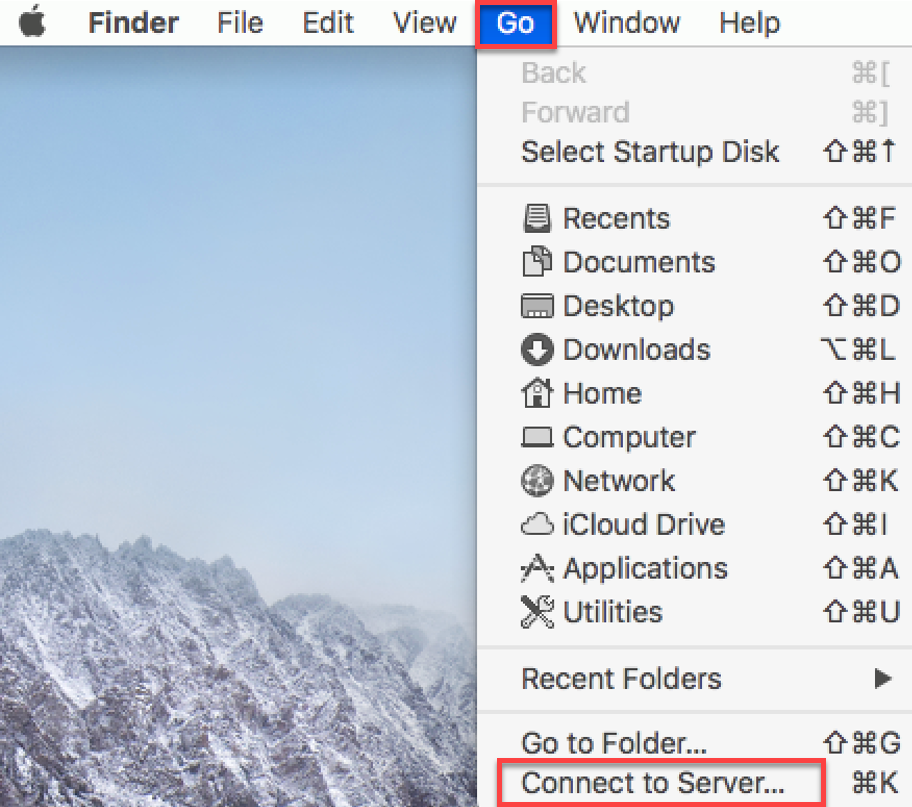
Configure the Windows NAS location on your Mac client workstation.
In the Finder, click the Go option and select Connect to server.
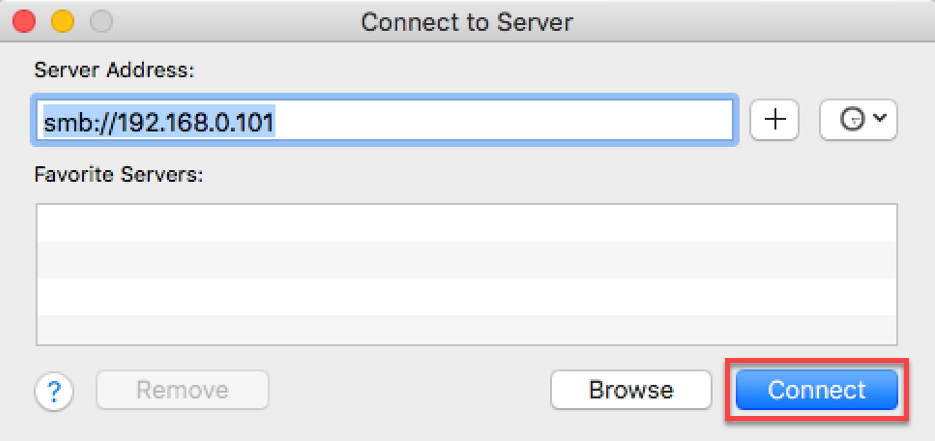
Provide the Windows NAS address and click the Connect button.
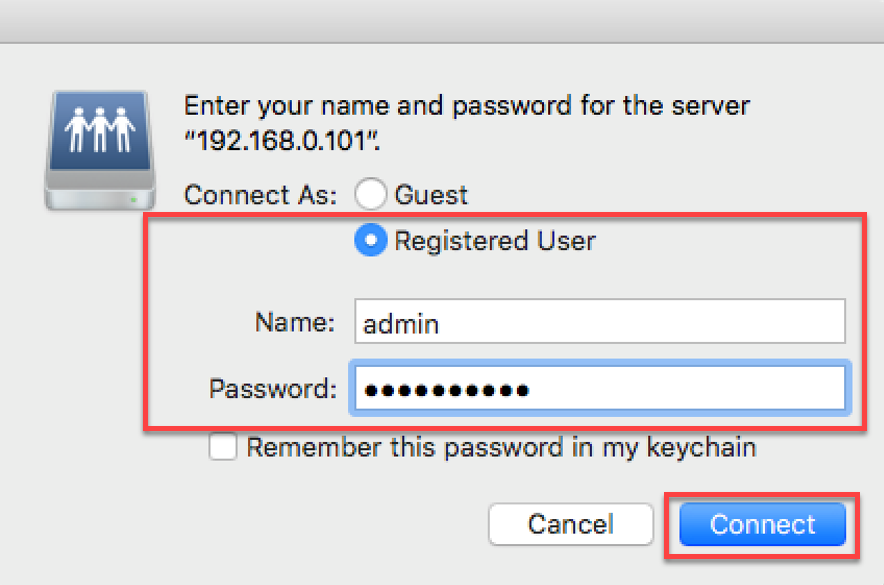
Provide the credentials to connect to the NAS location and click the Connect button.
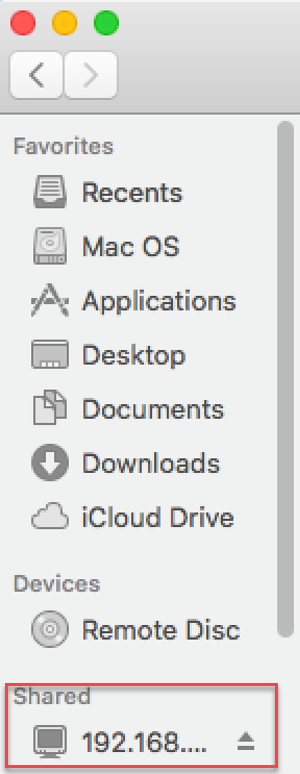
The NAS folder is now available in your location list.
You can locate the actual location using the following command prompt:

Please note that the connection to the NAS location is lost every time the computer is restarted. To avoid having to reconnect it manually, follow one of the procedures below:
Method 1*
- Open System Preferences and click on Users & Groups.
- Select your user name from the list and then click the Login Items tab.
- Drag & drop a mounted network drive into the login items list.
- Optional: check the Hide box to keep the drives window from opening on each login and boot.
This can be used to automatically connect to and mount drives to share files with a Windows PC, though it is necessary to enable SAMBA beforehand within File Sharing preferences.
Method 2*
- Launch Automator in OS X and create a new Application.
- Drag Get Specified Server into the workflow, click Add and place the network drive network location address into the field.
- Drag Connect to Server into the workflow.
- Click on Run then log in to the network drive as usual to verify that it works, choosing to save the login credentials.
- Save the Automator application.
*Source: http://osxdaily.com/2012/05/04/automatically-connect-to-network-drive-mac-os-x/
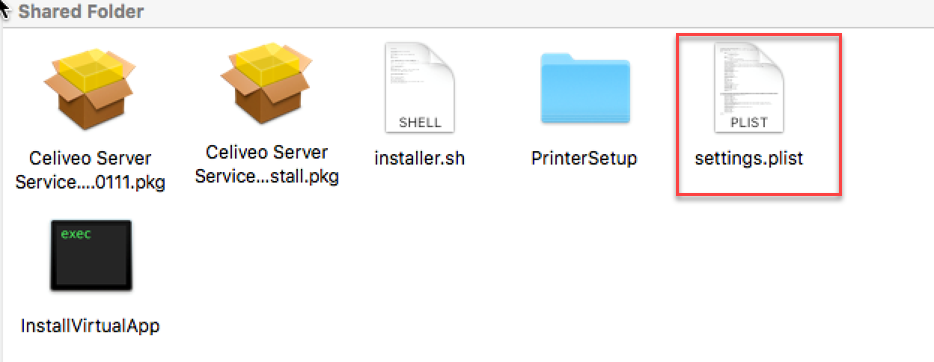
Configure the NAS location and Default user in the Mac package before installation
In the Mac package, open the settings.plist file.
Update the string corresponding to the NAS location as indicated on the picture below.

You can also define the predefined Active Directory user in the settings.plist file.

Note: database details also have to be updated in the settings.plist file.
Install the Mac Package
Install the package using the command line as shown below.
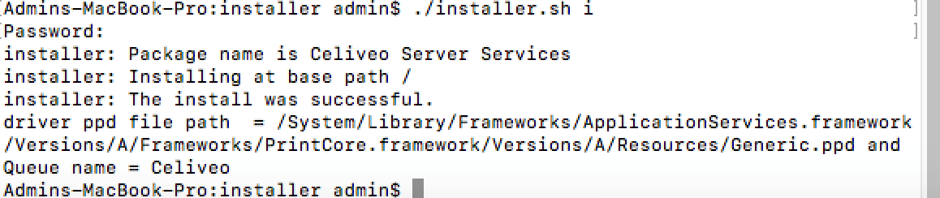
For more information on the installation process, please refer to this article.
After installation, the application UI is available in the Mac tray:
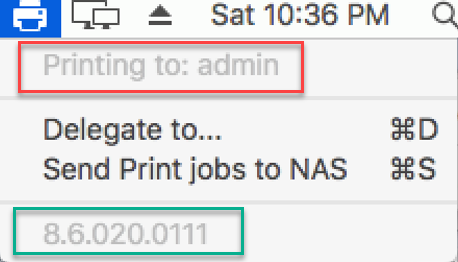
The section highlighted in red displays the Celiveo Pull Print User Name and the one highlighted in green indicates the version of the CVP.
User Delegation
By default, Pull Print jobs are generated for the logged-in user and they are stored under the CSS jobs directory. However, it is possible to delegate jobs to another user.
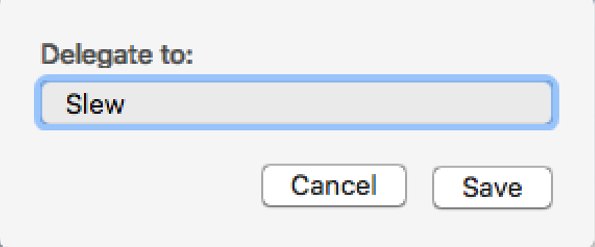
Click on Delegate to choose the user to delegate to.

Enter the user you wish to delegate to and click Save.
Note: Only the following special characters are allowed in the Delegate to field: ~ ` ! # $ % ^ & ( ) – _ { } ‘ .
A notification is displayed and the status of the virtual printer in the tray is updated:

Pull Print jobs are now released for the delegated user. Jobs will be stored in the delegated user folder after print and appear in the database under the delegated user ID.


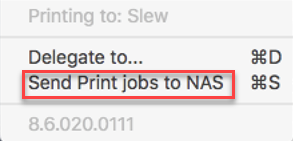
Pull Print can now be transferred to the configured NAS location by selecting the Send Print job to NAS option which is now available.
A notification indicates the job transfer to NAS has been successful.

Users are able to print after the jobs have been transferred to NAS even if the client workstation is powered off.
Post your comment on this topic.