
Celiveo Web Admin Installer
This Celiveo 8 installer comprises of Web Admin, Celiveo Virtual Printer (CVP) and Discovery Agent (DA). This product installer is 64-bit compatible and should only be installed on Windows Server systems running on 64-bit OS. It is not recommended to install WA on Windows Client systems, except for demonstrative purposes. For more information, refer to System requirements for Celiveo 8.
Celiveo Virtual Printer installer is compatible for both 32-bit and 64-bit operating systems. The appropriate version will be automatically deployed based on the OS running on the client/ server systems.
Before you begin…
If you have an existing Celiveo 8 solution from a previous release, it is necessary to uninstall the old version before installing the new version.
Ensure to take note of the following attributes in the Web configuration file before uninstalling the solution. If the attribute values are modified, you will have to update those values in the Web configuration file of the new version.
- Go to “C:\Program Files\Celiveo\Celiveo 8\Web Admin”
- Open Web configuration file.
- Search for attribute key “DbHost”.
- Take note of the value if it has been changed. The default value is zero.
“DbHost” values can be the following:
0: The Web Admin will use the Database IP in the CVP configuration file and to send Database details to printers.
Or
2: The Web Admin will use the Database Hostname or FQDN (depending on the DNS resolution) in the CVP config file and to send to printers. - Similarly, note the value for the attribute “KMUI” if it has been changed. The default value is zero. (This is optional)
![]()

Uninstall the existing Celiveo 8 solution
- Go to Control Panel > Programs and Features.
- Choose Celiveo 8 and click Uninstall.
- Click OK on the confirmation dialog to uninstall.
Install the new Celiveo 8 solution
- Download the latest Celiveo 8 solution from here.
- Follow the steps here to install the Celiveo Web Admin.
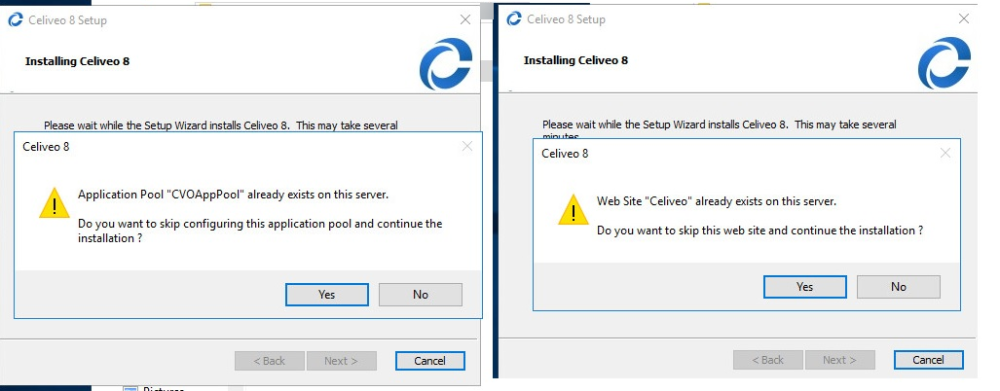
- During the installation, confirmation prompts will be displayed to skip the configuration of the Celiveo Application Pool and Website.
- Click Yes to use the existing Application pool and Website.
![]()
- Complete the installation and update the Web configuration file, if required.
Celiveo Virtual Printer
To upgrade the Celiveo Virtual Printer installed on a user’s work station:
- Follow the instructions given here to upload the new Celiveo Virtual Printer deployment package on Web Admin.
- Follow the instructions given here to download and install the new Celiveo Virtual Printer Deployment package on a user’s workstation.
Celiveo Smart Appliance/ Embedded Agents
To upgrade the agents (Celiveo Smart Appliance/ Embedded Agent for HP FutureSmart and Ricoh Android printers), follow the instructions given here to upgrade the Celiveo Version on CSA Agent/ Embedded Agents.
Migrating from SecureJet 7.0.x / Celiveo 8.0.x to Celiveo 8
Follow the instructions given here to upgrade to the latest Celiveo 8 version.
Post your comment on this topic.