
Follow the steps below to deploy a Celiveo Virtual Printer on a user’s workstation:
- Download the Virtual Printer deployment package.
- Install the Virtual Printer on a user’s workstation.
- Install Physical Printers for direct print.
1. Download Virtual Printer Deployment Package
![]()
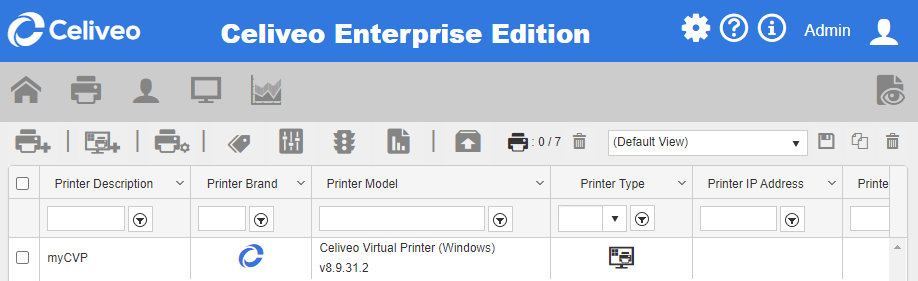
- In the Web Admin, select the Celiveo Virtual Printer.
- Click
![]() .
.
The Virtual Printer Deployment Package downloads.
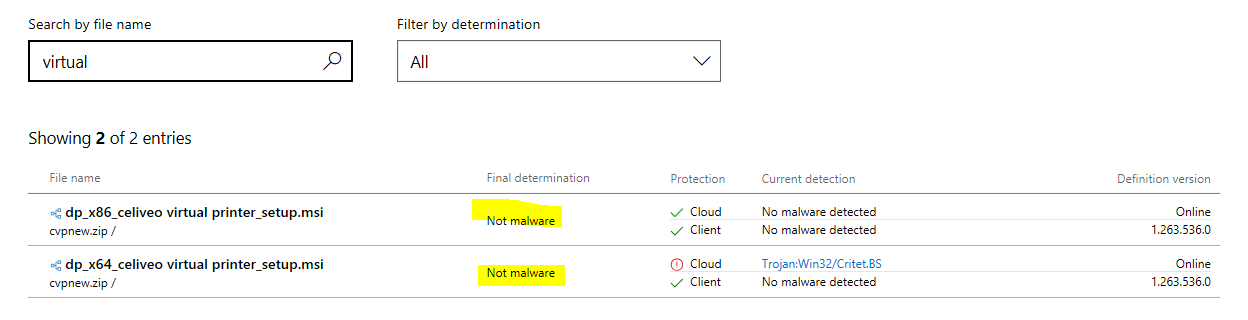
BEFORE YOU INSTALL CELIVEO VIRTUAL PRINTER:
In some cases, the Windows Defender antivirus identifies Celiveo Virtual Printer as a threat.
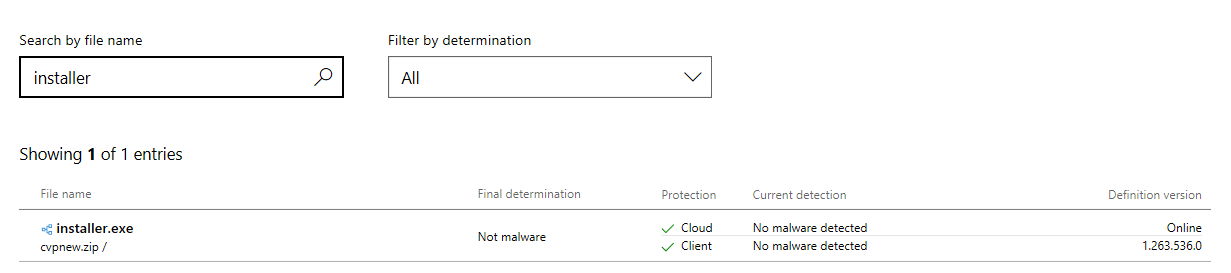
We have submitted the file to Microsoft for a malware analysis who confirmed this was a false positive as proven by the reports below:
To avoid this problem, make sure that you add Celiveo to the Windows Defender antivirus exclusion list. To do so, add the “C:\Program Files\Celiveo” folder to the exclusion list : https://support.microsoft.com/en-ie/help/4028485/windows-10-add-an-exclusion-to-windows-defender-antivirus.
Celiveo software executable files are verified virus/malware using eSET Nod32, then digitally signed, and therefore can’t be patched at a later stage by a virus without triggering a signature failure alert.
If you receive an invalid signature alert, do not run the application as it means software has modified the binary file.
Recent versions of Windows Defender wrongly report some clean obfuscated .Net assemblies as a threat, this is a false positive.
Would you face that issue, we strongly recommend you try another anti-virus to get a confirmation before considering that detection as accurate.
2. Install Virtual Printer on User’s Workstation.
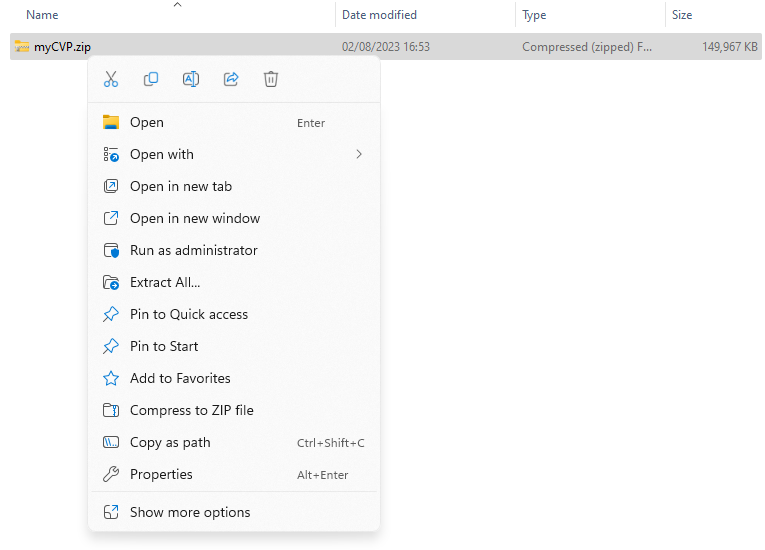
- Copy the Virtual Printer Deployment Package to a temporary folder on the user’s workstation.
- Right-click the Deployment Package. A menu displays.
![]()
- Click [Extract All].
- Select a temporary folder to extract the files to and click [Extract].
![]()
- Right-click [Installer] and Run as Administrator to start the installation.

2.a. Silent Installation
This option is useful, to silently install Celiveo Virtual Printer on the user workstation without requesting any user interaction.
To do this:
- Launch the command prompt dialog as Administrator.
- Run the following command: installer.exe -s
Define a custom path:
You can also define a custom path to extract the files and install Celiveo Virtual Printer. To do this:
- Enter the following command: installer.exe -t”[folder path]”.
E.g: installer -t“D:\Program Files\Celiveo”
Upon installation, a Celiveo Virtual Printer icon is placed on the Desktop and the System Tray.
Desktop shortcut:
If you do not wish to create a shortcut on the Desktop, run the following command: installer.exe -nosc
Alternate Option for Silent Installation:
You can also define a custom path to extract the files and install Celiveo Virtual Printer. To do this:
- Run the command prompt.
- Enter the following command:
installer -t”[folder path]”. For e.g: installer -t“D:\Program Files\Celiveo”
- Upon installation, a Celiveo Virtual Printer icon is placed on the Desktop and the System Tray.
2.b. Silent Uninstallation
Celiveo Virtual Printer can also be removed from user workstations without requesting any user interaction.
- Launch the command prompt dialog as Administrator.
- Run the following command: installer.exe -u
All binaries are removed from the Install folder.
3. Install Physical Printers for Direct Print
- Right-click
![]() on the system tray. A menu displays.
on the system tray. A menu displays. - Click [Choose another printer]. The Celiveo Virtual Printer screen displays.
!(zoom){IMAGE-LINK+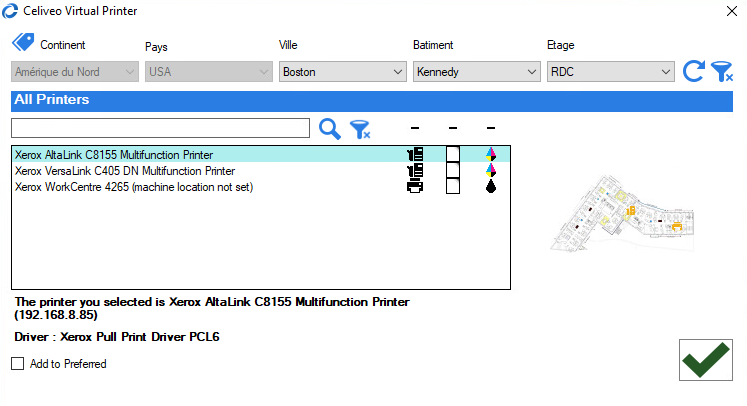 }!
}! - Select the printer to use on this workstation, and click
![]() .
.
A vertical yellow bar starts running on the Celiveo Virtual Printer system tray icon while the printer is installed on the workstation. - Repeat steps 1 – 3 until you have added all the printers you need.
Post your comment on this topic.