
Special Gateway Replacement on SJ7.0.x Server
- Open the Celiveo 8 Web Admin and create a CSVP. This CSVP should be created with an AD access profile.
- Download the CSVP package and copy it to the SJ7.0.x server.
- Install the Celiveo 8 CSVP on the SJ7.0.x server.
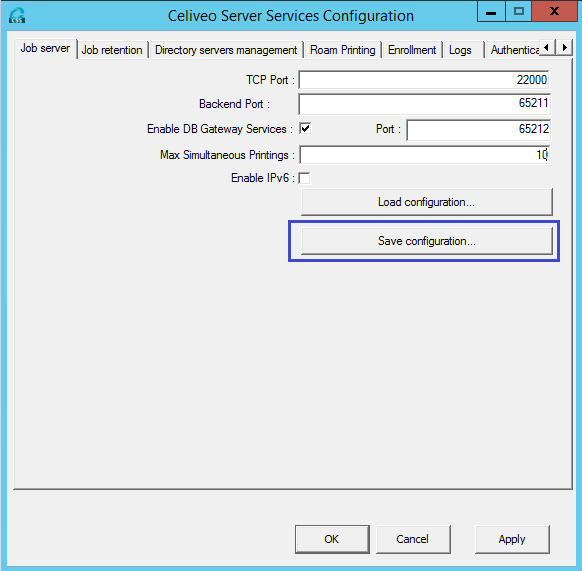
- Back up the SJ7.0.x Server Services configuration on the Celiveo 8 server:
- Navigate to C:\Program Files\Jetmobile\Celiveo Server Services.
- Run SJ Print-PS Configuration as administrator.
- Click Save Configuration…
![]()
- 5. Execute the MigrationCVP.exe console application as Administrator on the Celiveo 8.0.x server.
Once the MigrationCVP.exe console application is successfully run, unzip the CSVP package and install the CSVP as administrator.
Notes:
- If the backup is made following the method given in step #4, the CSVP can be installed by simply running installer.exe on the CSVP package as administrator. The default TCP Port on the CSS configurations will be ‘22000’.
- If the CSS backup is not performed on step #4 and if a different TCP port needs to be defined, please use the following method to install the CSVP on the Celiveo 8.0.x server:
- Open the command prompt as administrator.
- Go to the unzipped CSVP package folder using the command prompt.
- Type installer.exe -p< PORT_NUMBER > Ex: installer.exe -p2000
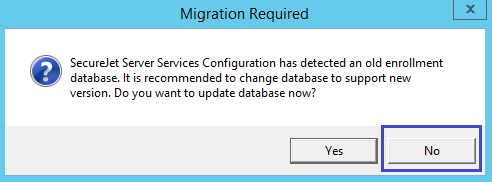
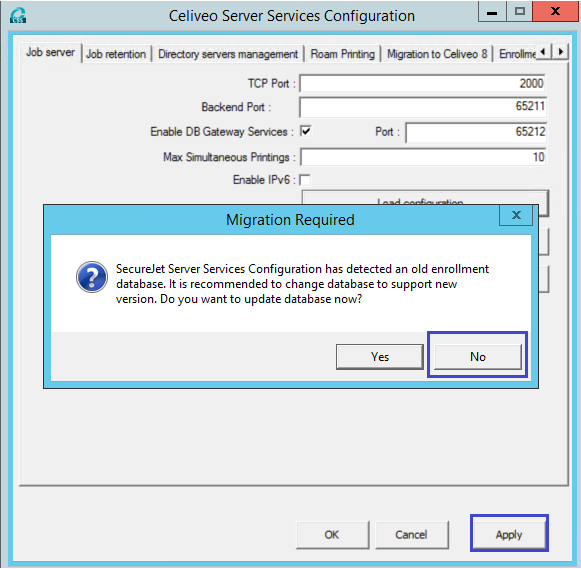
- Once the CSVP installation is complete, navigate to C:\Program Files\Celiveo\Celiveo Server Services and open SJ Print-PS Configuration as administrator. If it prompts to upgrade the enrollment database, click ‘No’.
![]()
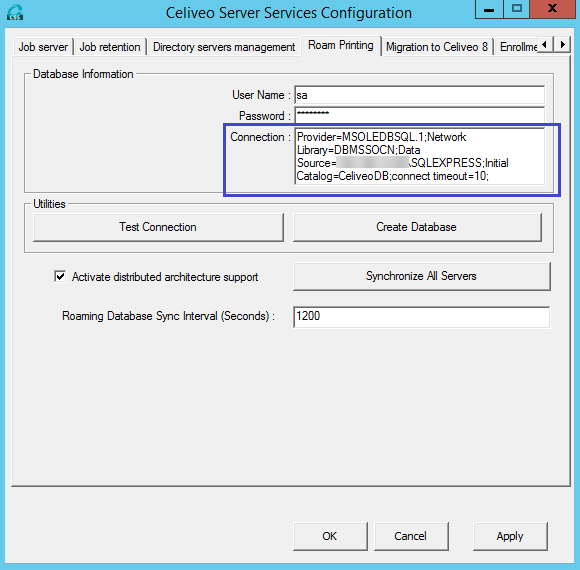
- Navigate to the Roam Printing tab and copy the connection string.
![]()
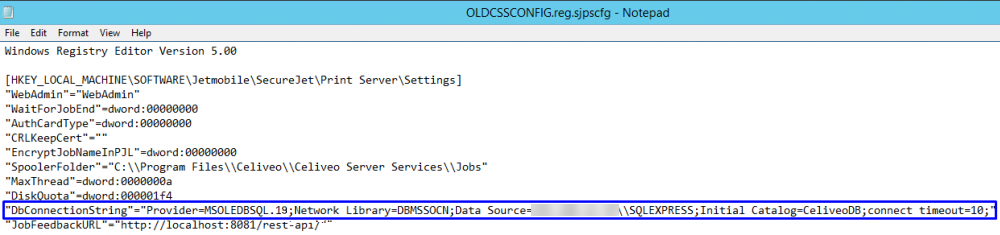
Open the saved SSS configuration file and replace the SJ 7.0.x DBConnectionString with the Celiveo 8 DBConnectionString.
“DbConnectionString”=“Provider=MSOLEDBSQL.1;Network Library=DBMSSOCN;Data Source=\\;Initial Catalog=CeliveoDB;connect timeout=10;”
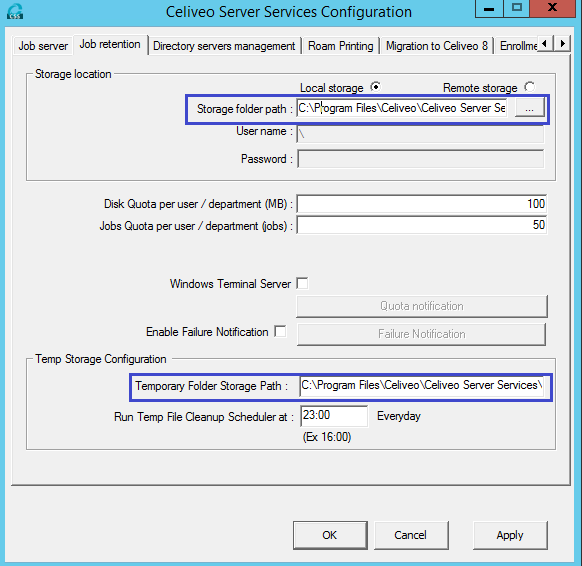
- If the old SSS configurations are not saved, all tabs need to be manually configured to match the existing configurations on the previous SSS except for the Job retention tab.
- Storage folder path and Temporary Folder Storage Path on the Job retention tab should always point to Celiveo Server Services as indicated below:
Storage folder path = C:\Program Files\Celiveo\Celiveo Server Services\Jobs
Temporary Folder Storage Path = C:\Program Files\Celiveo\Celiveo Server Services\Temp
![]()
If the old SSS configurations are saved, proceed to the following steps:
a. Navigate to the Job Server tab and click Load configuration… to load the SSS configurations saved on step #4. Once the configuration is loaded, click Apply.
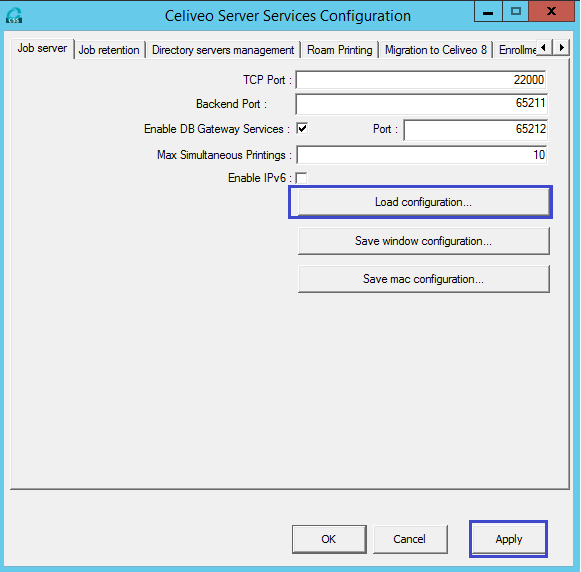
Once the old configurations are loaded, if it prompts to upgrade the enrollment database, click No and Apply the changes.
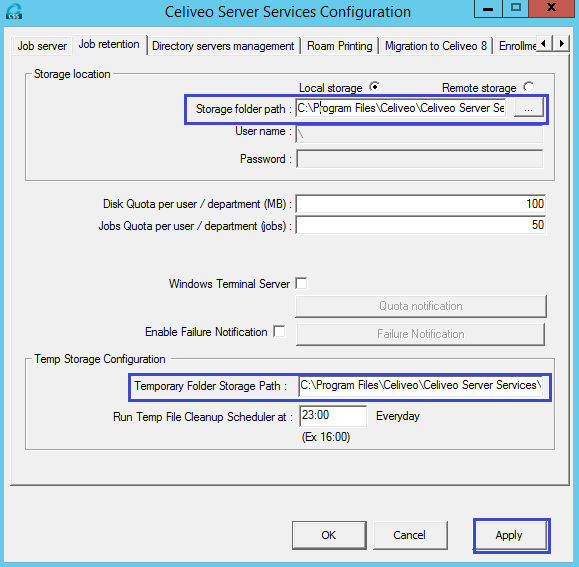
b. Navigate to the Job retention tab and edit the Storage folder path and Temporary Folder Storage fields as indicated below and click Apply.
_Storage folder path = C:\Program Files\Celiveo\Celiveo Server Services\Jobs
Temporary Folder Storage Path = C:\Program Files\Celiveo\Celiveo Server Services\Temp_
- Navigate to the Migration to Celiveo 8 tab and perform the following steps:
i. Enable the Dual lookup checkbox.
ii. Enter the SJ7.0.x connection string.
iii. Test the connection.
iv. Once the connection is successful, click Apply.

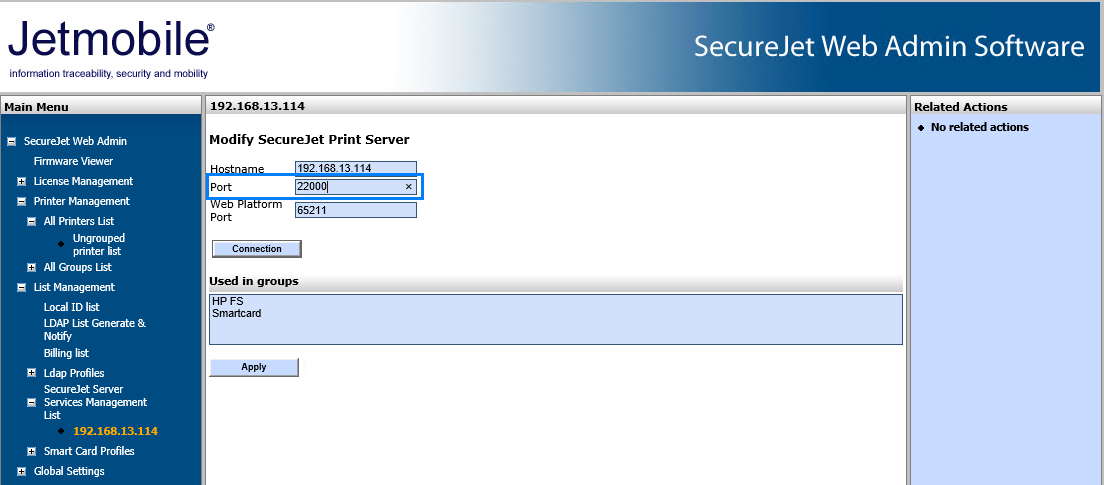
- On the SJ7.0.x Web Admin:
- Navigate to List Management > Server Management List and select the relevant server.
- Change the Port to 22000 and click Apply.
Note: This needs to be the Celiveo 8 CSS port
- Navigate to the Roam Printing tab and perform the following steps:
i. Make sure that the database connection string is pointing to the Celiveo 8 database.
Note: To avoid any error, install the MSOLEDBSQL driver on the SJ7.0.x server.
ii. Test the connection.
iii. Once the connection is successful, click Apply.

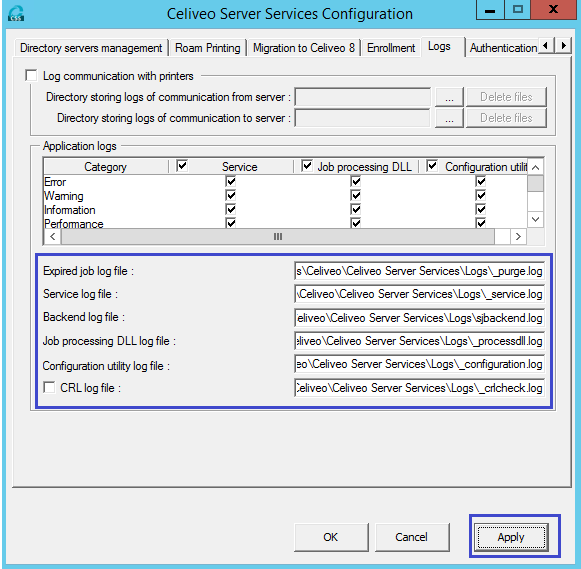
e. Navigate to the Logs tab and replace the existing log paths which point to SecureJet Server Services with Celiveo Server Services as indicated below
_Expired job log file = C:\Program Files\Celiveo\Celiveo Server Services\Logs\_purge.log
Service log file = C:\Program Files\Celiveo\Celiveo Server Services\Logs\_service.log
Backend log file = C:\Program Files\Celiveo\Celiveo Server Services\Logs\sjbackend.log
Job processing DLL log file = C:\Program Files\Celiveo\Celiveo Server Services\Logs\_processdll.log
Configuration utility log file = C:\Program Files\Celiveo\Celiveo Server Services\Logs\_configuration.log
CRL log file = C:\Program Files\Celiveo\Celiveo Server Services\Logs\_crlcheck.log_
Migrate SJ7.0.x clients to Celiveo 8 CVP
- Create a CVP from the Celiveo 8 Web Admin.
- Download the CVP package and install it on the Celiveo 8 client.
- Once the CVP installation is complete, perform a sign-out/sign-in on the client PC.
Migrate the Enrollment Table
- In Celiveo 8.0.x database, right-click on SJPS > Task > Generate Script > Next
- Select Select specific database table > select dbo.T_Enrollment > Next
- Provide a name and a path for the file.
- Click Advanced.
- Select Data only in the *Types of data to script *
- Click OK then Next.
- Copy the script to the Celiveo 8 database.
- Execute the script on the Celiveo 8 database. Note: Make sure to log out and close all the opened Celiveo 8 Web Admin windows.
- Since the Celiveo 8 Web Admin has been opened before at least once, delete the MigrationStatus from the database.
- Open the Celiveo 8 Web Admin and Log in.
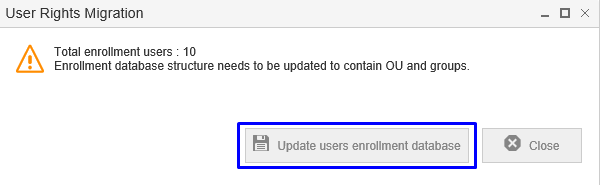
- Select Update users enrollment database.
![]()
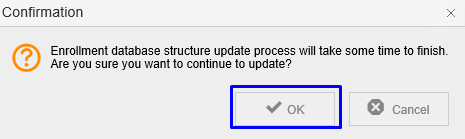
- Click OK to confirm.
![]()
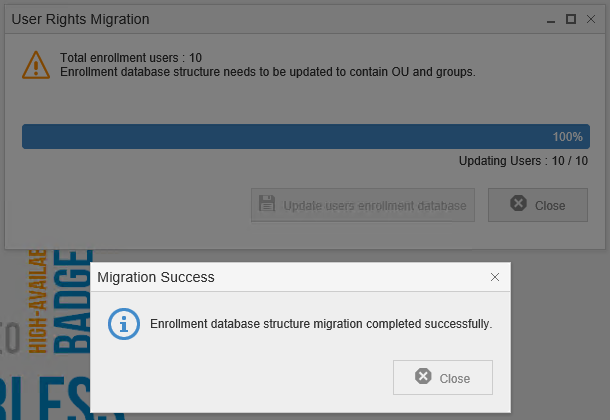
The migration starts.
- Once the migration is successful, a confirmation message displays.
![]()
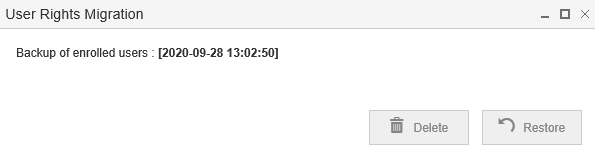
- Close the backup popup.
![]()
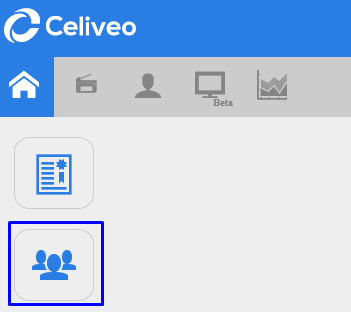
- The Users icon is now available on the Web Admin.
![]()
Limitations
- A user cannot have a mix of SJ7.0.x SPP clients and Celiveo 8 CVP client workstations. If a user has multiple SJ7.0.x SPP workstations, all of them need to be upgraded to Celiveo 8 CVP clients in order to use the Celiveo functionalities.
- Once the enrollment table is migrated, the users should not enroll using SJ7.0.x printers.
- If there is any job left with the SJ7.0.x SPP client, the jobs will be migrated to the new Celiveo 8 database upon the migration of the SPP client to the Celiveo 8 CVP client. However, the tracking details listed below will not appear on the reports for the expired and deleted migrated jobs.
For deleted jobs:
[PrinterFormatterNumber] = NULL
[Language] = Blank
[UserGroups] = NULL
[UserOUs] = NULL
For Expired jobs:
[Language] = Blank
[UserGroups] = NULL
[UserOUs] = NULL - If there is any job left with the SJ7.0.x SPP client, the jobs will be migrated to the new Celiveo 8 database upon the migration of the SPP client to the Celiveo 8 CVP client. However, the tracking information for the migrated jobs will not be displayed under FQDN.
Post your comment on this topic.