
What is a Celiveo Shared Virtual Printer (CSVP)?
The CSVP is a module that is deployed and shared on a Print Server so that users can print to and release print jobs on Celiveo enabled-printers. On the Web Admin, you add a Celiveo Virtual Printer (CVP), set it up as a CSVP, and generate a deployment package. Later on, you use the deployment package to install the CSVP on a Print Server.
Tip: It is recommended to follow the Microsoft’s Print Server Scalability and Capacity planning guide to dimension appropriately the Windows Print Server hosting the Celiveo Shared Virtual Printer (CSVP). The CSVP provides the Server-based Pull Print service and is equivalent to 50 physical printers in terms of resources. The actual number of physical printers in your setup that benefit from the pull print service is irrelevant when defining the Print server specifications.
Before you begin…
Typically, a different printer driver is required for each printer. In order to make the most of pull printing, you need universal printer drivers that can support a fleet of printers. While adding the virtual printer, you may need to upload such a universal printer driver to the Celiveo Virtual Printer. The Add Printer wizard launches the Discovery Agent to enable you to import the driver from the workstation you are running the wizard on. So before you start, make sure that the workstation you are working on has the required printer drivers installed on it.
1. Start the Add Printer Wizard
- At the Main menu, click
![]() .
. - At the Printer menu, click
![]() .
. - At the Add Printer menu, click
![]() to create a virtual printer. The Add Printer Wizard starts.
to create a virtual printer. The Add Printer Wizard starts.
![]()
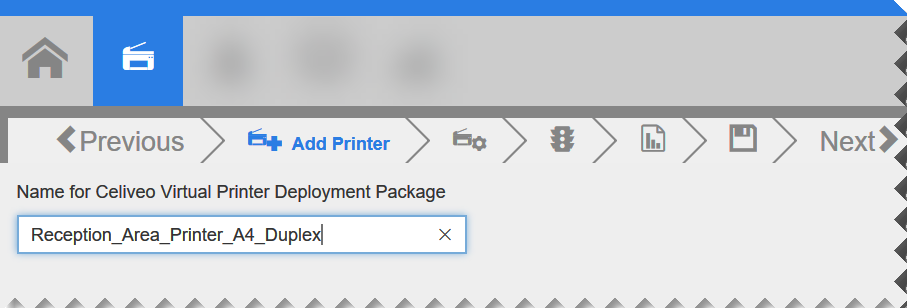
2. Specify Virtual Printer Options
- Specify a name for the CSVP deployment package. After you add the Printer, you can download the deployment package and install it on a Print Server.
- Click [Next>]. The next page displays.
![]()
![]()
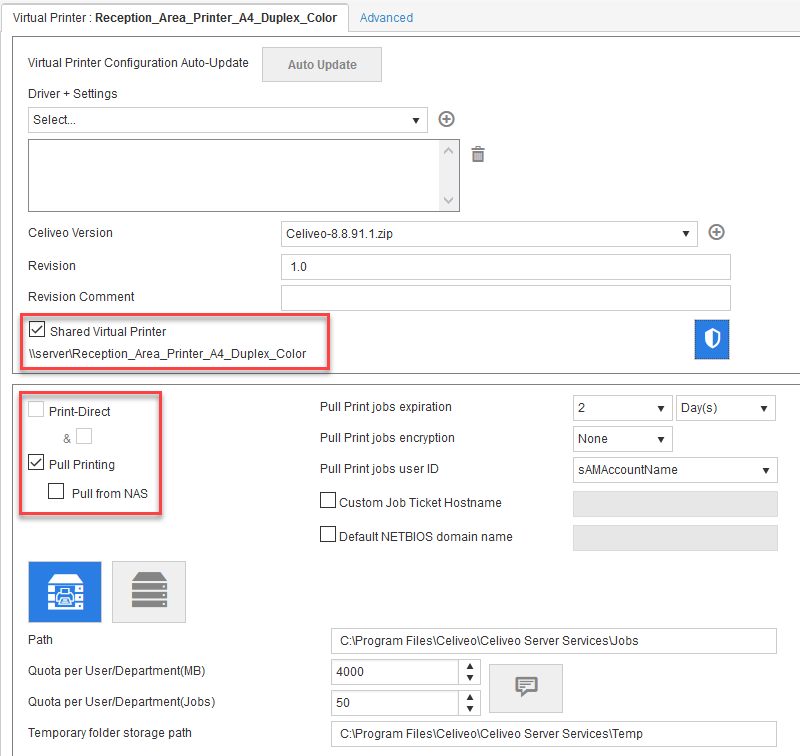
- Select [Shared Virtual Printer].
- Verify that [Pull Printing] is selected. [Print-Direct] is disabled when you select [Shared Virtual Printer] option. Additional options are enabled for configuration, when you select [Pull Printing] option.
2.1 Options
- Stealth Mode – Enabling this option for the virtual printer encrypts the user data (user login name and print job information) on both shared and non-shared print queues. The document name will be replaced with asterisks symbols prefixed and suffixed respectively with first and last character of the original document name, in the Tracking Reports.
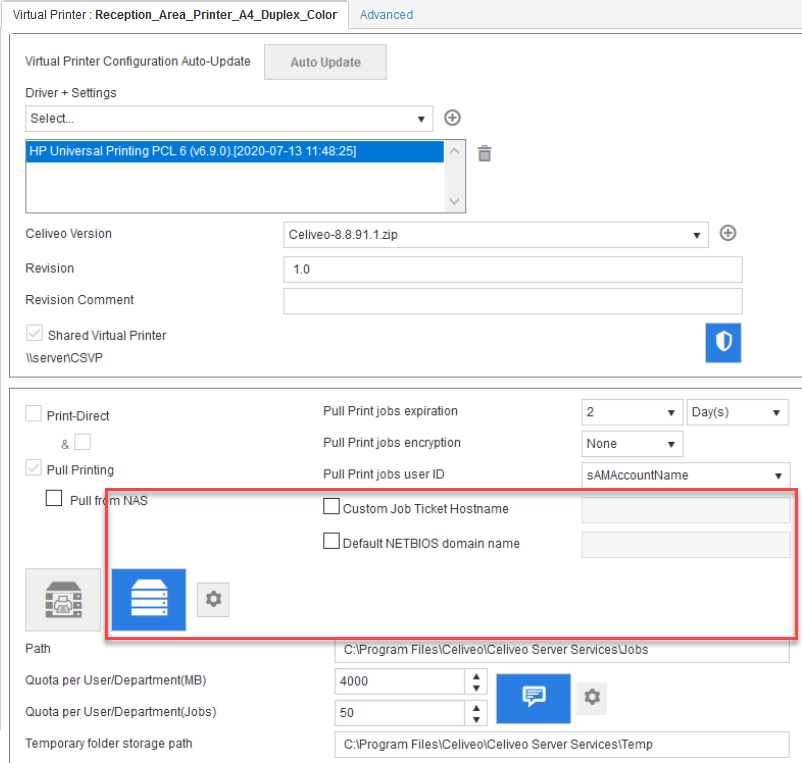
- Custom Job Ticket Hostname
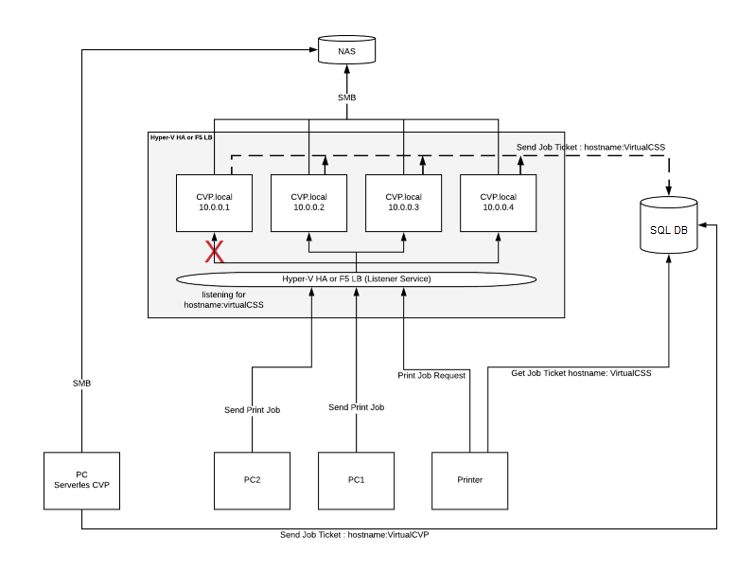
Custom Job Ticket Hostname allows the CVP to replace its own IP/Hostname with a custom CVP IP/Hostname to all the spooled jobs. This information is then stored on the SJPS DB Job Ticket. This configuration is useful when using Clusters/Load Balancers with Virtual IP/Hostname.
To enable Custom Job Ticket Hostname:
- In the Domain, User Name and Password fields, enter the information of the service account that has access to the remote storage/share.
- In the Path and Temp fields, enter the share location: eg \\servername\sharename.
- Pull Print jobs expiration – indicates the number of days/ hours after which the print jobs shall expire.
- Pull Print jobs encryption – indicates the encryption to be used on print jobs.
You can choose either the Local (HDD of the Print-Server where CSVP is installed) or Remote server to store the print jobs.
2.2 To store print jobs on local server
- Click
![]() icon icon to store print jobs on hard disk.
icon icon to store print jobs on hard disk. - Path – Enter the directory location in which the user jobs are to be stored. For custom server (Custom Job Ticket Hostname), enter the directory location to the custom server.
- Quota per User/ Department (MB) – indicates the quota for a user or department on the basis of print job size.
- Quota per User/ Department (Jobs) – indicates the quota for a user or department on the basis of print job count.
- Temporary folder storage path – Enter the directory location where the jobs are to be stored on a temporary basis.
2.3 To store print jobs on a network drive:
- Click
![]() to store on remote server.
to store on remote server. - At [Domain], enter the domain name of the network drive to store the print jobs.
- At [User name] and [Password], enter the login credentials to the network drive to store the print jobs.
- At [Retry Count], enter the number of attempts to reach the network drive to store the jobs.
- At [Retry timer], enter the time interval (Seconds) between each attempt to reach the network drive.
- Enter the directory location in which the user jobs are to be stored. Ensure that the user has read/write access permissions on the shared network folder.
- Define the quota to be set for the user/ department.
- Enter the directory location where the jobs are to be stored on a temporary basis.
2.4 To store print jobs on Network Attached Storage (NAS) unit:
You can configure the print jobs to be transferred to a NAS unit connected in the same domain network. The Celiveo Virtual Printer pushes the print files to NAS unit when user initiates Shutdown of his/her PC.
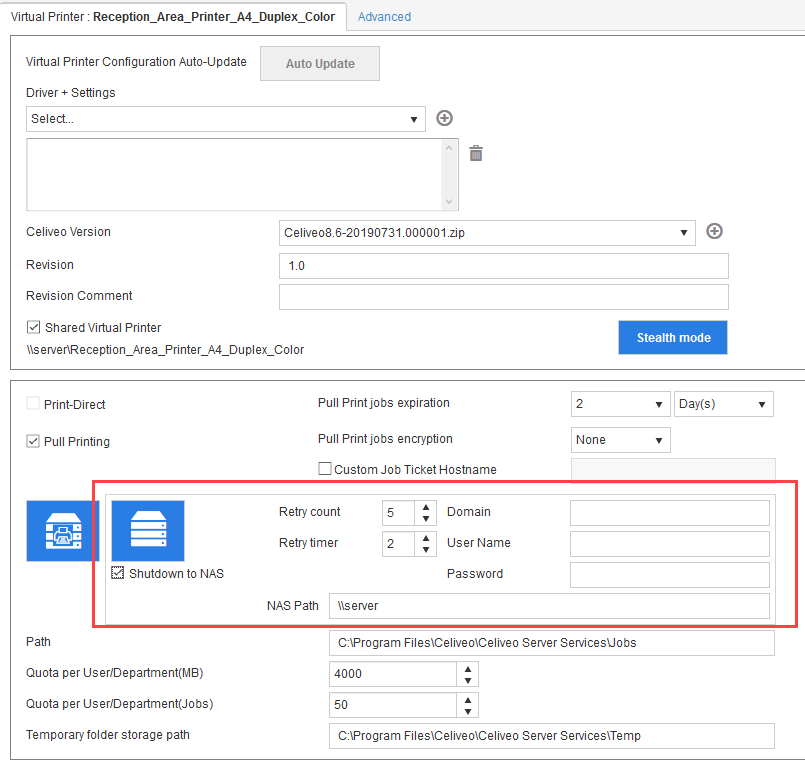
- Select the [Shutdown to NAS] option.
- Enter [User name], [Password], [Domain] and [NAS Path].
- At [Retry Count], enter the number of attempts to reach the NAS to store the jobs.
- At [Retry timer], enter the time interval (Seconds) between each attempt to reach the NAS.
3. Import Printer Driver
![]()
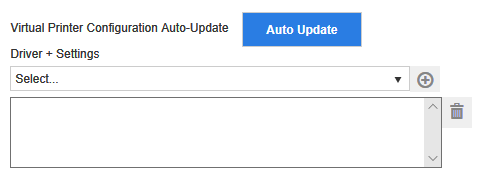
- Click [Auto Update] to enable automatic update of Virtual printer settings. This will synchronize the Driver, Cost Definition Profile, and Access and Rules Profile settings for the virtual printer.
For example, if a printer driver was already installed in the workstation by Celiveo Virtual Printer, then the [Auto-update] option updates the driver settings configuration (if it had been modified); rather than downloading and installing the driver again.
- From the [Driver + Settings] drop-down, select the printer driver to use for pull printing.
If the driver you want to use is not available on the list:
- Click
![]() , next to the [Driver + Settings] drop-down. The Discovery Agent displays.
, next to the [Driver + Settings] drop-down. The Discovery Agent displays.
![]()
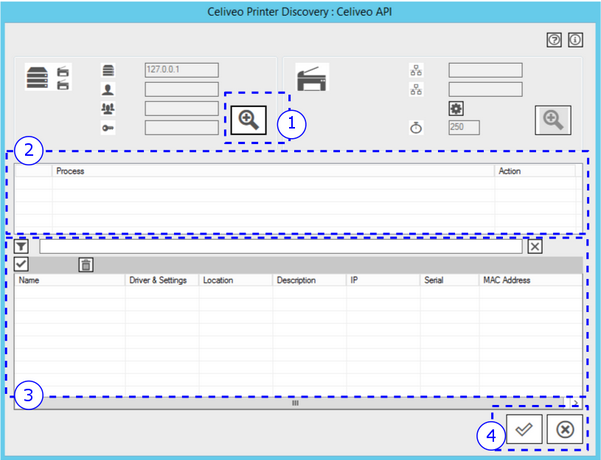
- In the area marked 1, click on the Search icon (
![]() ).
).
The Discovery Agent searches the workstation the Web Admin is running on for printer drivers. The printer drivers installed on the workstation are displayed in the area marked 3 in the illustration above.
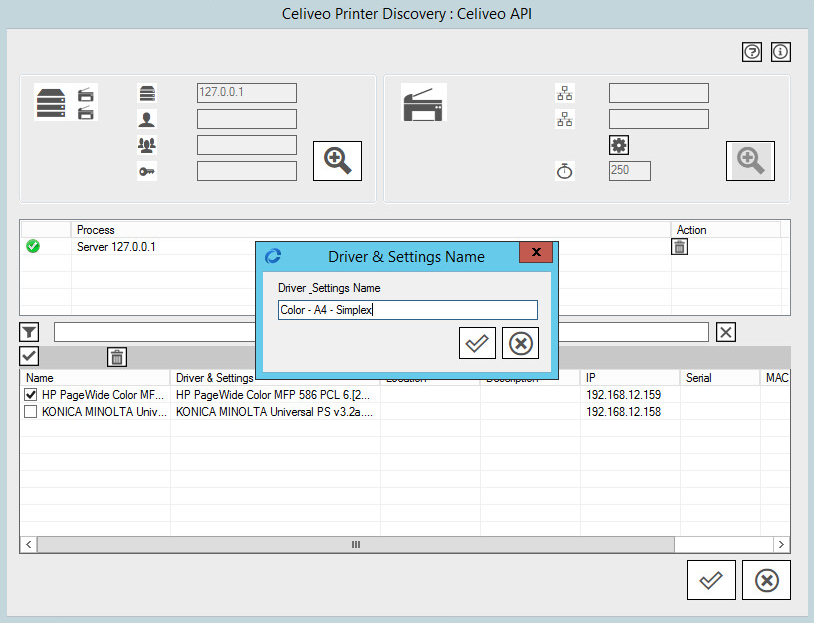
- Select the driver to import.
When you import the driver, the default printing preferences are also imported with the driver. With Celiveo Enterprise, you can assign up to five drivers per printer. Thereby, you can have five different sets of printing preferences for the same driver, which translate into five print queues for the user. By renaming the driver+settings meaningfully, users can perceive each print queue as a preset for the same printer.
To rename the driver+settings to something more meaningful:- Double-click the row containing the driver.
![]()
- At [Driver+Settings Name], specify the new name.
- Double-click the row containing the driver.
- Click
![]() until all dialogs close.
until all dialogs close. - From the [Driver + Settings] drop-down, select the printer driver you just added.
You are returned to the Add Printer wizard.
- Click [Next].
4. Finalize
- Accept the defaults for the next few steps and click [Next>] until the Save Confirmation dialog displays.
- Ensure that the option for downloading the deployment package is selected, and click [Save].
Preserve the downloaded file so that you can expand it and deploy it on a Print Server.
Post your comment on this topic.