
This section provides the information regarding the prerequisites, specific settings to be made on the HP device and the configurations to be performed on the device web server page for installation of Celiveo solution.
System Requirements
FIRMWARE NOTES – IMPORTANT
Important: Do not use HP Futuresmart firmware 4.9.0.1 on MFPs or 4.10.0.1 on SFPs as some problems have been encountered. You need to use more recent firmware (i.e. 4.10.0 on MFPs) or earlier for SFPs.
Link to HP printers firmware download page: https://support.hp.com/us-en/document/c03933242
4.10 or later
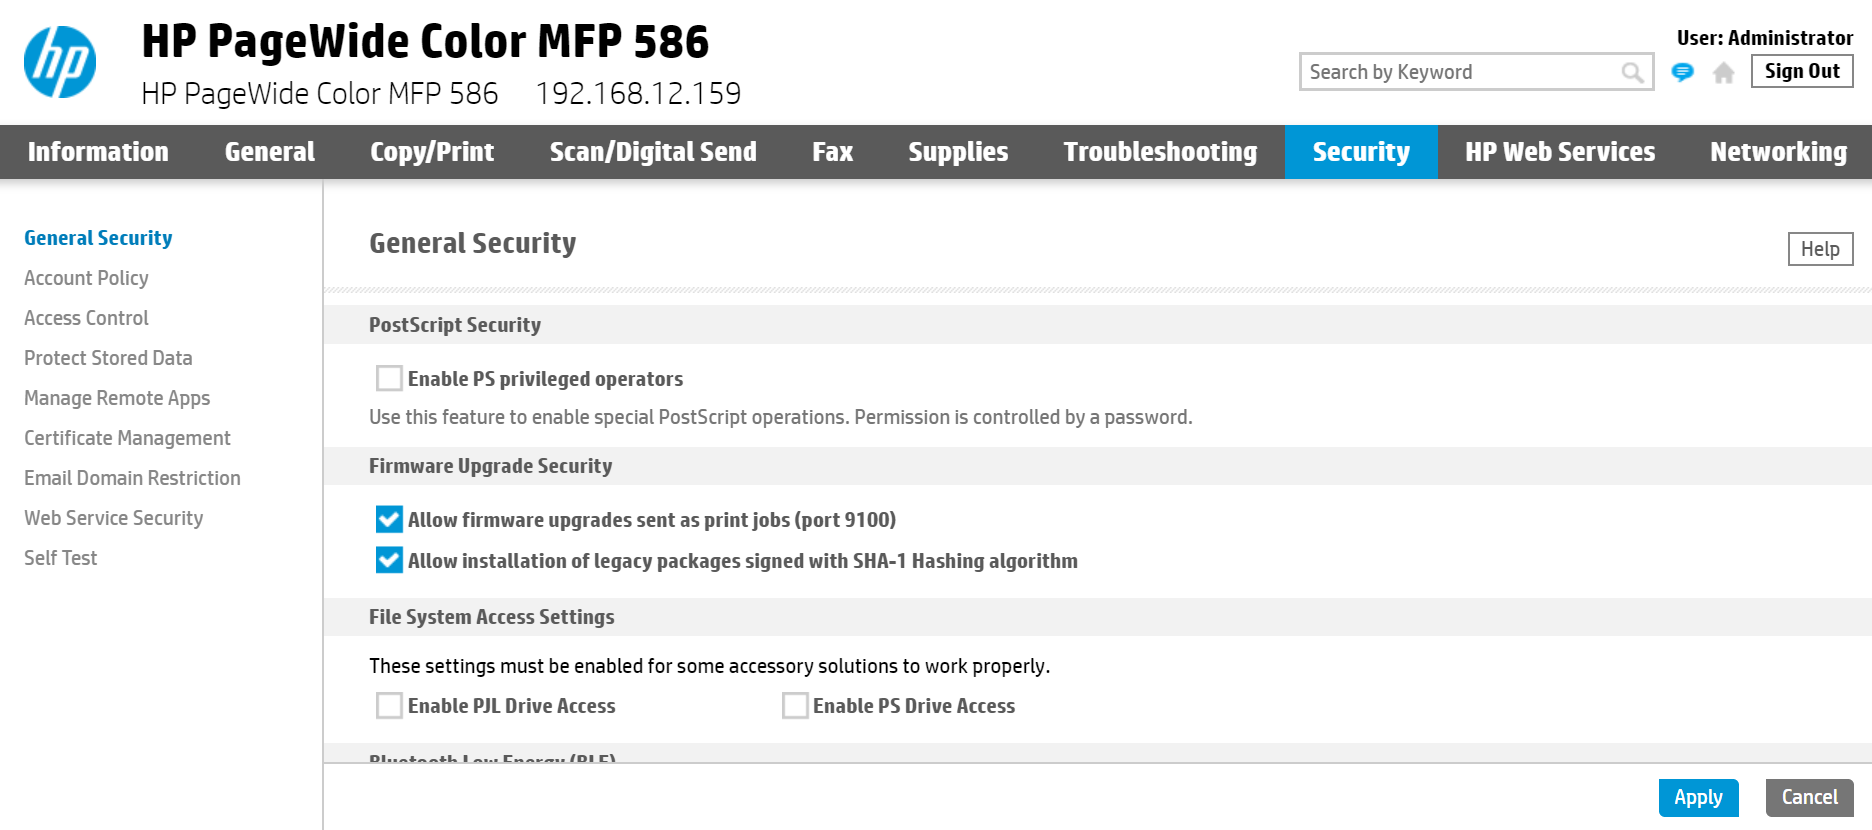
If you are using HP Futuresmart firmware 4.10 or later, you need to disable port 9100 after the synchronization is complete.
This can be done through the EWS:
- On the Printer panel, in Administrator mode, select Security > General Security and disable the Allow firmware upgrades sent as print jobs (port 9100) option.
- Click Apply.
Compatibility with HP Futuresmart 4.10.0 firmware
HP Futuresmart firmware 4.10.0.1 has a defect on HP Single Functions Printers (SFP) such as the M607/M608/M609.
It loads multiple times solutions instead of just once. This results in corrupted print job data.
This problem and the solution can easily be diagnosed by checking the printer configuration page, where repeated lines about Celiveo being “Enabled” appear. Solution: downgrade the printer firmware to a version earlier than 4.10.0.1, or upgrade the firmware when HP releases a fix.
4.9.0.1
Do not use HP Futuresmart firmware 4.9.0.1 as some problems have been encountered.
You need to stay with a 4.8.x.x firmware or earlier until a 4.9.x.x is released, that fully support added solutions.
The system requirements for installing Celiveo 8 solution can be found here.
Ports and Communication
A comprehensive list of all the ports used by Celiveo solutions, describing the ports and applications used for communication between the Celiveo components that consist of the Celiveo Server Services, Web Admin Server, Active Directory, Database (SQL) server, the device, and the PC/laptop/workstation can be found here.
Prerequisites
Before you install, make sure these prerequisites are met:
- The device is connected to an active LAN connection.
- The device has a fixed IP or DHCP reserved IP address.
- The network allows management by Simple Network Management Protocol (SNMP) v1/v2.
- From the device Embedded Web Services (EWS) page, set the device session time to be longer than the default Celiveo Web Admin inactivity time out (30 sec).
Configuring CSA
By default, the CSA is set in DHCP mode. You can also opt for fixed IP network settings.
The steps to configure CSA for DHCP and for fixed IP network settings can be found here.
Celiveo Version upgrade on CSA
Follow the procedure given here to upgrade the Celiveo Version on CSA.
Limitations
HP PageWide Pro and HP OfficeJet Pro models are only supported for ID to Print All.
For print jobs stored on the printer HDD (secure push printing) the “Print B&W” and printer print rules do not apply as of today.
Push Printing
In Push Printing, jobs are sent to the device for authentication and release. Push Printing is convenient as it makes a powerful serverless secure printing solution. On the other hand, the limited hard disk drive capacity on a device can be an issue as compared to that of a server, if large jobs are to be retained. The print jobs can also be released only from the device where they are stored.
Push Printing is supported on HP devices with a hard disk drive, and a minimum disk space of 30GB. The Push Printing feature is not supported on CM8050 and CM8060 multi‐function printers. Printers must have storage media (HDD, USB stick) with 50MB free, and an active TCP‐IP LAN connection.
A special driver plug-in to benefit from the Secure Push Printing feature is available in the Downloads section.
HP Printer Setup
1. Configuring Settings on the Device
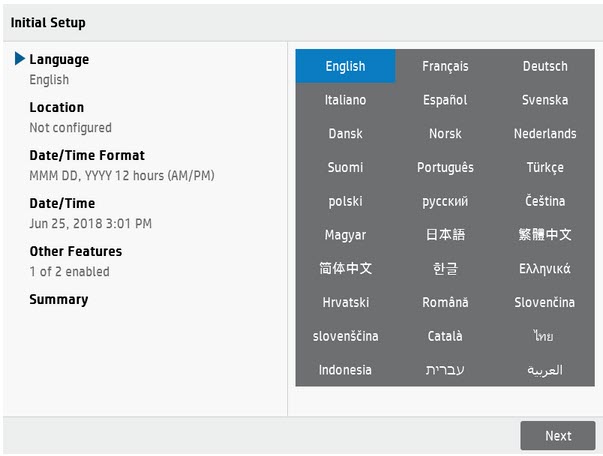
On initializing the HP printer, the date and time, location, and language need to be set for the device. This is done through the device’s control panel.
To configure initial setup for the device:
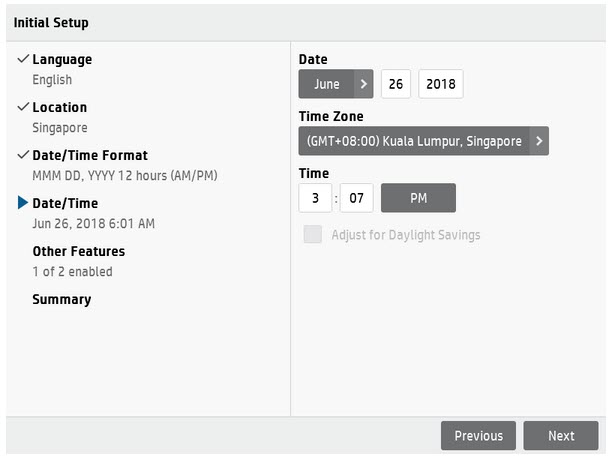
- When the printer completes its initial boot up, the Initial setup screen is displayed on the device control panel. Select appropriate values for the following attributes on the screen:
- Language
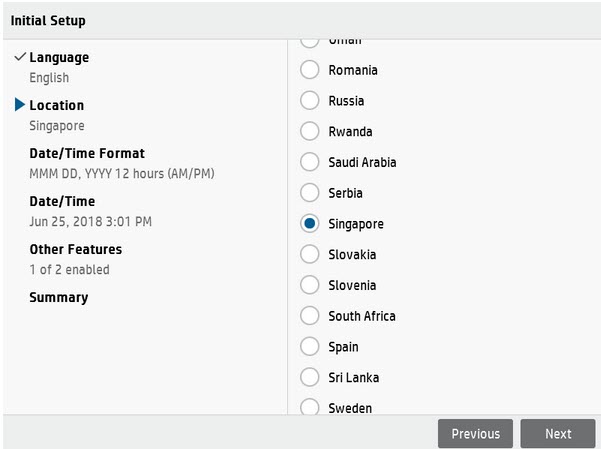
- Location
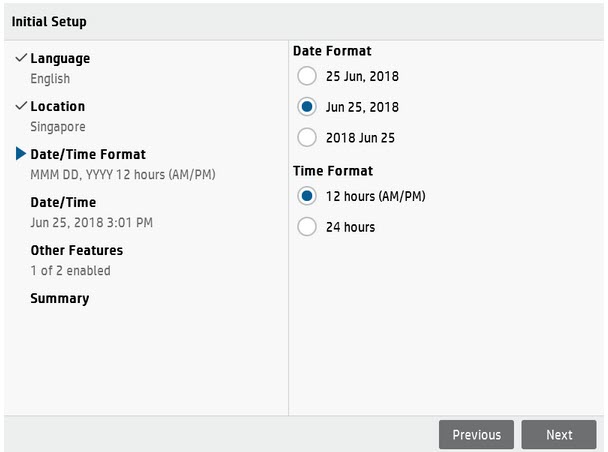
- Date/Time Format
- Date/Time
![]()
![]()
![]()
![]()
- Press Finish to apply the settings.
2. Setting up Printer Administrator credentials
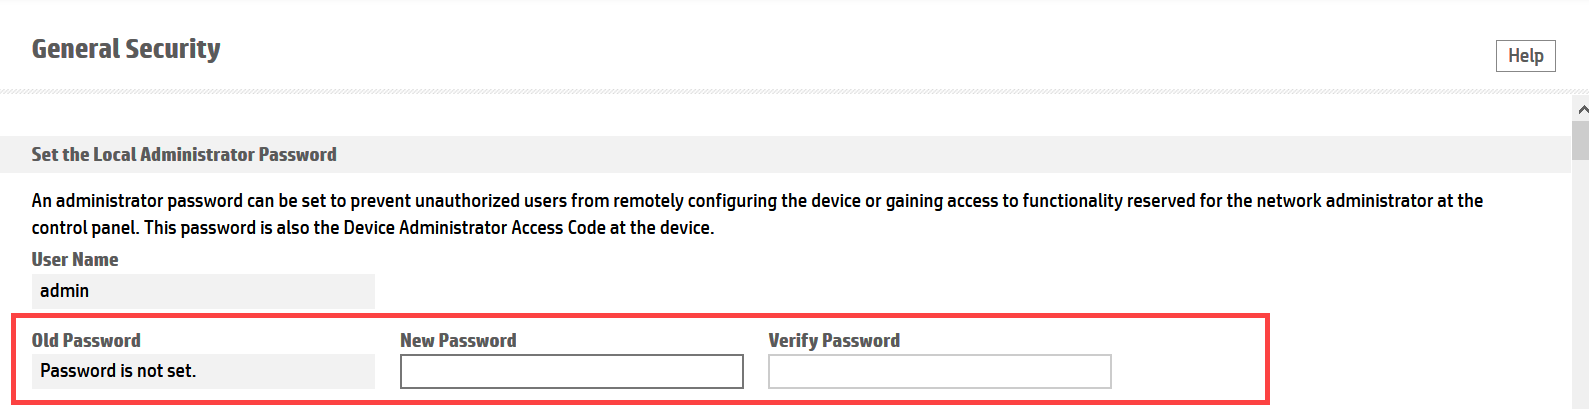
Administrator password is set to prevent unauthorized users from remotely configuring the device or gaining access to functionality reserved for the network administrator at the control panel. This password acts as the Device Administrator Access Code at the device.
To set password for Administrator:
- In the browser address bar, enter the following URL by replacing the text in bold typeface with the IP address of the HP device: https://*{device IP address}*/hp/device/DeviceStatus/Index.
The device EWS page opens. - Go to Security tab and select General Security.
- The user name is predefined here. Set the password for the Admin user and click Apply.
![]()
3. Configuring SNMP and Network Settings
The SNMP and network settings can be configured for the printing device using the device EWS page.
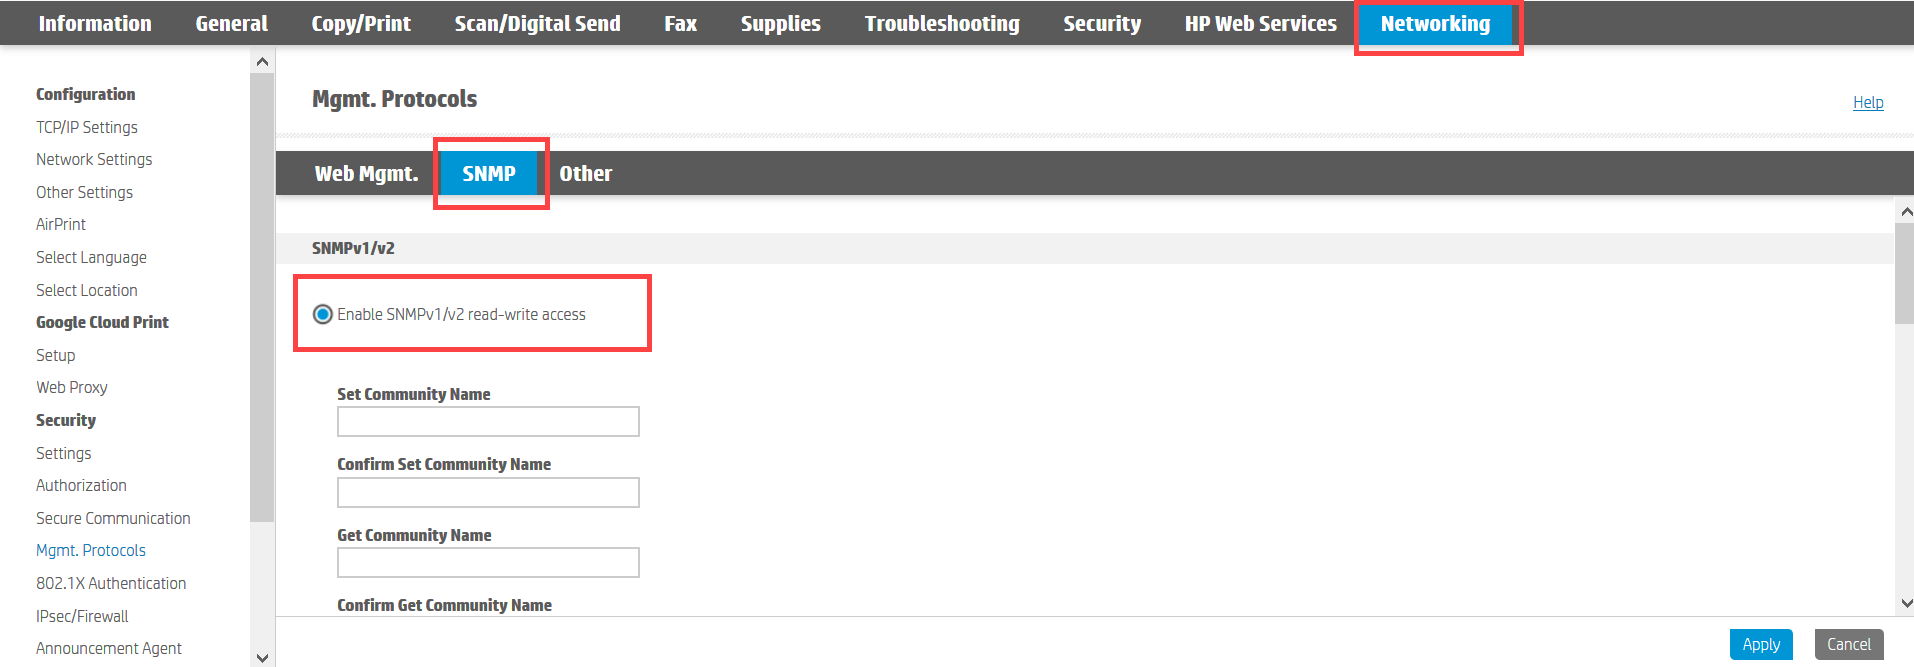
To enable SNMP:
- Log in to the EWS page of the device.
- Go to Networking tab and select Mgmt. Protocols on the left menu.
- Select SNMP tab.
- Select Enable SNMPv1/v2 read-write access option.
- You can also configure the Community Name. By default, the Community Name is set to ‘public’.
![]()
To configure the Network setting:
- Under Networking tab, go to TCP/ IP Settings > Network Identification tab.
- Set the Domain name and DNS for the device. Click Apply.
![]()

You can also configure the network settings using the device control panel.
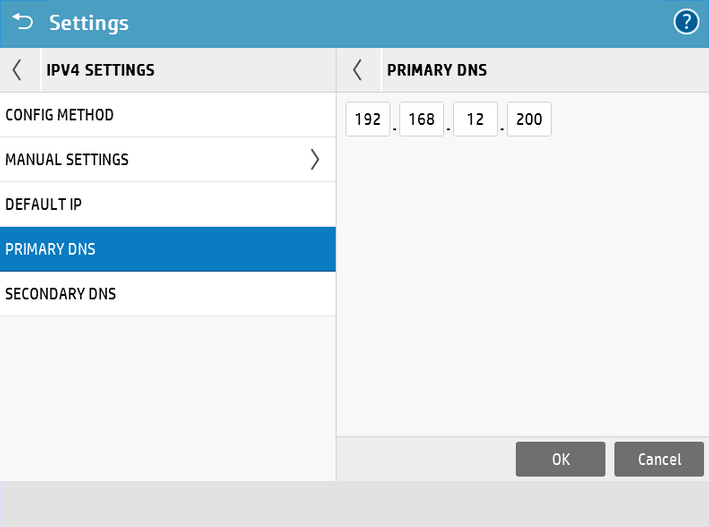
To set the network configuration through device panel:
- On the device control panel, press Settings > Networking > Ethernet > TCP/IP
- Select appropriate IP settings (IPV4 or IPV6) to configure.
![]()
- Enter the Primary DNS and Secondary DNS for the selected IP settings.
- Press OK.
![]()

More Information:
Configuring Scan to Email/ Scan to Sharepoint for Office365 account
For users using Office 365 account, HP provides instructions on how to configure the cloud-based Microsoft Office 365 Outlook email system on HP LaserJet Enterprise/ HP PageWide Enterprise (with firmware version 3.4 and newer) MFPs for Scan to Email/ Scan to Sharepoint options.
Follow the steps provided here: https://support.hp.com/in-en/document/c05920994
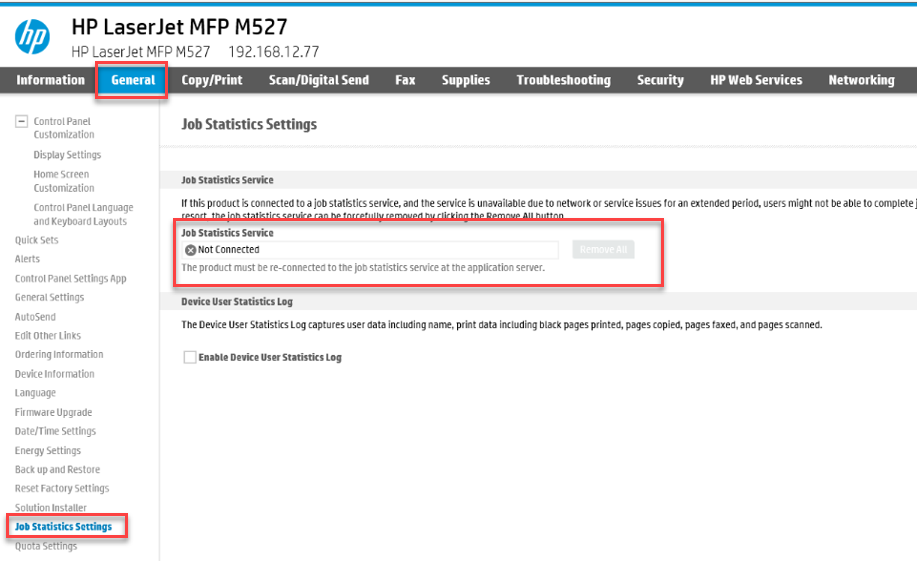
Note regarding the Jobs Statistics Service:
Celiveo Embedded Agent registers the Tracking service as a non-critical service so it would not appear on the below Jobs Statistics Service:
Post your comment on this topic.