
The Floor Plan is tied to the combination of settings that are current at the time the Floor Plan is imported.
As such, ensure that tags are defined before you begin this exercise.
Contents
- Why Floor Plans?
- Import a Floor Plan and Place a Printer on It
- Place Another Printer on the Floor Plan
1. Why Floor Plans?
2. Import a Floor Plan and Place a Printer on It

- In the Printers List, select the printer you want to place on the Floor Plan.
- In the Printer Menu, click
![]() . The Tag/Map displays.
. The Tag/Map displays.
![]()
- Specify the tags for the printer.
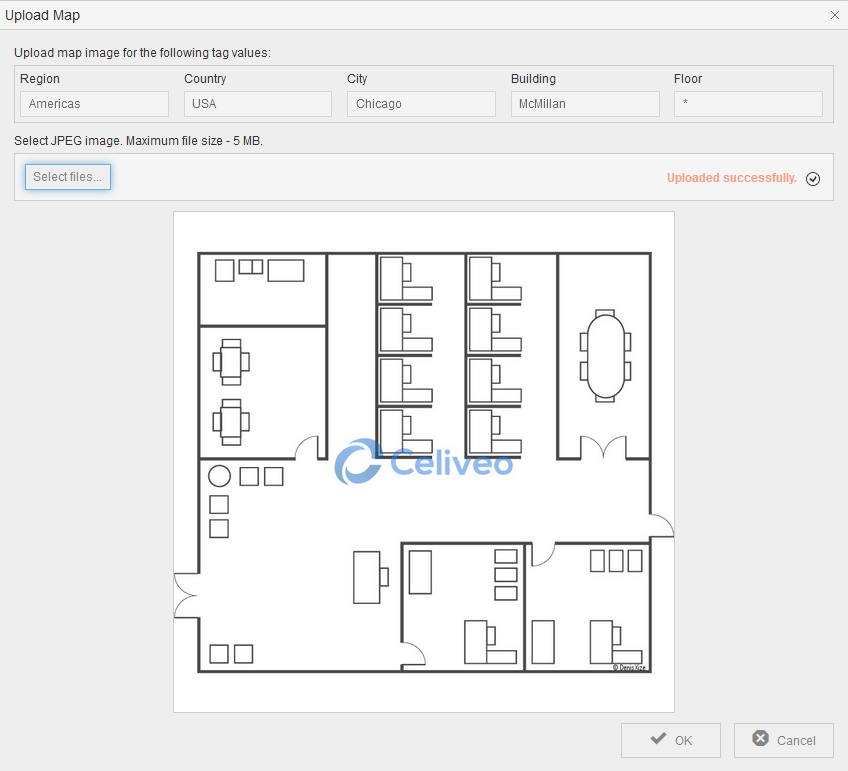
- Click + below the first tag. Upload Tag Map displays.
![]()
- Click [Select files] and pick the image file that contains the floor plan.
![]()
Note:- The image should be in JPEG format.
- The image file must at least be 600px X 600px.
- If the width is not the same as the height, the floor plan may become distorted.
- The image file must be smaller than 5MB.


- Click [Save].
![]()
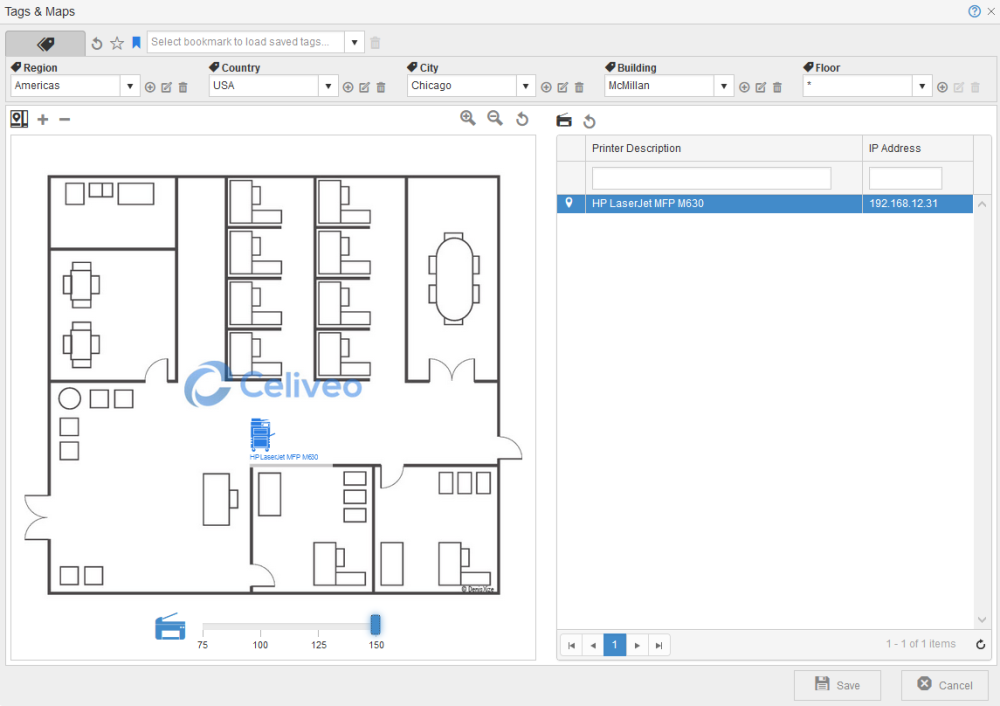
- Drag the printer from the printer list on the right to its location on the Floor Plan.
![]()
- Use the cursor to increase or decrease the size of the printer icon.
- Click [Save].
3. Place Another Printer on the Floor Plan
![]()
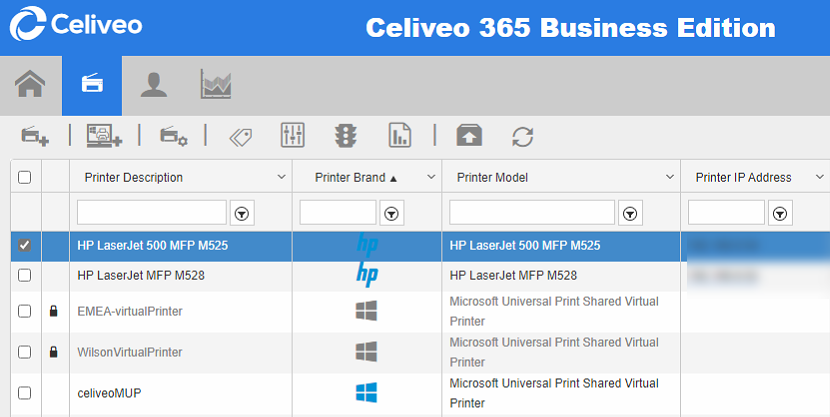
- In the Printers List, select the printer you want to place on the Floor Plan.
- In the Printer Menu, click
![]() . The Tag/Map displays.
. The Tag/Map displays.
![]()
- Specify the tags for the printer. When you specify the tags, the floor plan displays automatically.
- Drag the printer from the printer list to its location on the floor plan.
- Click [Save].
You can find Sample Floor Plans in our Downloads section (requires a Celiveo Portal Account).
Last modified:
12 December 2022
Post your comment on this topic.